Complete Guide to Acronis NVMe Clone in Windows
Cloning an NVMe SSD can feel intimidating, but with the right tool, it’s a breeze. This guide shows you how to use Acronis for NVMe drive cloning and offers some troubleshooting tips.
By Lily Updated on April 22, 2025
Common reasons for cloning NVMe drives
Cloning an NVMe drive isn't just for IT pros—it’s a smart move for anyone looking to upgrade or safeguard their data. Below are the most common reasons users turn to cloning their NVMe SSDs.
🎯Upgrade to a Larger or Faster NVMe SSD: Cloning lets you move your entire system—OS, apps, and files—to a new drive without reinstalling anything. It’s the fastest way to upgrade your storage and performance.
🎯Migrate to a New PC or Motherboard: When switching to a new system, cloning helps you carry over your exact setup, saving hours of configuration and avoiding data loss.
🎯Move from SATA to NVMe for Speed Gains: If you're transitioning from a slower SATA drive, cloning to an NVMe SSD delivers a huge speed boost without the hassle of a clean install.
🎯Create a Bootable Backup for Recovery: A cloned NVMe drive can act as a ready-to-go backup in case your primary drive fails—ideal for minimizing downtime.
How to use Acronis to clone NVMe SSD
Cloning your NVMe SSD with Acronis True Image is a smooth process. Here are the detailed steps:
In case Acronis fails, pick a better alternative to clone NVMe SSD.
Step 1. Install the new NVMe SSD inside your computer or connect it externally via an enclosure.
Step 2. Download, install and open Acronis True Image. Click on Tools > Clone Disk.
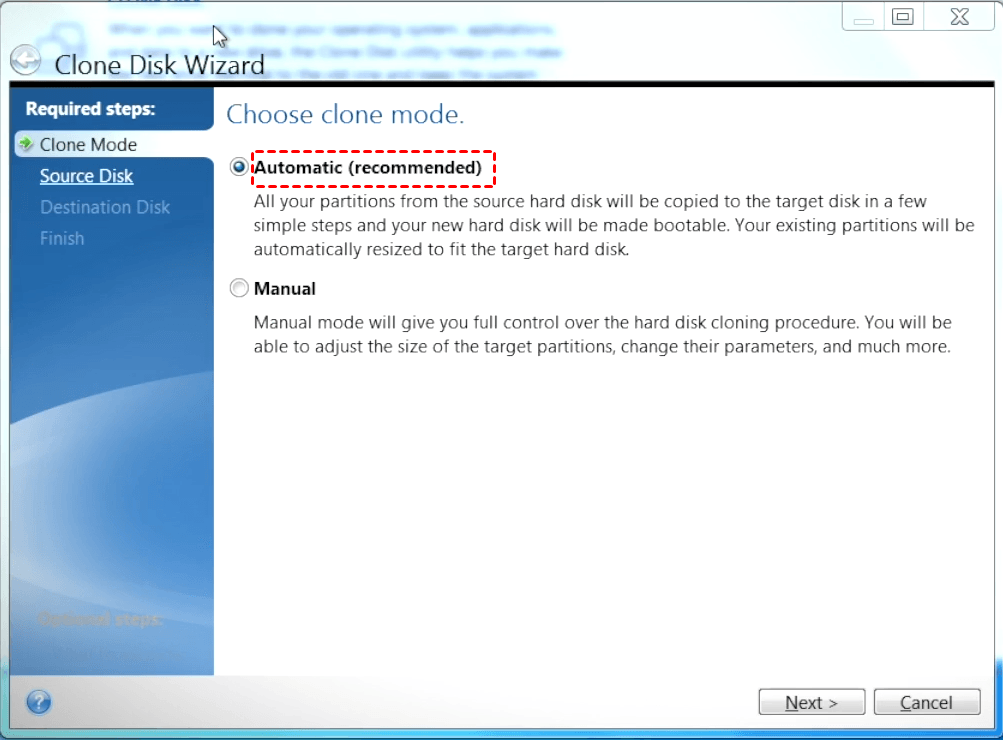
Step 3. Choose Automatic for a simple, hassle-free clone, or Manual if you want to adjust partitions.
Step 4. Select your current NVMe SSD—the one that contains your OS and files—as the source disk.

Step 5. Now pick the new NVMe SSD as your target disk.

⚠️ Warning: All data on the target drive will be erased, so double-check you selected the correct drive.
Step 6. Select a disk usage type according to your situation. Here I choose To replace a disk on this machine.
Step 7. Review the cloning layout. If everything looks good, click Proceed to begin. Acronis may prompt you to reboot if the OS is being cloned—allow it.
Step 8. Boot from the cloned NVMe SSD after cloning.
- Replace the old NVMe with the new NVMe (if your computer has only one M.2 slot).
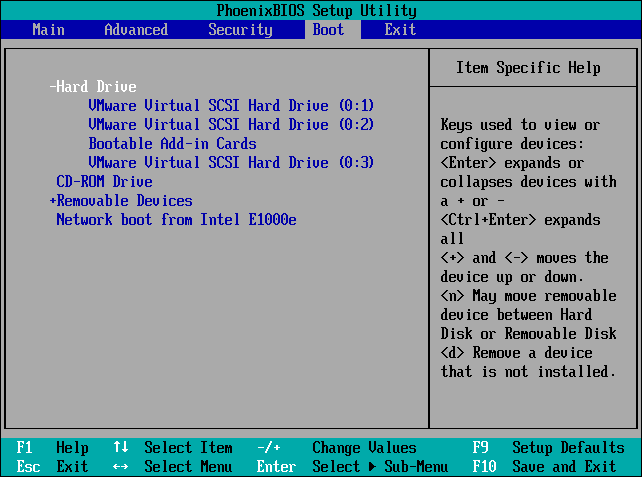
- Enter BIOS and set the new NVMe SSD as the primary boot drive.
- Boot into Windows and verify that everything is working correctly.
Troubleshoot: Acronis True Image NVMe clone failed
Acronis NVMe clone usually works like a charm, but you may encounter the Acronis clone failed error sometimes. Here are the most common issues and how to fix them.
1. Clone Operation Fails to Start or Crashes Midway
It can be caused by outdated Acronis version, incompatible NVMe driver or SSD controller, or conflicting background processes.
👉 How to Fix:
- Update Acronis True Image.
- Try running the clone using the Acronis bootable media instead of Windows mode.
- Disable antivirus temporarily and close other background apps before launching the clone.
2. Target NVMe SSD Not Detected
It can be caused by NVMe SSD not initialized or formatted, BIOS settings not recognizing new SSD, or USB-to-NVMe enclosures not fully supported.
👉 How to Fix:
- Open Disk Management in Windows and check if the drive appears. If not, initialize it (GPT recommended).
- Boot into BIOS and ensure NVMe support and relevant storage modes (AHCI/RAID) are enabled.
- Use a known-compatible NVMe enclosure or install the SSD directly into the M.2 slot.
3. Cloning Succeeds, but New SSD Won’t Boot
It can be caused by boot sequence not updated in BIOS/UEFI or wrong partition style (MBR vs GPT).
👉 How to Fix:
- Enter BIOS and set the new NVMe as the first boot device.
- If cloning from MBR to GPT, make sure your system supports UEFI and Secure Boot is configured.
Bonus: Clone NVMe SSD with better alternative
If you are tired of troubleshooting the Acronis True Image clone failed error, you can turn to a rock-solid alternative - AOMEI Cloner. It offers all-around clone features to ensure a smooth cloning process.

- Cloning options: It gives you options to clone entire disk, selected partitions or clone only operating system.
- Partition styles: It supports both MBR and GPT data & system disks. You can even clone GPT to MBR or vice versa without conversion.
- Different sizes: With the intelligent clone and partition editing capabilities, you can clone NVMe drive to larger drive or smaller drive easily.
- Disk interfaces: It supports all types of disk interfaces, including SATA, mSATA, U.2, M.2 and PCIe.
Download AOMEI Cloner now to try it out! Then follow the instructions below to clone NVMe SSD to another NVMe SSD:
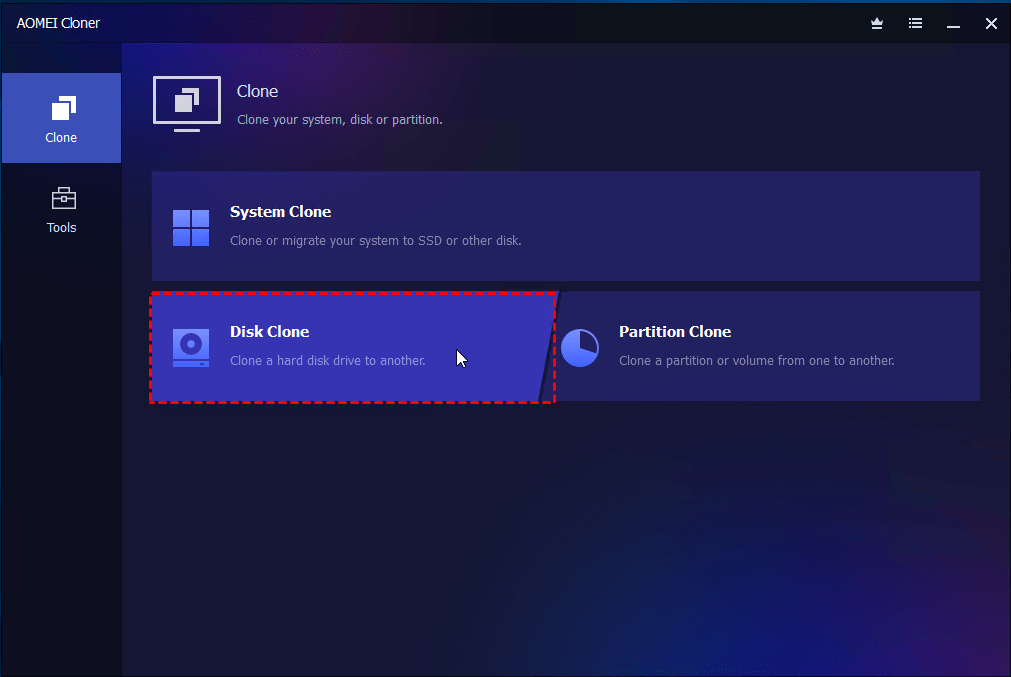
Step 1. Install and launch AOMEI Cloner. Then navigate to Clone > Disk Clone.
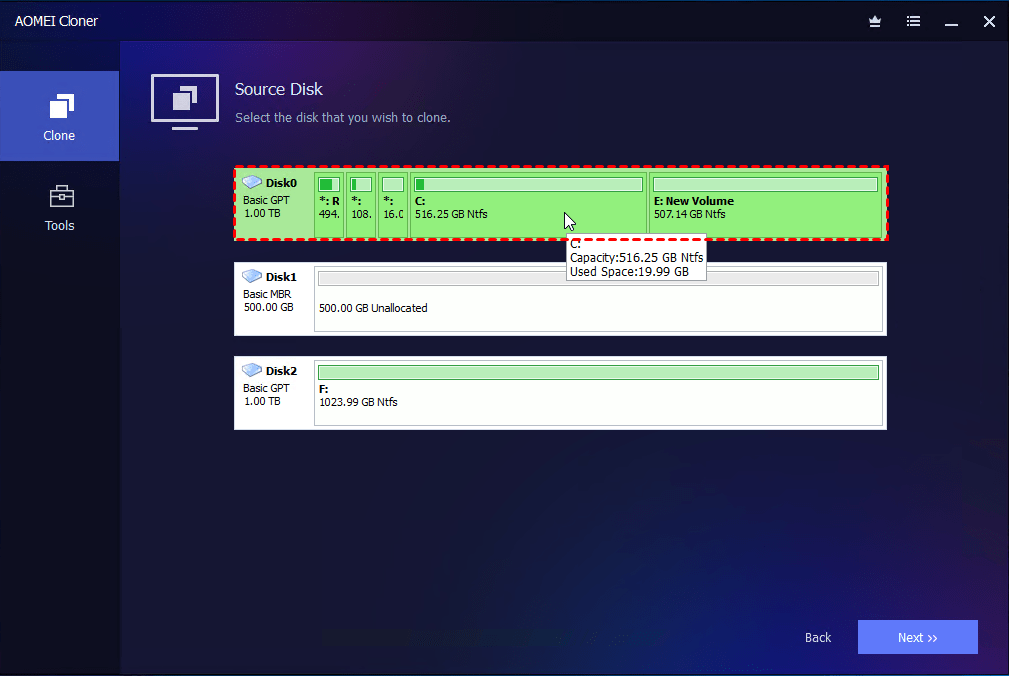
Step 2. Choose your original NVMe SSD as the source drive and select your new NVMe SSD as the target.
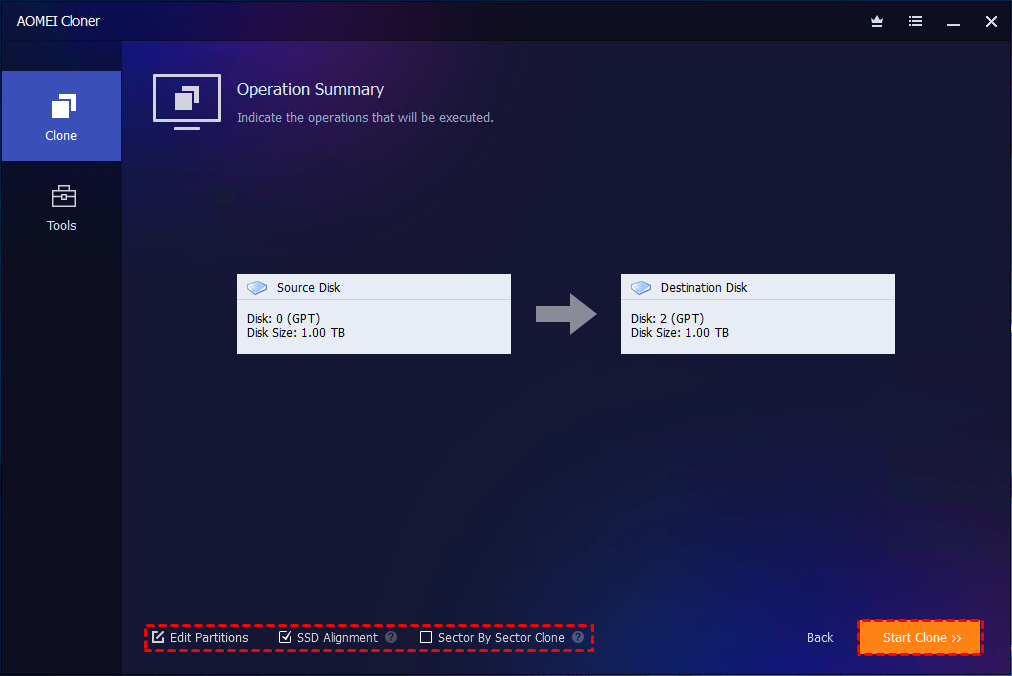
Step 3. Check the SSD Alignment option for peak NVMe performance. Then initiate the process by clicking Start Clone.
The end
Acronis NVMe clone is a smart way to upgrade your storage, back up your system, or migrate to a faster drive without reinstalling everything from scratch. However, it can sometimes be tricky with certain NVMe setups. If you run into errors or want a simpler experience, AOMEI Cloner stands out as a powerful, beginner-friendly alternative that just works. Follow this guide to clone your NVMe SSD now!