Full Guide to ASUS TUF FX505 Hard Drive Upgrade (2 Cases)
Upgrading the hard drive on your ASUS TUF FX505 is one of the easiest ways to boost performance and storage. This comprehensive guide walks you through everything involved in the upgrade process.
By Lily Updated on April 25, 2025
The ASUS TUF FX505 is a capable mid-range gaming laptop, but its stock hard drive holds it back. Upgrading to an SSD (NVMe for speed or SATA for storage) can slash boot times, speed up game loads, and expand capacity—all for a reasonable cost. This guide will show you how to perform ASUS TUF FX505 hard drive upgrade step by step.
Is ASUS TUF upgradable?
Yes, the ASUS TUF series is upgradable. As for ASUS TUF FX505, users often upgrade two parts:
🔧 1. RAM (Memory)
- Slots: 2 DIMM slots
- Max supported: Up to 32GB DDR4
💾 2. Storage (Hard Drive/SSD)
Drive slots:
- 1 x 2.5" SATA (usually used for an HDD or SATA SSD)
- 1 x M.2 PCIe NVMe slot (for faster SSDs)
You can replace the existing drive or add a second one if your model supports dual drives.
Prepare for ASUS TUF hard drive upgrade
Below is a step-by-step guide to help you prepare for ASUS TUF FX505 hard drive upgrade:
✅ Choose the Right Drive
Choose a new drive as per your needs:
- NVMe SSD (M.2 PCIe 3.0)– Recommended for faster boot and load times (e.g., Samsung 980 Pro, WD Black SN850X, Crucial P5 Plus).
- 2.5" SATA SSD – Slower than NVMe but still fast (e.g., Samsung 870 EVO, Crucial MX500).
- 2.5" SATA HDD – Only for bulk storage (e.g., Seagate Barracuda, WD Blue).
✅ Backup Your Data
Before replacing the drive, backup important files to an external drive or cloud.
✅ Gather Tools
- Screwdriver set (Phillips #0 or #1 for laptops).
- Plastic pry tool.
- Anti-static wrist strap (optional but recommended).
- External USB enclosure/adapter (for cloning data).
- Disk cloning software
As for the best disk cloning software for ASUS laptop, AOMEI Cloner is a solid choice.

- Disk Clone: Migrate all data from one hard drive to another, including OS, apps, and personal files.
- System Clone: Copy just Windows and boot partitions to a smaller SSD without unnecessary data.
- Partition Clone: Clone specific partitions (e.g., data volumes) for flexible storage management or backups.
- SSD Optimization: Automatically align partitions for enhanced SSD performance and extended lifespan.
- Universal Compatibility: Work flawlessly with all ASUS laptops (TUF, ROG, ZenBook, etc.). You can also use it to clone Dell laptop, HP laptop, and more.
Download and install AOMEI Cloner now!
How to perform ASUS TUF FX505 hard drive upgrade
In this part, I’ll show you how to upgrade the hard drive on your ASUS TUF FX505 under two different scenarios: swap SATA HDD and add an M.2 SSD. Check them one by one.
Case 1: Swap SATA HDD
If you're replacing the factory 2.5" HDD with a new SATA SSD or larger HDD, follow these steps:
1. Connect the target SSD/HDD to your laptop via the enclosure or adapter you prepared.
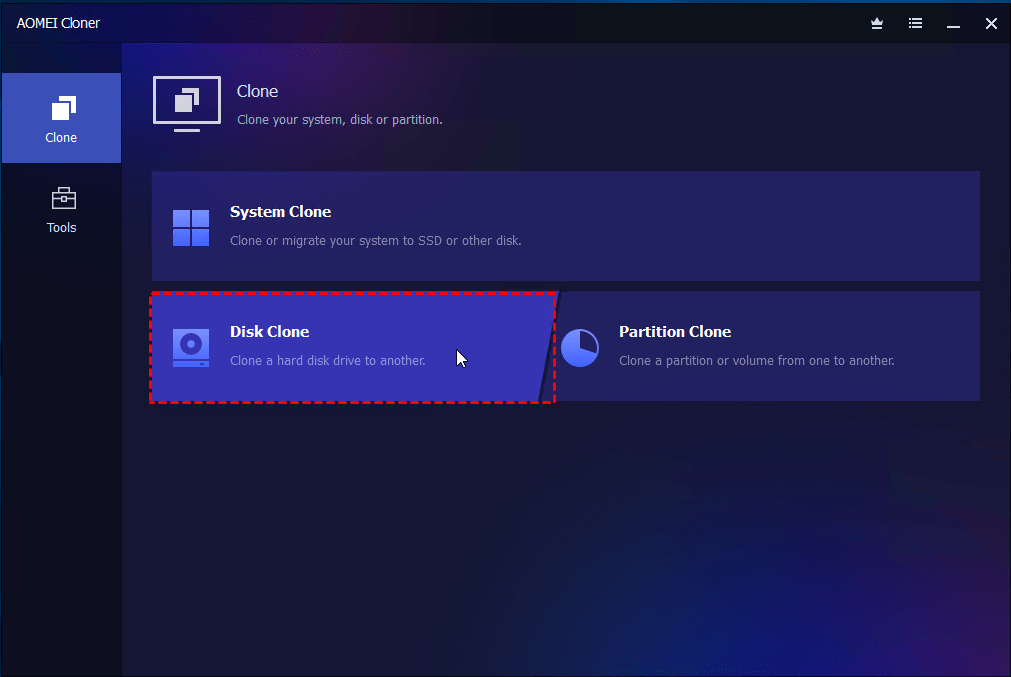
2. Run AOMEI Cloner and click Clone > Disk Clone.
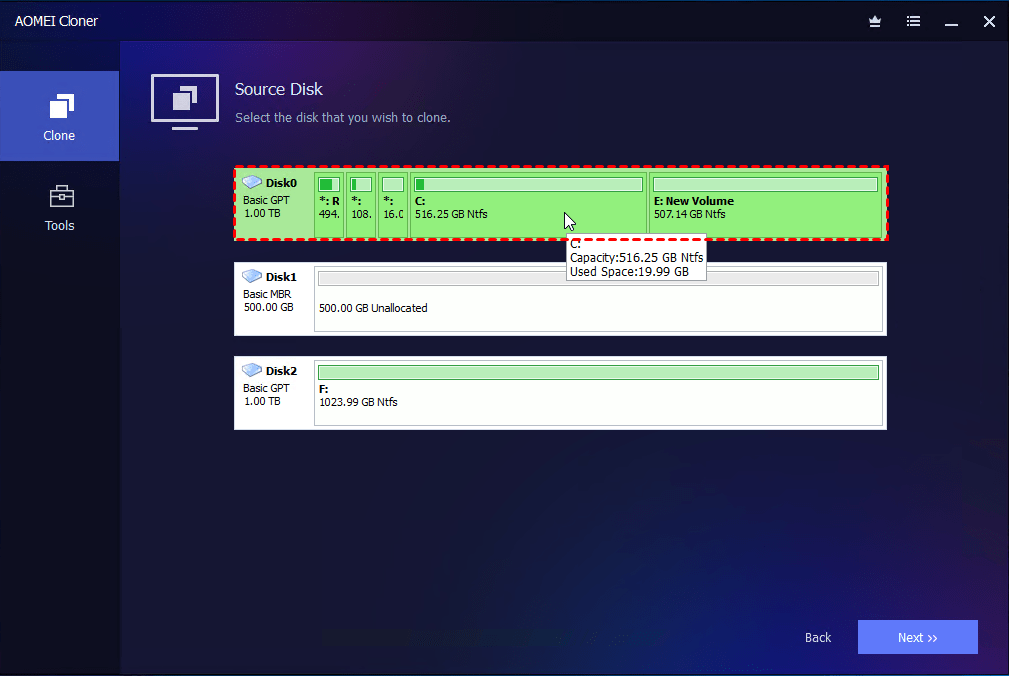
3. Select your current hard drive as the source disk and choose your new SSD/larger HDD as the destination disk.
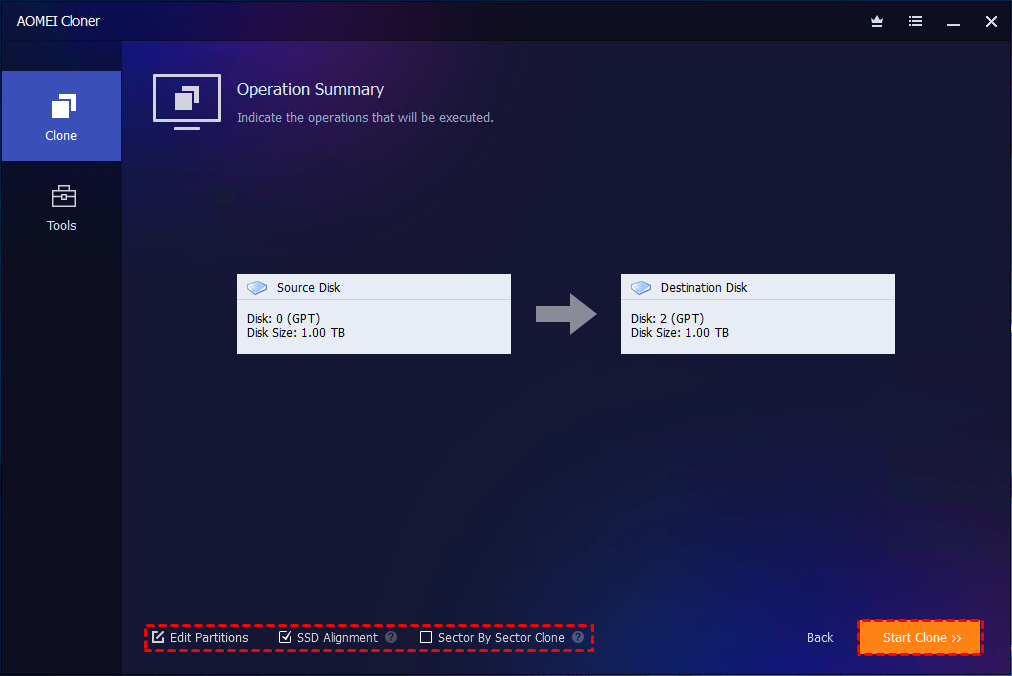
4. Configure more cloning options and click Start Clone. Wait for the cloning process to complete.
- Edit Partitions: Adjust partition size or partition style of the destination disk.
- SSD Alignment: Use this option to improve the read and write speed of the target SSD as well as prolong its service life.
- Sector By Sector Clone: Copy both used and unused space on the source disk. Destination drive must be the same size or larger to use this option.
5. Shut down your laptop and disconnect the power adapter. Hold the power button for 10 seconds to drain any residual charge.
6. Remove the bottom panel.
- Use a Phillips screwdriver to remove all screws on the back panel (keep track of different lengths).
- Carefully pry the bottom cover open using a plastic tool. Work around the edges slowly to avoid cracking the shell.
7. Replace the drive.
- Locate the 2.5" SATA bay. Disconnect the SATA cable if needed and remove the four screws holding the drive caddy.
- Remove the old drive from the caddy.
- Insert the new 2.5" SATA HDD or SSD into the same caddy.
- Reattach the SATA connector and secure it back into the bay.
8. Reassemble the bottom cover. Boot into BIOS (press F2 at startup) to ensure the new drive is detected. Then exit BIOS and boot normally.
Case 2: Add an M.2 SSD
If you want to keep your original drive and add a faster NVMe SSD, follow these steps:
1. Open the laptop using the same process as above (power down, remove the screws, and carefully lift the back panel).
2. Locate the M.2 slot - a slot with a screw mount at the end.
3. Slide the M.2 SSD into the slot at a slight angle (around 30°). Press it down gently and secure it with the small mounting screw.
4. Close the back panel and boot up.
5. Decide how you’ll use the new M.2 SSD.
👉 To use the M.2 SSD as boot drive:
- Transfer OS to the M.2 SSD with AOMEI Cloner.
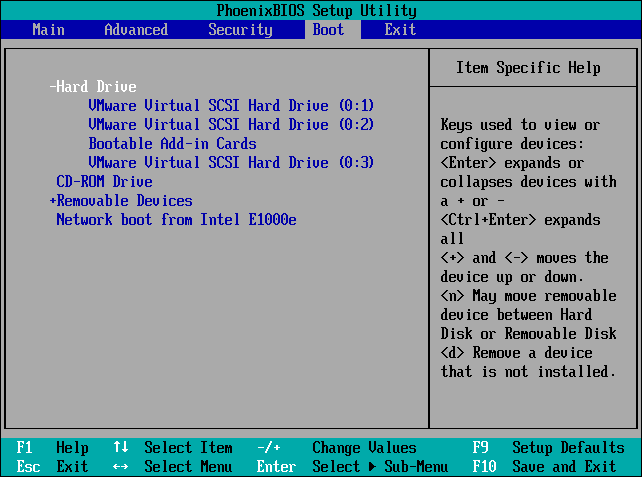
- Restart your laptop and enter BIOS. Set the new M.2 SSD as the first boot device and boot.
- If everything works fine, you can reformat the old drive for reuse.
👉 To use the M.2 SSD as storage drive:
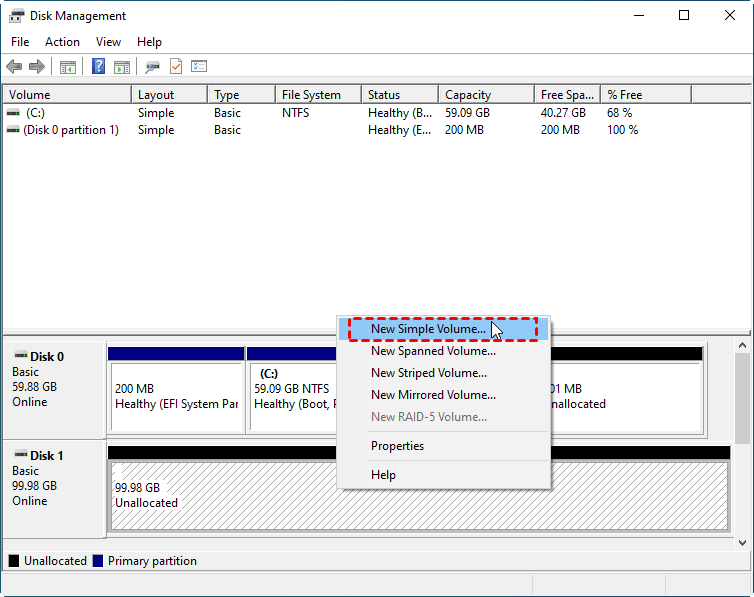
- Right-click the Start menu and select Disk Management.
- Initialize the M.2 SSD and create a new simple volume so Windows can use it.
The end
Whether you’re replacing the factory-installed 2.5" SATA drive or adding a lightning-fast M.2 NVMe SSD, you can follow this guide to perform ASUS TUF FX505 hard drive upgrade. AOMEI Cloner can help you upgrade your hard drive without reinstalling Windows and your installed programs. Just give it a shot!