Full Guide to HP Laptop SSD Upgrade (Victus, Pavilion, etc.)
Upgrading your HP laptop with an SSD is one of the best ways to boost speed, responsiveness, and overall performance. In this guide, we’ll walk you through everything involved in the SSD upgrade process.
By Lily Updated on April 22, 2025
Benefits of HP laptop SSD upgrade
If your HP laptop is equipped with an HDD, you may want to upgrade it to an SSD for the following reasons:
- Faster Boot Times - Start Windows in seconds instead of minutes.
- Quicker App Launches & File Transfers - Load programs and move files much faster.
- Better Multitasking - Smooth performance even with many apps open.
- Longer Battery Life - Lower power usage means more unplugged time.
- Cooler & Quieter Operation - No moving parts means silent and low heat.
- More Durable & Reliable - Shock-resistant, perfect for travel or daily commutes.
If your HP laptop comes with an SSD, you may want to upgrade to a new SSD for the following reasons:
- Swap your slow SATA SSD for a faster NVMe drive for even better speed.
- Upgrade a small capacity SSD to a large capacity SSD.
No matter what your situation is, continue reading to learn how to upgrade your HP laptop to an SSD step by step.
Choose the best SSD for your HP laptop
Not all SSDs are created equal—and choosing the right one for your HP laptop makes all the difference in performance, compatibility, and long-term reliability. Here are recommended SSDs for different HP laptop series:
|
HP Series |
Form Factor |
Best SSD Options |
Suggested Capacity |
|
Victus (Gaming) |
M.2 NVMe (PCIe Gen 4) |
|
1TB or more |
|
Pavilion (Everyday Use) |
M.2 NVMe or 2.5" SATA |
|
512GB or higher |
|
Envy (Creators) |
M.2 NVMe |
|
1TB ideal, 512GB minimum |
|
Spectre (Ultrabook) |
M.2 NVMe |
|
1TB preferred, 512GB okay |
|
ProBook / EliteBook (Business) |
M.2 NVMe or 2.5" SATA |
|
512GB min, 1TB for work use |
How to upgrade HDD/SSD to a new SSD on HP laptop
After choosing the right SSD for your HP laptop, you can follow the guidance below to upgrade HDD or older SSD to a newer, faster SSD. The steps apply to HP Victus SSD upgrade, HP Pavilion SSD upgrade and other HP laptop series.
Preparations
Before you start, please make the following preparations:
- Small Phillips screwdriver
- External enclosure or SATA-to-USB/NVMe-to-USB adapter (for cloning)
- Disk cloning software
- Backup important data on the old drive just in case
- Check your HP laptop’s specs to confirm how many drive bays or slots your laptop has
As for the best disk cloning software for HP laptop SSD upgrade, AOMEI Cloner is a solid choice.

- Disk Clone: Transfers everything from one drive to another—operating system, applications, and personal files. Works for HDD-to-SSD, SSD-to-SSD, or HDD-to-HDD upgrades.
- System Clone: Moves only the Windows OS and essential boot partitions, perfect for switching to a smaller SSD.
- Partition Clone: Lets you copy specific partitions (usually data volume) without cloning the entire disk—great for selective backups or storage expansion.
- SSD Alignment: Optimizes partition structure for solid-state drives, ensuring peak speed and longevity.
- Wide Compatibility: Works with all HP laptop models, including Victus, Pavilion, Envy, etc. It can also help you clone Dell laptop hard drive.
Download AOMEI Cloner and install it on your PC now!
Case 1: Your laptop has only one M.2 slot or 2.5" drive bay
If your HP laptop has only one M.2 slot or 2.5" drive bay, follow these steps to upgrade HDD or old SSD to a new SSD:
1. Connect the target SSD to your laptop via the enclosure or adapter you prepared.
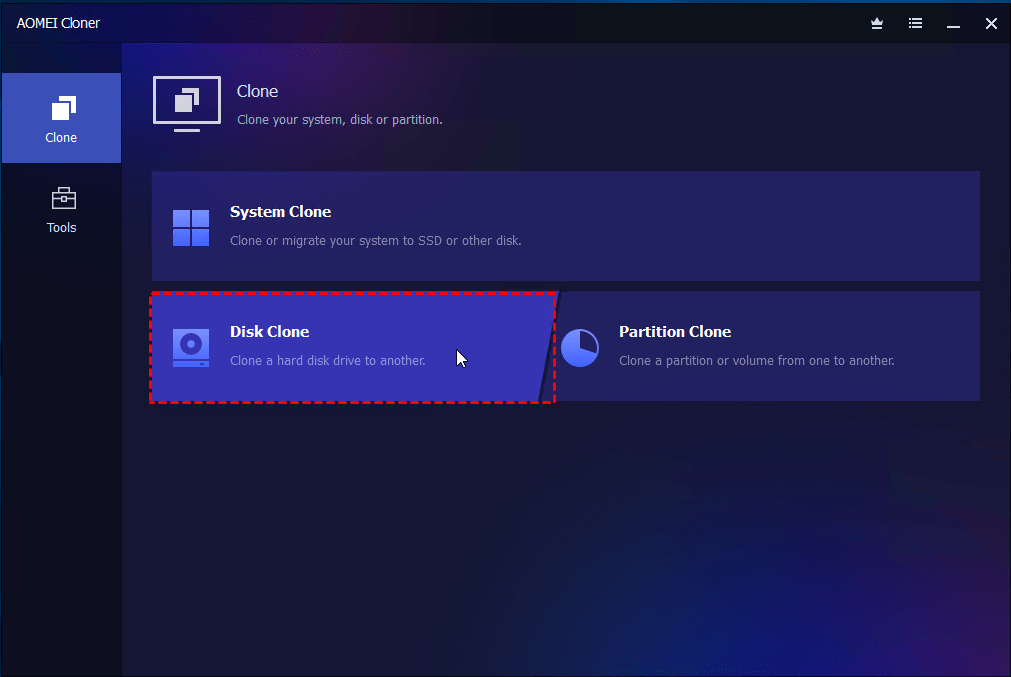
2. Run AOMEI Cloner and click Clone > Disk Clone.
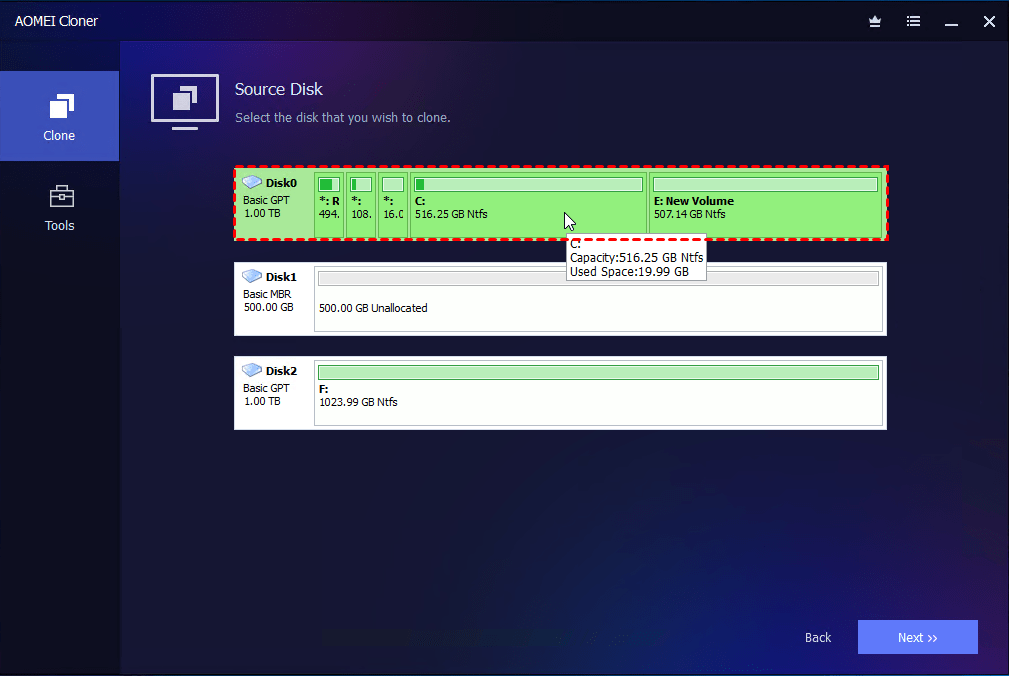
3. Select your current hard drive as the source disk and choose your new SSD as the destination disk.
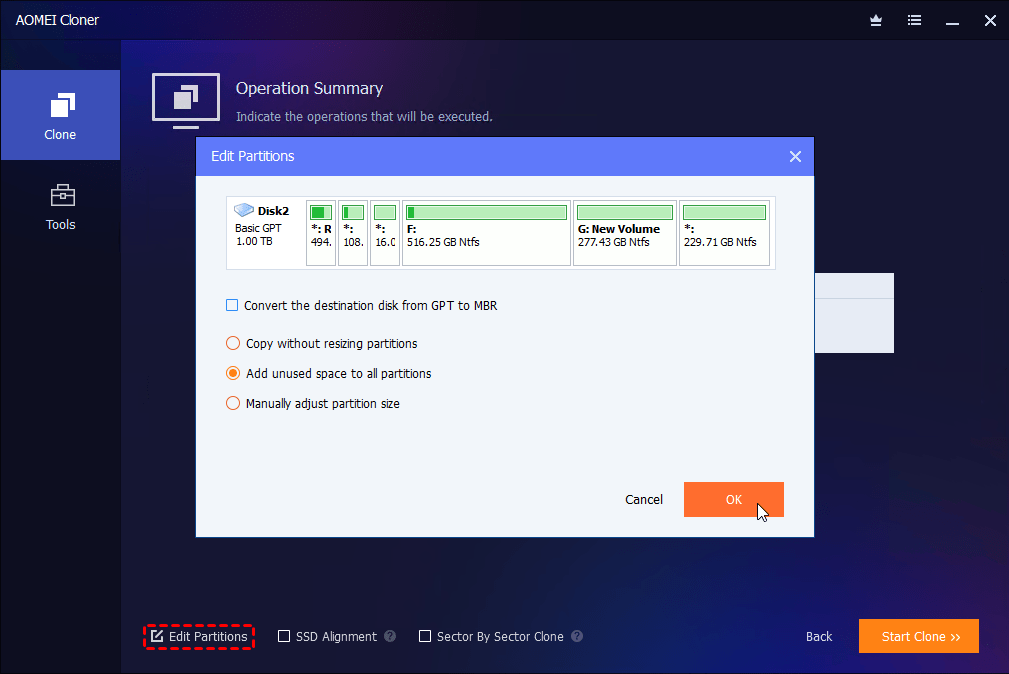
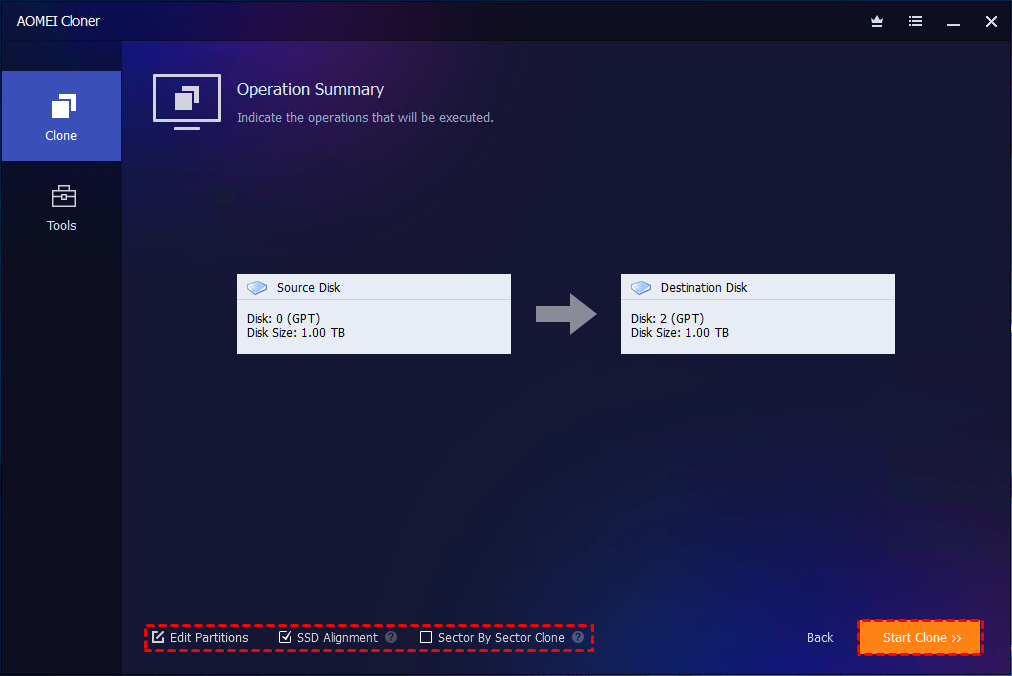
4. On the Operation Summary page, check the information of the source and destination disks.
- If your source and destination disks use different partition schemes (e.g., MBR vs. GPT), click Edit Partitions > Convert the destination disk from MBR (GPT) to GPT (MBR). This ensures compatibility and prevents boot errors from BIOS/UEFI conflicts.
- When cloning to a bigger SSD, click Edit Partitions and choose Add unused space to all partitions or Manually adjust partition size. This maximizes your SSD's storage capacity.
5. Enable SSD Alignment to optimize the target SSD performance and click Start Clone. Wait for the cloning process to complete.
6. Replace the drive and boot.
- Power off the laptop and unplug it.
- Remove the back cover (you may need to unscrew several tiny screws).
- Disconnect the battery (for safety, if accessible).
- Remove the old HDD or SSD carefully and install the new SSD in the same slot or bay.
- Reconnect everything and restart the laptop. Your system should load exactly as before—but faster.
Case 2: Your laptop has an extra M.2 slot
If your HP laptop has an extra M.2 slot, follow these steps to perform HP laptop storage upgrade:
1. Install the new M.2 SSD.
- Power off & unplug the laptop, remove the battery (if removable).
- Open the laptop back panel and locate the M.2 slot (typically near the Wi-Fi card or existing SSD).
- Insert the M.2 SSD at a 30° angle into the slot. Press down gently and secure with the tiny screw.
- Reassemble the laptop.
2. Restart your laptop. Run AOMEI Cloner and perform HDD to SSD or SSD to SSD clone.
3. Boot from the new SSD.
- Shut down your HP laptop completely (do not use "Restart").
- Power on the laptop and immediately start pressing the BIOS key (usually F2 or F10) repeatedly.
- Navigate to Boot Options. For older BIOS, go to "System Configuration" > "Boot Options". For newer UEFI, go to "Boot" or "Storage" tab.
- Highlight the new M.2 SSD and press + or - to move it to the top of the list.
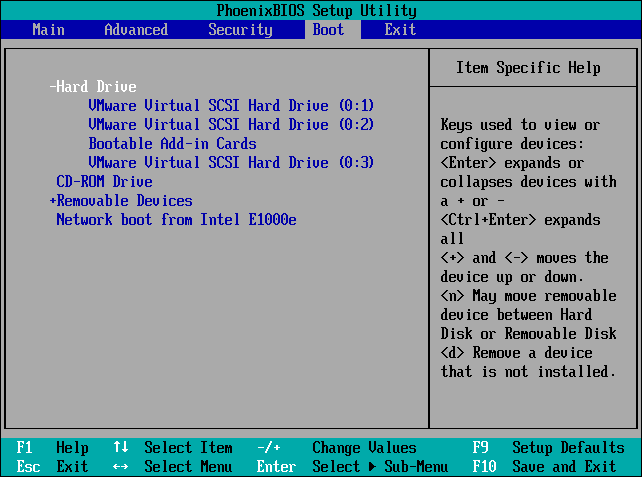
- Press F10 and select "Yes" to save and exit. Your laptop should now boot from the new M.2 SSD.
Conclusion
Whether you’re trying to breathe new life into an older system or supercharge a newer one for gaming, creative work, or everyday performance, you can follow this guide to perform HP laptop SSD upgrade. AOMEI Cloner makes the upgrade process easier for you don’t need to reinstall Windows and all your apps on the new SSD. Try it out by yourself!