NVMe Not Showing Up? Here's How to Fix It Fast (3 Cases)
Is your NVMe SSD missing in BIOS, Disk Management, or File Explorer? This guide breaks down all the reasons your drive isn't showing up and how to fix it—fast.
Last Updated April 23, 2025
Why Is M.2 NVMe Drive Not Showing Up?
If your M.2 NVMe SSD isn’t showing up in Windows or BIOS, don’t panic—this is a common issue with a variety of possible causes.
🔍Improper Installation: The drive may not be fully seated in the M.2 slot or isn’t secured with a screw, causing poor contact with the motherboard.
🔍Incompatible or Disabled M.2 Slot: Some M.2 slots only support SATA, not NVMe, or may be disabled in BIOS if they share lanes with other components.
🔍Incorrect BIOS/UEFI Settings: NVMe detection may fail if BIOS settings like PCIe lane configuration, storage mode, or Secure Boot are misconfigured.
🔍Uninitialized or Unformatted Drive: A brand-new NVMe SSD won’t show up in File Explorer until it’s initialized and formatted in Disk Management.
🔍Missing or Outdated Drivers: Without proper chipset or NVMe controller drivers, the system may not detect the drive.
🔍Dead or Defective SSD: If all else checks out, the drive itself may be faulty; try testing it in another system to confirm.
If the detection issue persists, you may clone old NVMe to new NVMe for hard drive replacement.
Pre-Check: Is Your NVMe SSD Installed Correctly?
Before troubleshooting software or BIOS settings, confirm your NVMe SSD is physically and properly installed. A simple misstep here can cause full detection failure.
1. Reseat the Drive
Ensure the SSD is fully inserted into the M.2 slot at a 30-degree angle, then pressed down and secured with a screw. A loose or misaligned drive won’t be recognized.
2. Confirm M.2 Slot Compatibility
Some M.2 slots only support SATA—not NVMe. Check your motherboard or laptop manual to ensure:
- The slot supports PCIe NVMe.
- The drive key matches the slot (M key or B+M).
- No SATA ports are disabled due to shared lanes.
3. Check for NVMe Support in BIOS
Older motherboards may not support NVMe, especially for booting. If needed, update your BIOS to the latest version to enable NVMe recognition.
💡 Tip: If you're using an NVMe-to-PCIe adapter, make sure it’s in a compatible slot (x4 or x16) and doesn’t require extra power or BIOS tweaks.
Fixes for “NVMe Not Showing Up” in Different Scenarios
If the basic fixes don’t work, here are some advanced fixes for the NVMe not showing up issue.
Case 1: NVMe Not Showing Up in BIOS
If your NVMe SSD isn’t detected in BIOS, you may fix it by adjusting BIOS/UEFI settings:
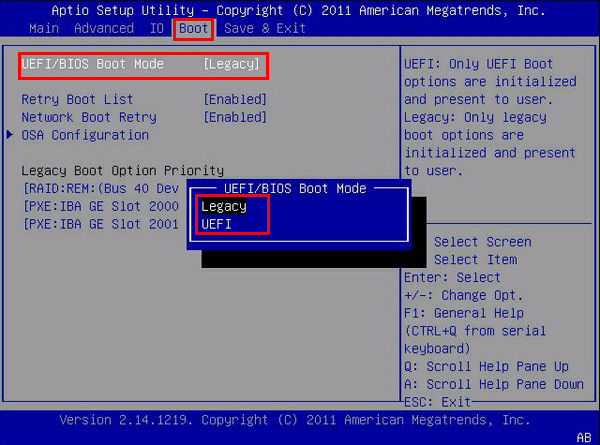
Fix 1: Enable UEFI Boot Mode
1. Enter BIOS/UEFI settings (usually by pressing Del, F2, or F10 at startup).
2. Navigate to Boot > Boot Mode or CSM (Compatibility Support Module).
3. Disable CSM or set boot mode to UEFI. Some NVMe drives require UEFI to be visible, especially for boot drives.
Fix 2: Configure PCIe Lane Settings
1. In BIOS, look for Advanced > PCIe Configuration or NVMe Configuration.
2. Set PCIe lanes to Auto or x4 if manually configurable.
3. If the M.2 slot is configurable, ensure it’s set to PCIe/NVMe mode—not SATA.
Case 2: NVMe Not Showing Up in Disk Management
If your NVMe SSD shows up in BIOS but is missing in Disk Management, it can be a driver issue. Follow these steps to troubleshoot and fix it:
1. Press Windows + X and select Device Manager.
2. Expand Disk drives and Storage controllers.
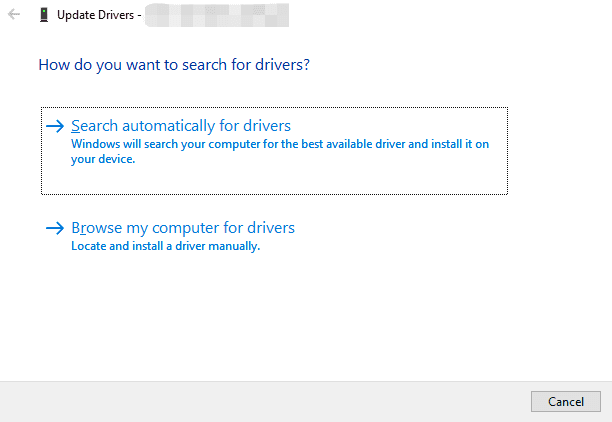
3. Right-click your NVMe SSD or controller and select Update driver.
4. Choose Search automatically for drivers. If Windows finds an update, follow the on-screen instructions to install it.
💡 Tip: You can also download the latest chipset/NVMe driver directly from your motherboard or SSD manufacturer.
5. After updating, restart your computer and check if your NVMe SSD appears now.
Case 3: NVMe Not Showing Up in File Explorer
If your NVMe SSD shows up in Disk Management but not in File Explorer, learn how to fix it below:
Fix 1: Initialize the Drive (If Not Initialized)
1. Press Windows + R, type diskmgmt.msc, and hit Enter to open Disk Management.
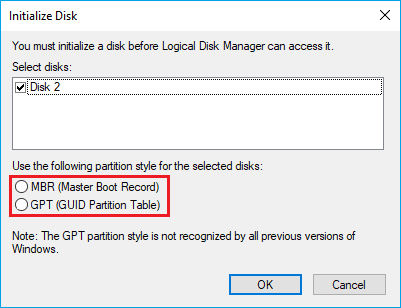
2. Look for your NVMe SSD, right-click on it, and select Initialize Disk.
3. Choose either GPT (for UEFI systems and drives over 2TB) or MBR (for legacy BIOS or older systems) and click OK.
⚠️ Note: Initializing will erase all data if the drive was previously used.
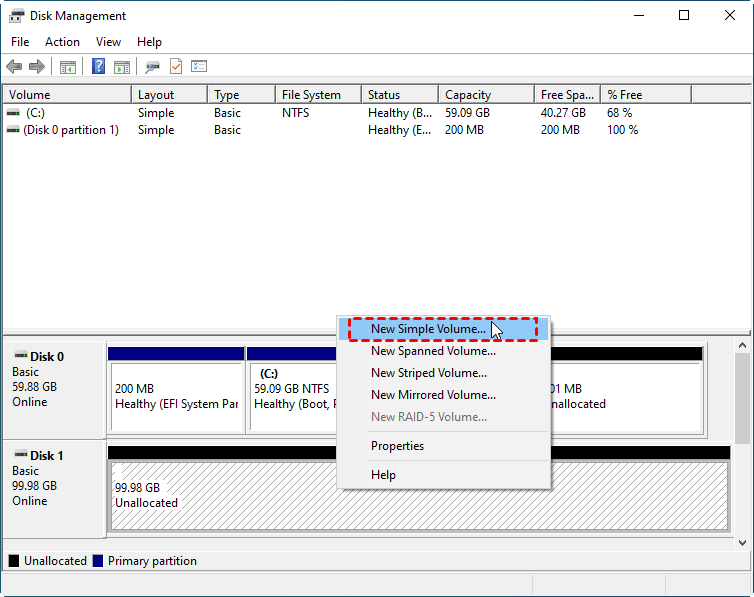
4. Once initialized, the drive will show as Unallocated. Right-click the unallocated space and choose New Simple Volume.
5. Follow the wizard to:
- Set volume size (use default for full size).
- Assign a drive letter.
- Format with NTFS (best for Windows use) or exFAT (best for external SSDs or cross-platform compatibility).
6. Click Finish, and the drive should now be visible in File Explorer.
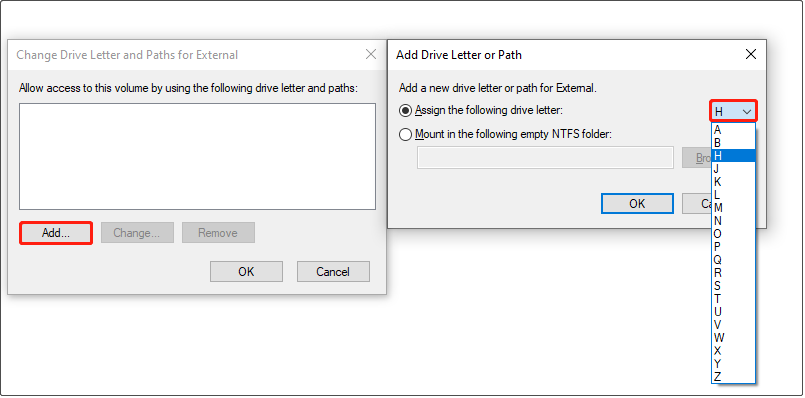
Fix 2: Assign a Drive Letter (If Missing)
1. In Disk Management, right-click on your NVMe SSD and select Change Drive Letter and Paths.
2. Click Add, pick a letter, and click OK. It will instantly show up in File Explorer.
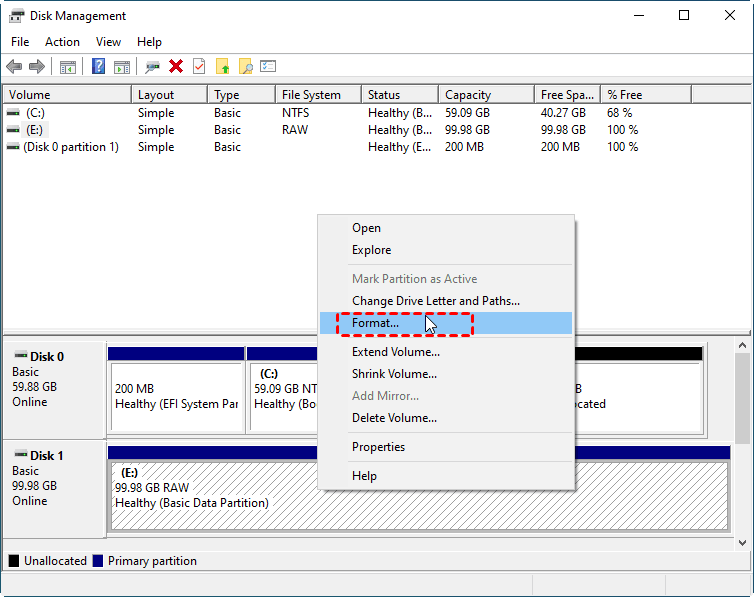
Fix 3: Format the Drive (If RAW or Corrupted)
1. In Disk Management, right-click on your NVMe SSD and select Format.
2. Set a file system (NTFS or exFAT), give it a name, and confirm.
⚠️ Note: This will erase all data on the drive.
Bonus: Transfer Data from Old NVMe to New NVMe
If your NVMe SSD randomly disappears from BIOS or Windows and the issue continues, the SSD is likely failing. In this case, replacing old NVMe with new NVMe is the safest long-term fix. How to transfer everything from old NVMe SSD to new NVMe SSD? AOMEI Cloner is the answer.
- It supports cloning NVMe PCIe SSDs (including Gen3/Gen4) to another NVMe or SATA SSD.
- You can choose to copy only used data (Intelligent Clone) or make an exact copy (Sector-by-Sector Clone).
- You are able to adjust partition sizes on the target NVMe SSD (e.g., expand system partition for larger drives).
- It automatically adjusts partition alignment to boost your NVMe SSD performance.
- It supports both UEFI/GPT & Legacy/MBR and is compatible with major brands like Samsung, WD, Crucial, Intel, etc.
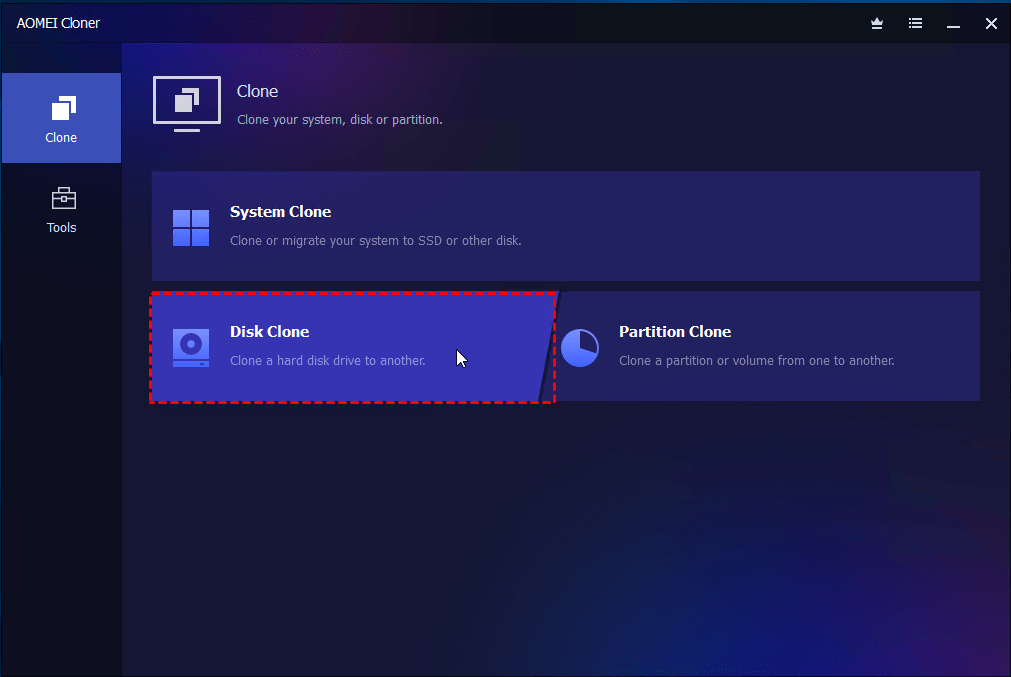
Download AOMEI Cloner now to try it out! Then follow the instructions below to clone NVMe SSD to another NVMe SSD:
Step 1. Install and launch AOMEI Cloner. Next, go to Clone and select Disk Clone.
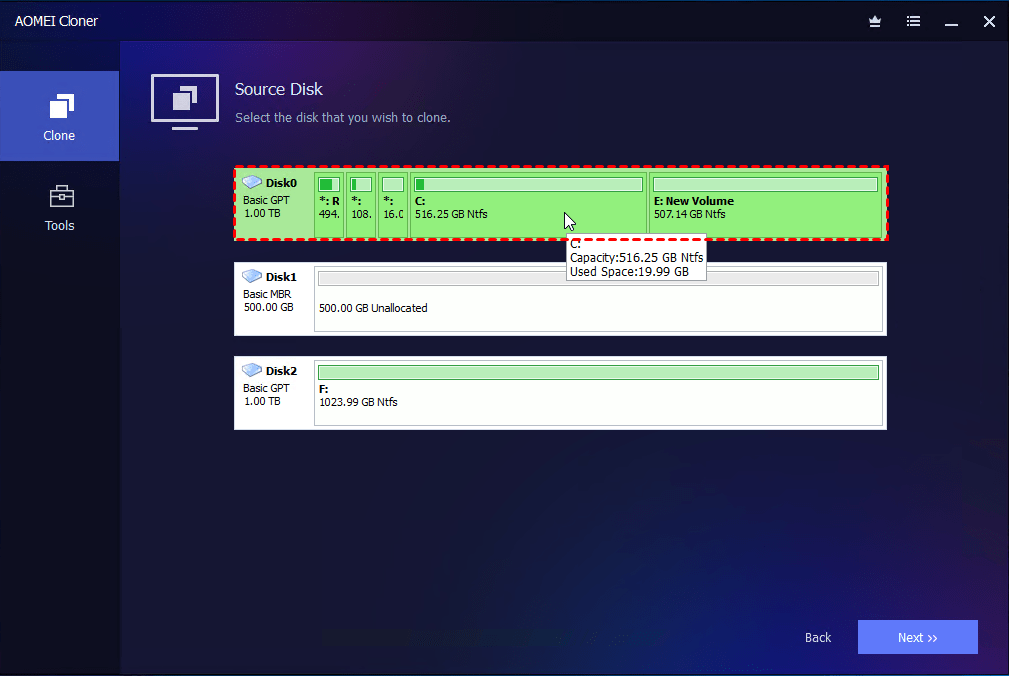
Step 2. Choose your original NVMe SSD as the source drive and select your new NVMe SSD as the target.
Step 3. Check the SSD Alignment option for peak NVMe performance. Then initiate the process by clicking Start Clone.
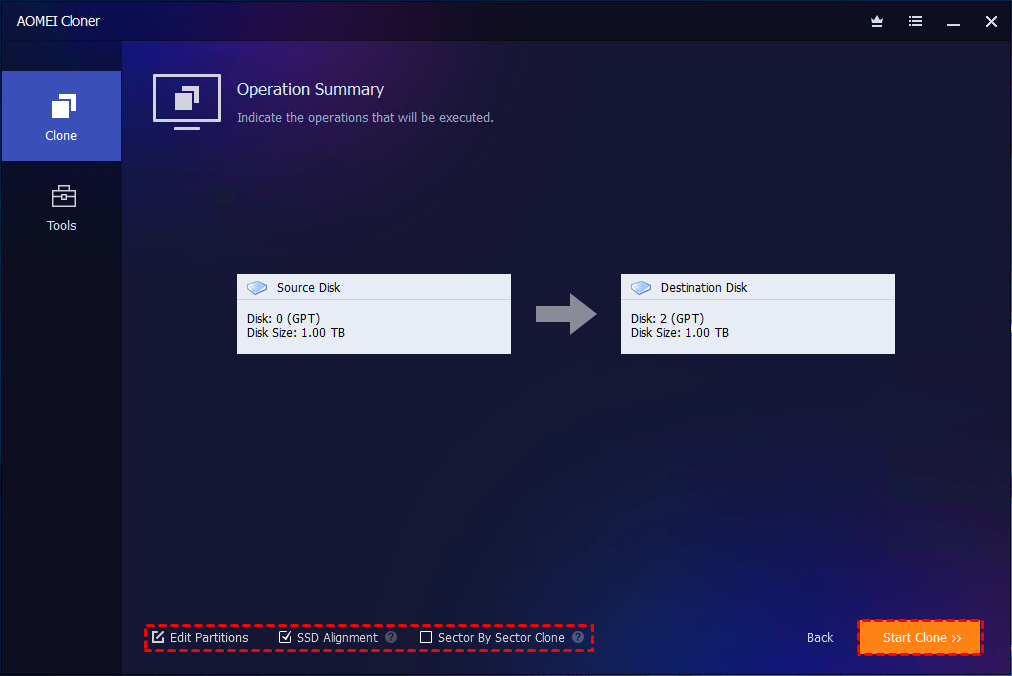
The End
Now you know how to fix the NVMe not showing up issue in BIOS, Disk Management, or File Explorer. You can start with essential checks like ensuring the NVMe is properly seated. If basic checks don’t work, there are advanced fixes, such as updating UEFI settings, updating drivers, and initializing the drive in Windows.
If the detection issue persists, you may replace old NVMe with new NVMe. AOMEI Cloner can help you with seamless data migration. Just go for it!