Azure as a backup solution
Azure, Microsoft's cloud platform, offers a robust backup solution for businesses and individuals alike. With Azure Backup, you can securely store your Windows Server data in the cloud, ensuring data redundancy and accessibility. Azure's infrastructure is designed to provide high availability and reliability, making it an ideal choice for your backup needs.
Advantages of backup Windows Server to Azure
Backing up your Windows Server to Azure offers a range of advantages that can enhance your data security and disaster recovery capabilities. Here are some key benefits:
- Scalability: Azure can scale to accommodate your growing data storage needs, eliminating concerns about running out of storage space.
- Reliability: Azure operates on a globally distributed network of data centers, ensuring your data is stored redundantly and protected against data center failures.
- Security: Microsoft takes data security seriously, implementing advanced security measures to protect your data from unauthorized access and cyber threats.
- Cost-Efficiency: Azure follows a pay-as-you-go pricing model, allowing you to pay only for the storage you use, thus optimizing costs.
- Centralized Management: Azure Backup offers centralized management, making it easy to monitor and schedule backups across multiple Windows Servers.
How to backup Windows Server to Azure
Backing up your Windows Server to Azure is a reliable and efficient way to protect your data and ensure disaster recovery. Here's a guide on how to perform Azure backup step by step:
Prerequisites:
- Azure Account: You'll need an active Azure account. If you don't have one, you can sign up for an Azure account on the Azure portal.
- Windows Server: Make sure you have a Windows Server that you want to back up. It should be connected to the internet.
- Azure Recovery Services Vault: Set up an Azure Recovery Services Vault within your Azure portal. This vault will serve as the destination for your Windows Server backups.
Steps to Backup Windows Server to Azure
✤Install and register the agent
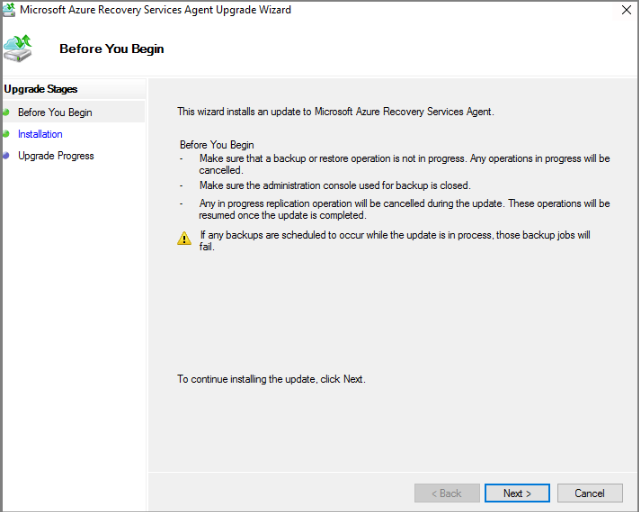
1. Find and double-click the downloaded MARSagentinstaller.exe. This action will launch the Microsoft Azure Recovery Services Agent Setup Wizard.
2. While on the wizard, input the following information as requested:
- Indicate the location for installation and the cache folder.
- If you utilize a proxy server to connect to the internet, provide the proxy server details.
- If you're using an authenticated proxy, furnish your username and password details.
3. Select Register. Towards the conclusion of the wizard, choose Proceed to Registration and supply the Vault Credentials file that you acquired in the previous step.
4. When prompted, create an encryption passphrase to secure your Windows Server backups. It's crucial to save this passphrase in a secure location since Microsoft cannot assist in recovering it if it's lost. Finally, click on Finish.
✤Configure backup and retention
1. Launch the Microsoft Azure Recovery Services agent. You can locate it by conducting a search on your computer for Microsoft Azure Backup.
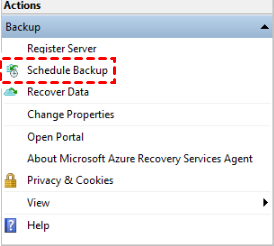
2. On the Recovery Services agent console, click on Schedule Backup found under the Actions Pane.
3. Click Next to proceed to the Select Items to Back up page.
4. Choose Add Items and within the dialog box that appears, pick System State and the specific files or folders you wish to include in the backup. Then, click OK.
5. On the Specify Backup Schedule (System State) page, set the preferred time of day or week when you want the backups to commence for the System State. Afterward, click Next.
6. On the Select Retention Policy (System State) page, select the retention policy that suits your needs for the System State backup copy, and then click Next.
7. Likewise, choose the backup schedule and retention policy for the designated files and folders.
8. On the Choose Initial Back up Type page, select Automatically over the network, and click Next.
9. Review the provided information on the Confirmation page, and then click Finish. Once the wizard completes the creation of the backup schedule, click Close.
✤Run an on-demand backup
1. On the Microsoft Azure Recovery Services agent console, click Back Up Now.
2. On the Back Up Now wizard, select either Files and Folders or System State that you wish to include in the backup, and then click Next.
3. Review the settings utilized by the Back Up Now wizard to perform the server backup on the Confirmation page. Afterward, select Back Up.
4. Select Close to close the wizard. If you close the wizard before the backup process completes, it continues to operate in the background.
Safe and reliable backup solution for Windows Server
For an added layer of security and reliability, consider using AOMEI Cyber Backup. This versatile enterprise backup solution is user-friendly and can seamlessly integrate with your Windows Server and Azure backup strategies. With AOMEI Cyber Backup, you can automate backup schedules, create incremental backups, and enhance data recovery capabilities, ensuring the safety of your Windows Server data. It also offers the following benefits:
✦Perpetual Free: No time limit for AOMEI Cyber Backup Free Edition.
✦User-Friendly Interface: Whether you're an IT professional or a small business owner, you can easily navigate the software.
✦Versatile Backup Options: Allow you to tailor your backup strategy to your specific needs, including VMware ESXi Backup, Hyper-V Backup, Microsoft SQL backup, Disk Backup, Partition Backup, System Backup.
✦Advanced Scheduling: Schedule your backups to run automatically at convenient times.
Please click the button below to try this freeware:
Download FreewareWindows Server & PC
* Both free and paid version of AOMEI Cyber Backup support Windows Server 2016/2019/2022/11,10,8,7.
Steps to back up and restore your Windows Server
1. Please download and install AOMEI Cyber Backup Agent on your computer at first.
2. Access to Source Device >> Windows. Select the device where the system you want to back up is located. If it's not here, you just need add your Windows device by clicking + Add Windows Device to fill in your Device Information and User Information.
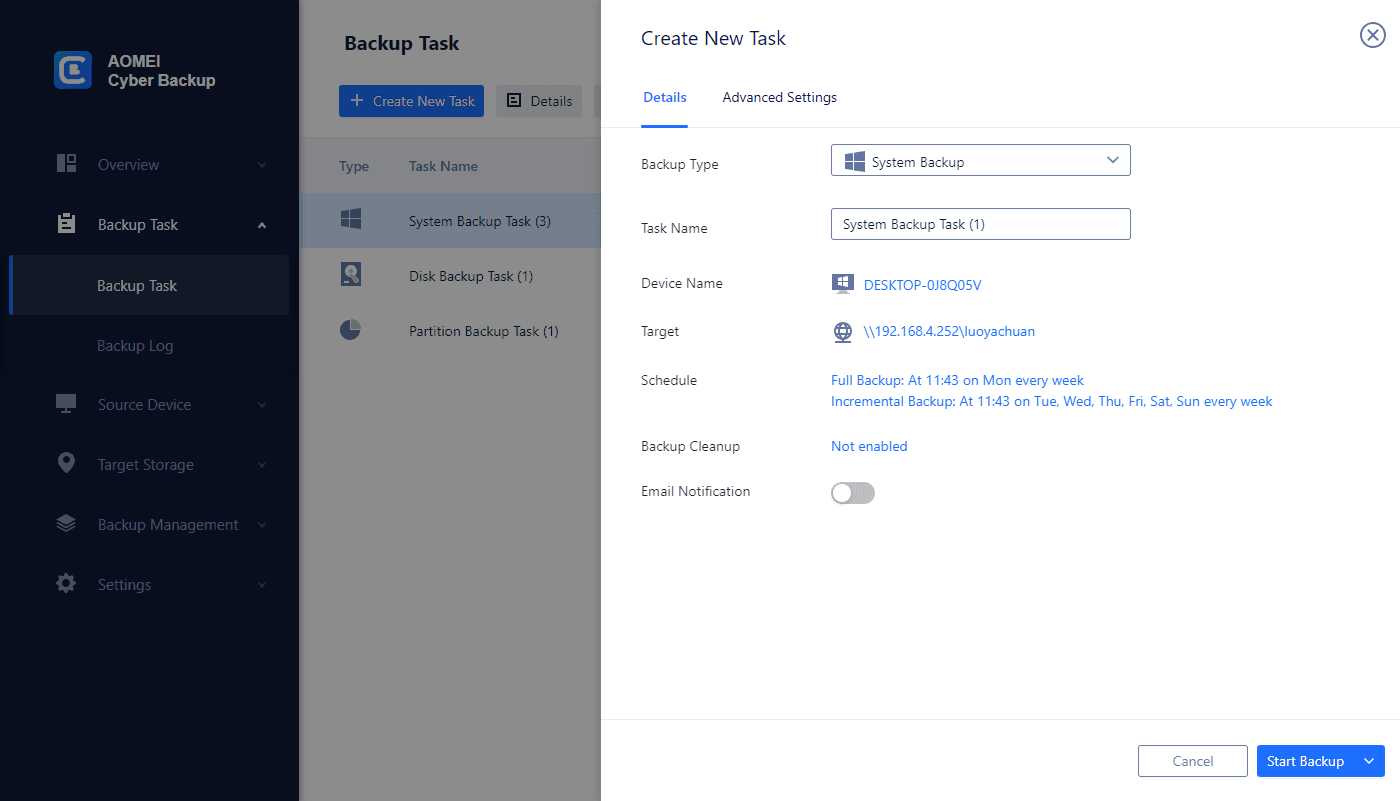
3. Click Backup Task >> + Create New Task >> System Backup. Then specify the backup details, such as: Task Name, Device Name, Target, and Schedule as you want.
4. Click Start Backup to start the process, you can select Add the schedule and start backup now, or Add the schedule only.
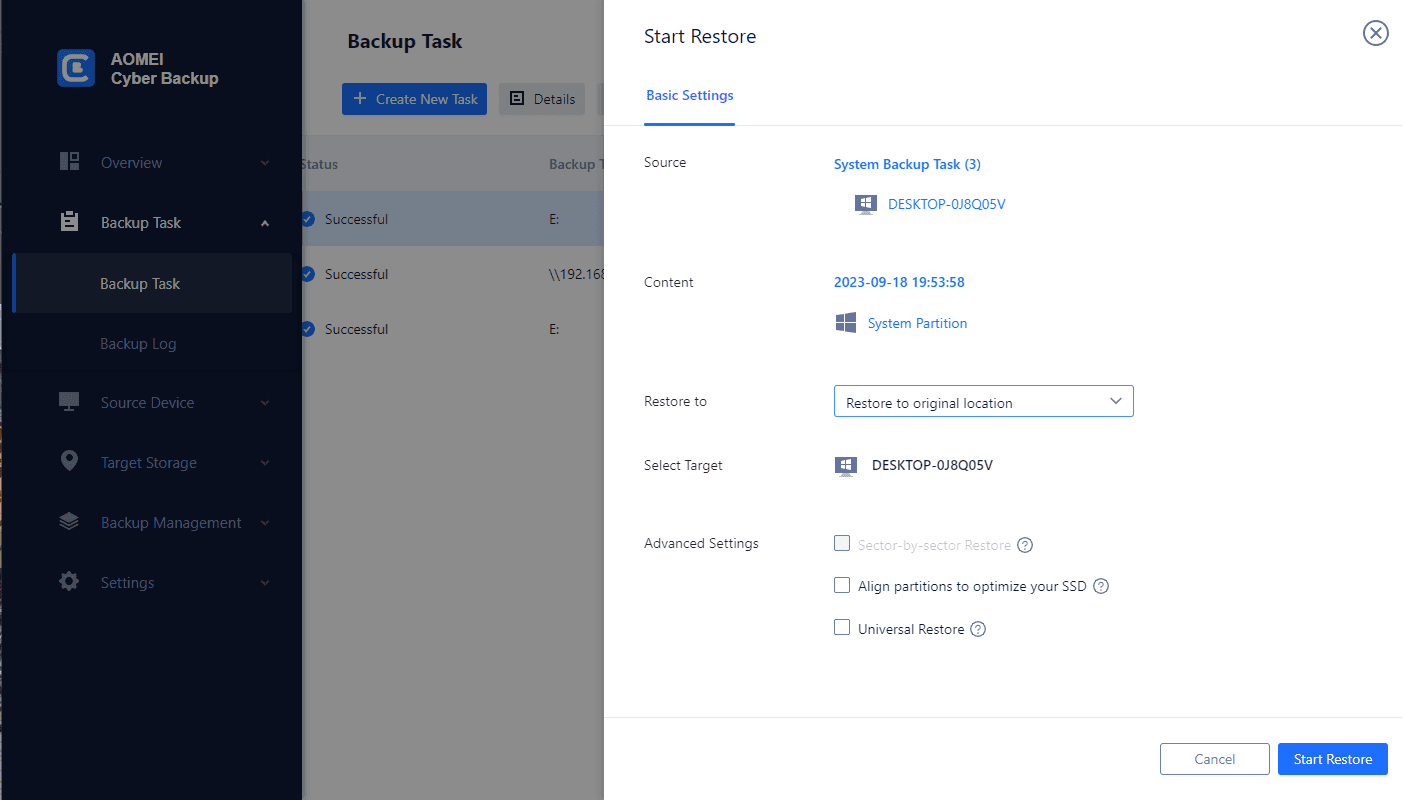
5. Click … right on the task and select Restore to configure the basic information. Once you've finalized the settings, click Start Restore.
Conclusion
Windows Server backup to Azure is a prudent move for data security and business continuity. Azure's scalability, reliability, security, and cost-efficiency make it an ideal choice. By following the step-by-step guide provided, you can efficiently perform this backup on-premise server to Azure.
Additionally, AOMEI Cyber Backup enhances the reliability of your backup strategy, ensuring the safety and accessibility of your Windows Server data. Embrace these solutions and rest assured that your data is secure and recoverable in any unforeseen circumstances.
