What is NT Backup
NT Backup, also known as "Windows NT Backup," is a legacy backup utility developed by Microsoft. It was initially introduced in Windows NT 4.0 and served as the default backup tool for Windows operating systems until Windows Server 2008. NT Backup allows you to create and manage backups of critical data, files, and folders on their Windows-based systems, providing a means of data protection and disaster recovery. While it was replaced by Windows Server Backup in later versions of Windows, NT Backup has been revived in Windows Server 2012 to address specific niche use cases and offer compatibility with older backup formats.
Benefits of NT Backup Windows Server 2012
NT Backup's reintegration in Windows Server 2012 offers several benefits, making it a valuable addition to the backup arsenal despite being a legacy tool. The advantages of using NT Backup in Windows Server 2012 include:
- Legacy Compatibility and Data Migration: NT Backup's resurgence in Windows Server 2012 caters to you that rely on legacy backup formats or wish to migrate the older backups seamlessly to the latest server version.
- Supplementing Modern Backup Strategies: While Windows Server Backup and other modern backup solutions offer robust features, NT Backup's reintegration provides additional options to you, allowing you to tailor your backup strategies according to specific needs.
- Addressing Niche Use Cases: NT Backup proves valuable in situations where compatibility with older backup files is essential or when specific applications rely on the legacy backup tool.
How to backup and restore files with NT Backup Windows Server 2012/2008
Backup and restoring files using NT Backup in Windows Server 2012/2008 involves several straightforward steps. Follow this guide on Windows Server 2012 how to start Windows NT Backup and utilize it for data protection and recovery:
Install NT Backup on the destination server
To utilize NT Backup on a Windows Server 2008 R2 or Windows Server 2008 destination server, you need to enable the NT Backup feature manually. Conversely, on the source computer, which runs Windows Server 2003 R2, NT Backup is automatically installed during the operating system setup process.
✍Install NT Backup on Windows Server 2008
1. Sign in to the Windows Server 2008 computer using administrator credentials.
2. Access Server Manager, locate the Features section, and choose Add features.
3. Select Removable Storage Manager, proceed by clicking Next, and then initiate the installation process by clicking Install.
4. Download the suitable NT Backup MSI file from the Windows NT Backup - Restore Utility and proceed to install it on the system.
Backup the files from the source server
1. Launch Ntbackup.exe on the source server.
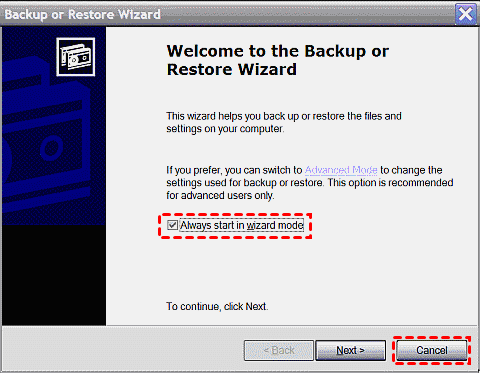
2. If the Backup or Restore Wizard dialog box appears, uncheck the Always start in wizard mode option, dismiss the wizard by clicking Cancel, and then restart NTBackup.exe.
3. Click the Backup tab.
4. Choose the replicated folders to include in the backup:
- Select each desired replicated folder for backup.
- Exclude the DfsrPrivate folder under each replicated folder to avoid unnecessary data backup. The DfsrPrivate folder does not contain data useful to the destination server and only increases the backup size.
5. In the Backup media or file name section, specify the path to a backup BKF file. This path can be a local location on the server or a remote share. You can designate the same volume or a different volume as the target. The destination server for the restore can also be specified here.
6. Click Start Backup and customize any desired options. You can add a custom description and label if necessary. Then, initiate the backup process by clicking Start Backup.
7. Once the backup operations conclude, verify that no errors occurred during the backup process.
Restore the backup to the destination server
1. After Windows NT Backup restore utility download, launch it and NtBackupRestoreUtility.exe, on the destination server.
2. Access the Restore Wizard (Advanced) feature.
3. On the Welcome to the Restore Wizard page, proceed by clicking Next.
4. On the What to restore page, choose the desired backup to proceed on the destination server. Utilize the Browse button to locate the BKF file generated during the backup process.
5. Select each replicated folder that requires restoration and click Next.
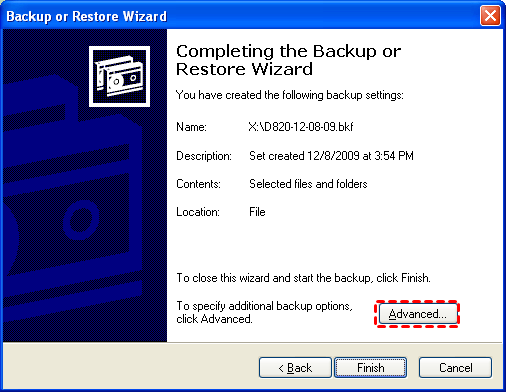
6. On the Completing the Restore Wizard page, click Advanced.
7. On the Where to Restore page, specify Alternate location. Select the appropriate location and continue by clicking Next.
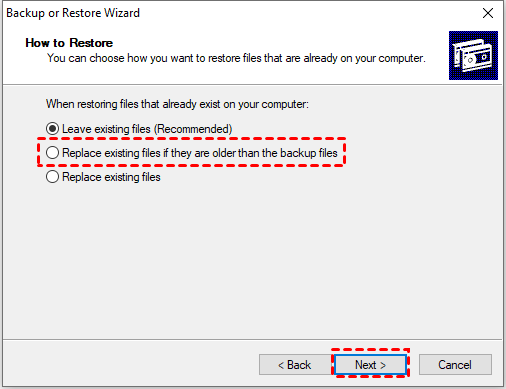
8. On the How to Restore page, select the Replace existing files if they are older than the backup files option, then click Next.
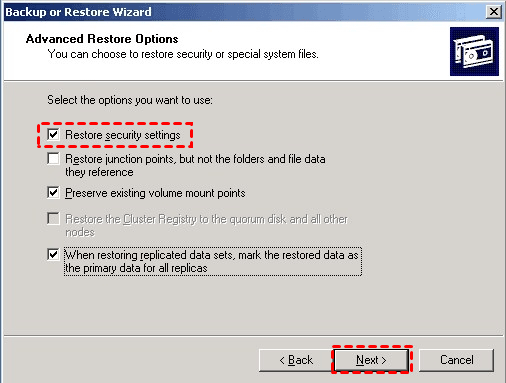
9. On the Advanced Restore Options page, select the Restore security settings option while clearing all other selections. Proceed by clicking Next.
10. On the final page of the Restore Wizard, click Finish to complete the process.
11. After the restoration operations conclude, ensure that no errors occurred during the process.
One effective alternative to auto backup Windows server
While NT Backup provides a useful manual backup solution, automating your Windows server backups can streamline the process and enhance data protection. By incorporating automated backups into your Windows Server environment, you can proactively safeguard your data, maintain system reliability, and ensure business continuity in the face of unforeseen challenges.
Therefore, I would like to introduce you – AOMEI Cyber Backup, a software simplifies the process, offering a user-friendly and versatile solution for data protection and system recovery. With AOMEI Cyber Backup, you have a dependable partner in securing your critical server resources.
✥User-Friendly Interface: With an intuitive and straightforward interface, ensuring you can navigate the backup process with ease.
✥Flexible restore method: You can restore your Windows system from backup to the same/another location.
✥Automated Execution: Schedule regular backups to occur automatically, ensuring data protection without manual intervention.
✥Reliable Restore: It excels in efficiency, ensuring a smooth and reliable restoration process.
Next, I will show you how to automatically back up your Windows server with AOMEI Cyber Backup. You can click the button below to download the freeware.
Download FreewareWindows Server & PC
* Both free and paid version of AOMEI Cyber Backup support Windows Server 2016/2019/2022/11,10,8,7.
Steps to automate the process of Windows server backup and restore
1. Add Agent: Please ensure you have installed AOMEI Cyber Backup Agent to your computer for the backup.
2. Bind Device: Navigate to Source Device >> Windows. Your device will automatically appear if it is compatible and online. Otherwise, you just need click + Add Windows Device to enter your Device Information and User Information.
3. Create Backup Task: Click Backup Task >> + Create New Task, and choose backup type as System Backup. Then specify Task Name, Device Name, Target, and Schedule according to your need.
- Task Name: Change the task name or use the default name with an ordinal.
- Device Name: If you are using the free version, you can choose to backup 1 Windows Server or 3 PC-based Windows systems.
- Target: Select to back up to a new local storage, or to a new network storage. Used paths will be saved in Favorite Storage for handy selection.
- Schedule: Choose to perform full, differential or incremental backup, and automate execution daily, weekly or monthly according to the frequency you specified.
4. Start Backup: Once you set up your backup task, it will automatically do the Windows server backup. You can select Add the schedule and start backup now, or Add the schedule only.
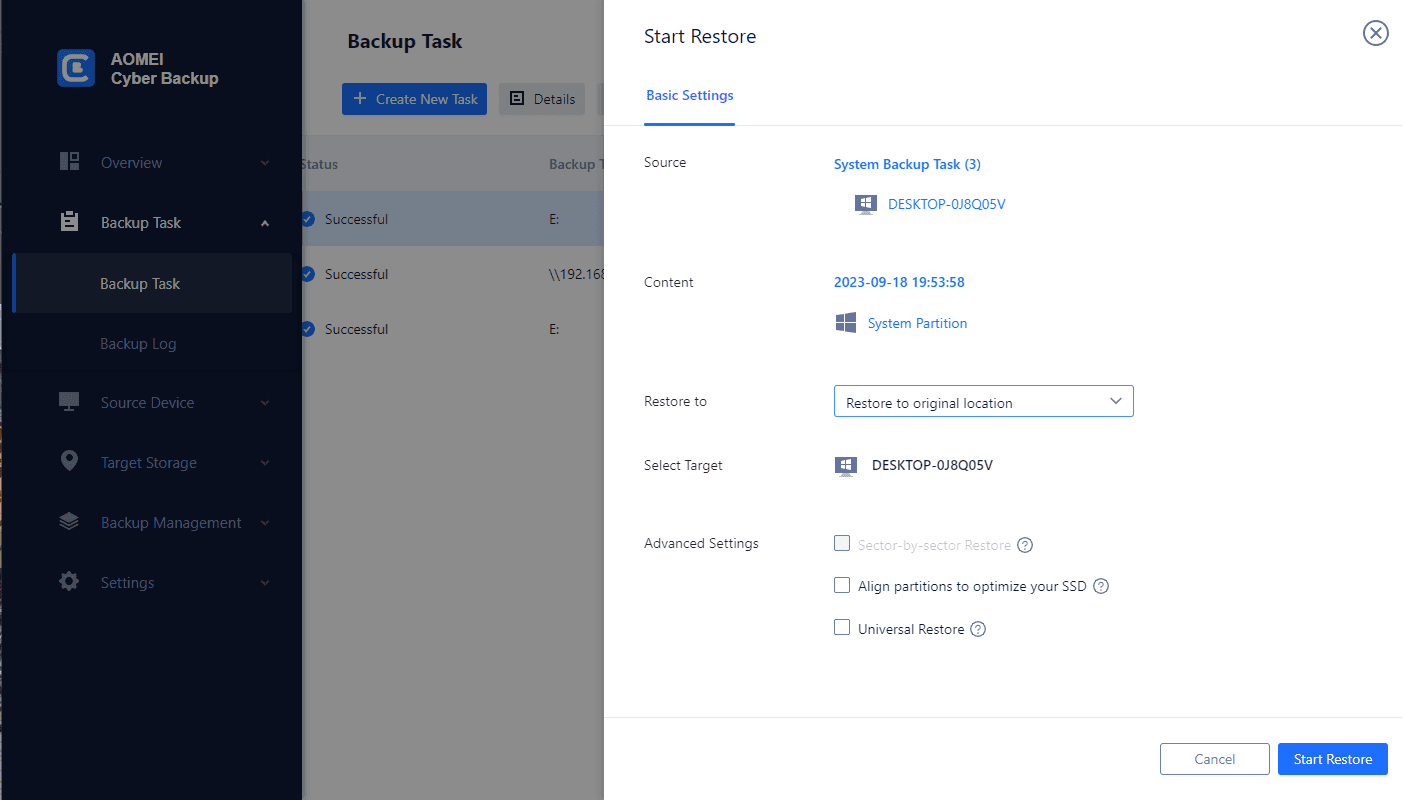
5. Start Restore: From the created backup tasks, locate the backup task you want to restore and click … >> Restore. Choose to Restore to original location to create the same data directly from the backup.
FAQs about NT Backup
Q: Does NT Backup support incremental or differential backups?
A: Yes, NT Backup supports both differential and incremental backups, allowing users to choose the backup type that best suits their data protection needs.
Q: Is NT Backup suitable for backing up large volumes of data?
A: While NT Backup can handle smaller-scale backups effectively, it may not be ideal for backing up large volumes of data due to performance limitations compared to modern enterprise backup solutions designed for larger datasets.
Q: Can NT Backup be used for backing up system state and application data?
A: Yes, NT Backup can perform system state backups and application-aware backups through Volume Shadow Copy Service (VSS) settings, ensuring data consistency and integrity.
Conclusion
NT Backup's revival in Windows Server 2012 brings a touch of nostalgia to data protection strategies. Although modern backup solutions offer comprehensive features, NT Backup serves as a valuable option for organizations with specific requirements and legacy backup formats. By harnessing the capabilities of NT Backup, you can achieve a well-rounded backup approach, ensuring the safety and recoverability of your critical data in Windows Server 2012 environments.

