What are Restore Points in Window 11
In Windows 11, a "Restore Point" is like a snapshot of your computer's setup at a specific time. It captures system files, settings, and installed programs. Windows creates these points automatically before major changes, like updates or new software installations. If something goes wrong later, you can use a Restore Point to revert your system back to how it was when the snapshot was taken. This process doesn't affect your personal files, like documents or photos. You can access and use Restore Points through the "System Restore" feature in Windows 11 settings.
This article will introduce you to specific ways to create a restore point in Windows 11 to protect your data.
Prerequisites for Creating Restore Points
Before you can create system restore points in Windows 11, ensure that the following prerequisites are met:
- Administrative Access and Privileges: You need administrative access and privileges on your Windows 11 computer to create and use restore points.
- Sufficient Disk Space Allocation: Allocate enough disk space on your system drive to accommodate restore points. The amount of space required depends on the size of your system and the frequency of creating restore points.
How to Create Restore Points in Windows 11
You can manually create a System Restore Point on your Windows computer. This point can be used to revert your system to its current state if any issues arise in the future.
✍ You need to enable System Restore first, as follows:
* Open the "Control Panel", and then click on "System and Security" > "System" > "System Protection" > "Configure" button.
* In the System Protection tab, select "Turn on system protection."
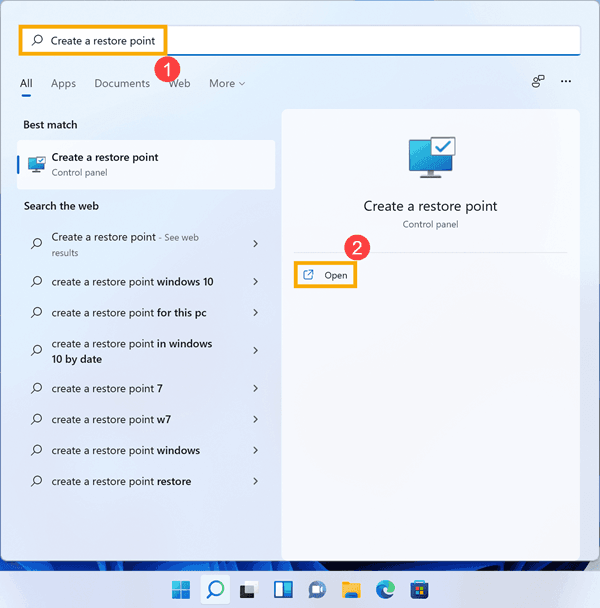
1. Open the System Restore utility by searching for "Create a restore point" in the Windows search bar and open it.
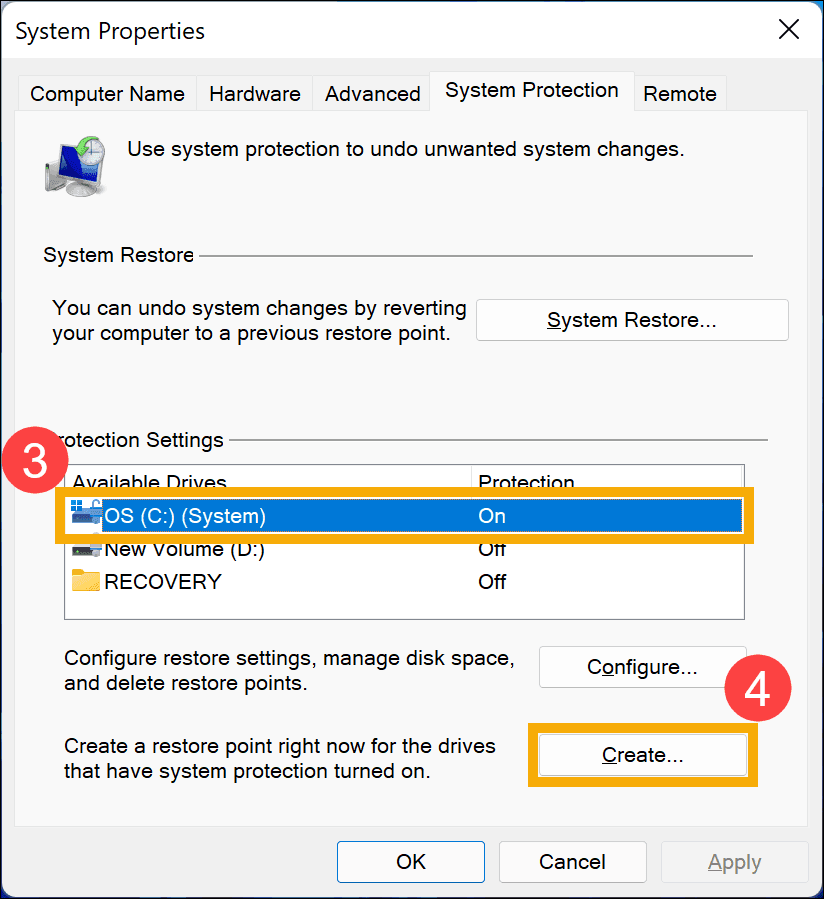
2. Select the drive for which you want to create the restore point (usually your main system drive, labeled "C:"). Click on the "Create" button.
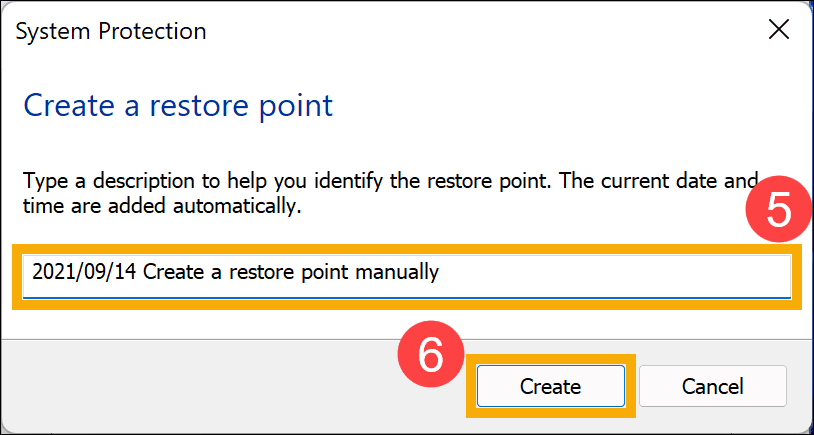
3. Enter a descriptive name for the restore point (optional). This can help you identify it later if you need to use it. Then click "Create" again to initiate the creation of the restore point.
4. Wait for the process to complete. This may take a few moments. Once the restore point has been successfully created, you'll see a confirmation message.
5. Click "Close" to exit the System Properties window.
Using Restore Points to Restore the System
When you encounter issues or errors on your Windows 11 system, you can use the previously created restore points to restore your system to a stable state. Follow these steps:
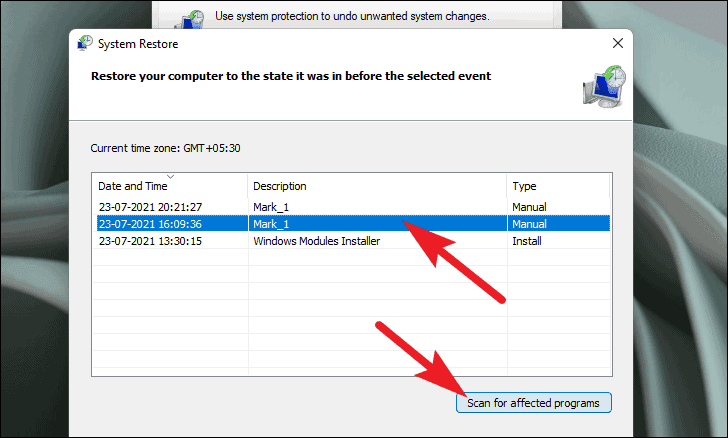
1. Open the System Restore utility, and click on the "System Restore" button.
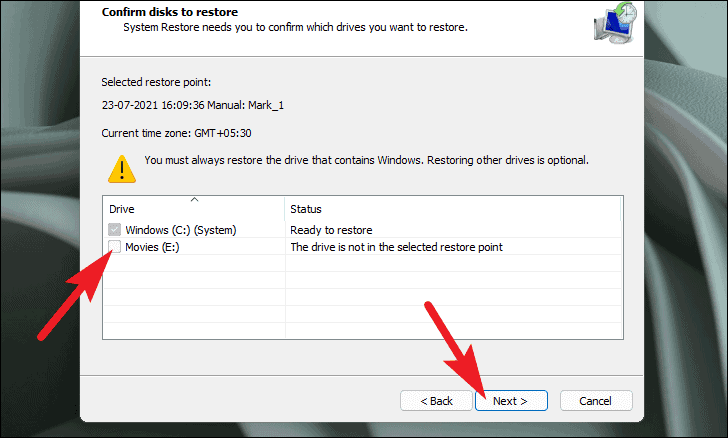
2. You'll see a list of available restore points with corresponding dates and descriptions. Select the restore point you want to use by clicking on it, then click "Next."
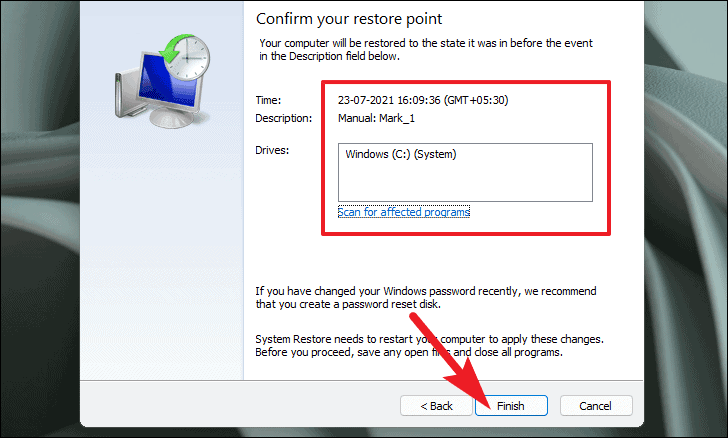
3. Review the details of the selected restore point to ensure it's the one you want to use.
4. Click "Finish" to confirm your selection. Your computer will restart, and the restoration process will begin. This may take some time depending on the complexity of the restore point.
You can log in to your computer and verify that the system has been restored to the state of the selected restore point. By following these steps, you can use restore points to revert your Windows system to a previous state, helping to resolve issues that may have arisen since that point in time.
💡 The limitation of restore points in Windows is that they primarily focus on system settings and configurations, rather than comprehensive data backup. While they can be helpful for reverting system changes, they do not provide a complete solution for backing up and restoring user data, applications, and settings. Additionally, restore points are subject to certain limitations:
⊹ Limited Storage: Restore points are stored within a limited amount of disk space allocated by the system, which may result in older restore points being automatically deleted to make room for new ones.
⊹ Dependency on System Restore Functionality: Restore points rely on the System Restore functionality built into Windows, which may not always be reliable or effective in restoring the system to a desired state, especially in the case of severe system issues or failures.
⊹ Lack of Flexibility: Restore points do not offer the flexibility to customize backup schedules, specify backup destinations, or perform advanced backup operations such as disk imaging or file-level backups.
Alternatives: Create System Restore Point Easily
To address these limitations and ensure comprehensive system backup and recovery, it's recommended to use dedicated backup and recovery software such as AOMEI Cyber Backup for Windows. AOMEI Cyber Backup offers various features and benefits, including:
Comprehensive Backup Solutions: AOMEI Cyber Backup provides options for full system backups, disk/partition backups, file backups, and more, allowing users to create complete backups of their systems, applications, and data.
Flexible Scheduling: Users can schedule automatic backups at regular intervals to ensure that their data is consistently backed up without manual intervention.
Incremental and Differential Backup: The software offers options for incremental and differential backups, which help reduce backup time and storage space by only backing up changed or new data since the last backup.
Download AOMEI Cyber Backup to recover lost or deleted personal files on the computer.
🚩 Step to backup data centrally with AOMEI Cyber Backup:
1. Navigate to "Backup" tab after opening this software, then choose "Create New Task" > "System Backup".
2. Select a system you want to back up. Then choose the connected external hard drive to save the backup.
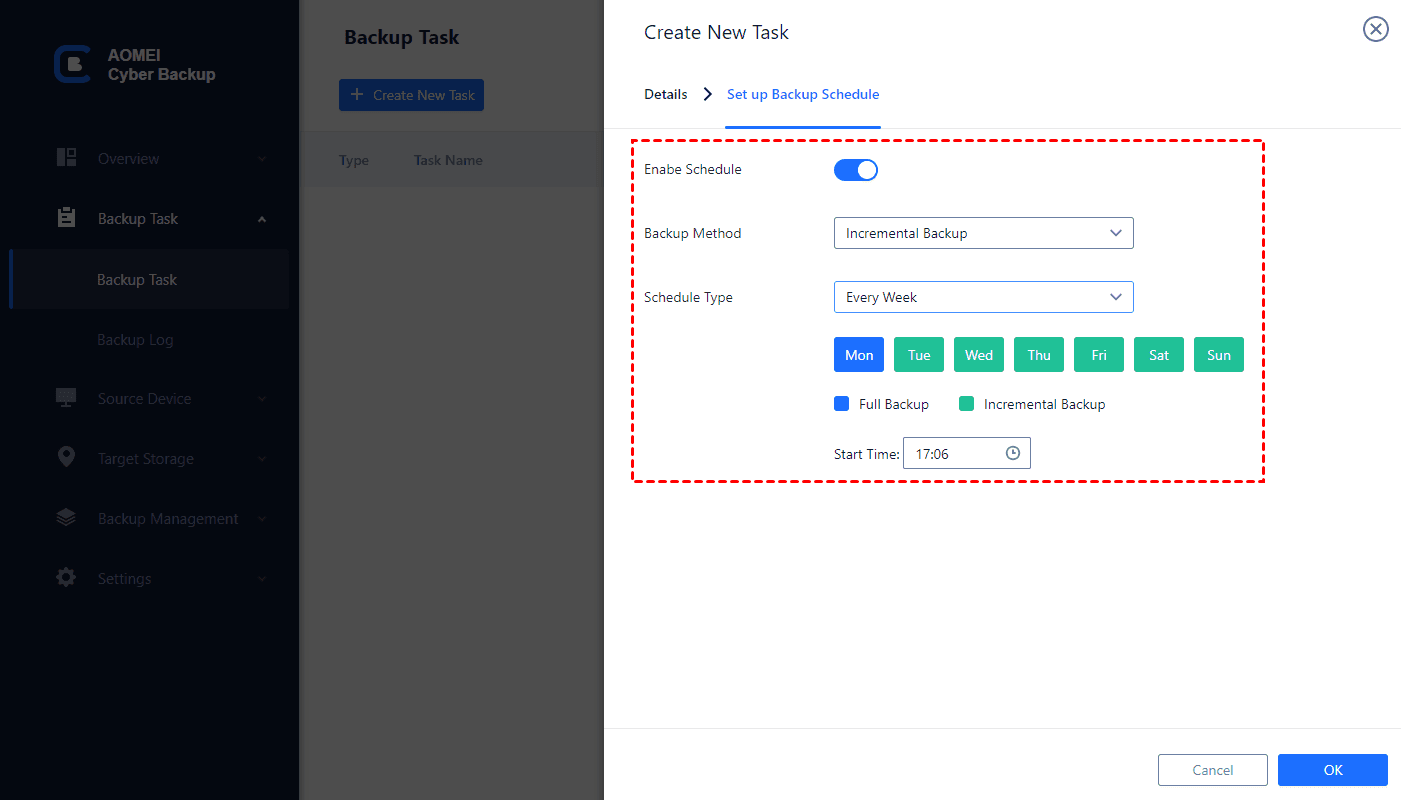
3. Schedule backup method as full / incremental / differential backup and run the backup tasks at daily / weekly / monthly.
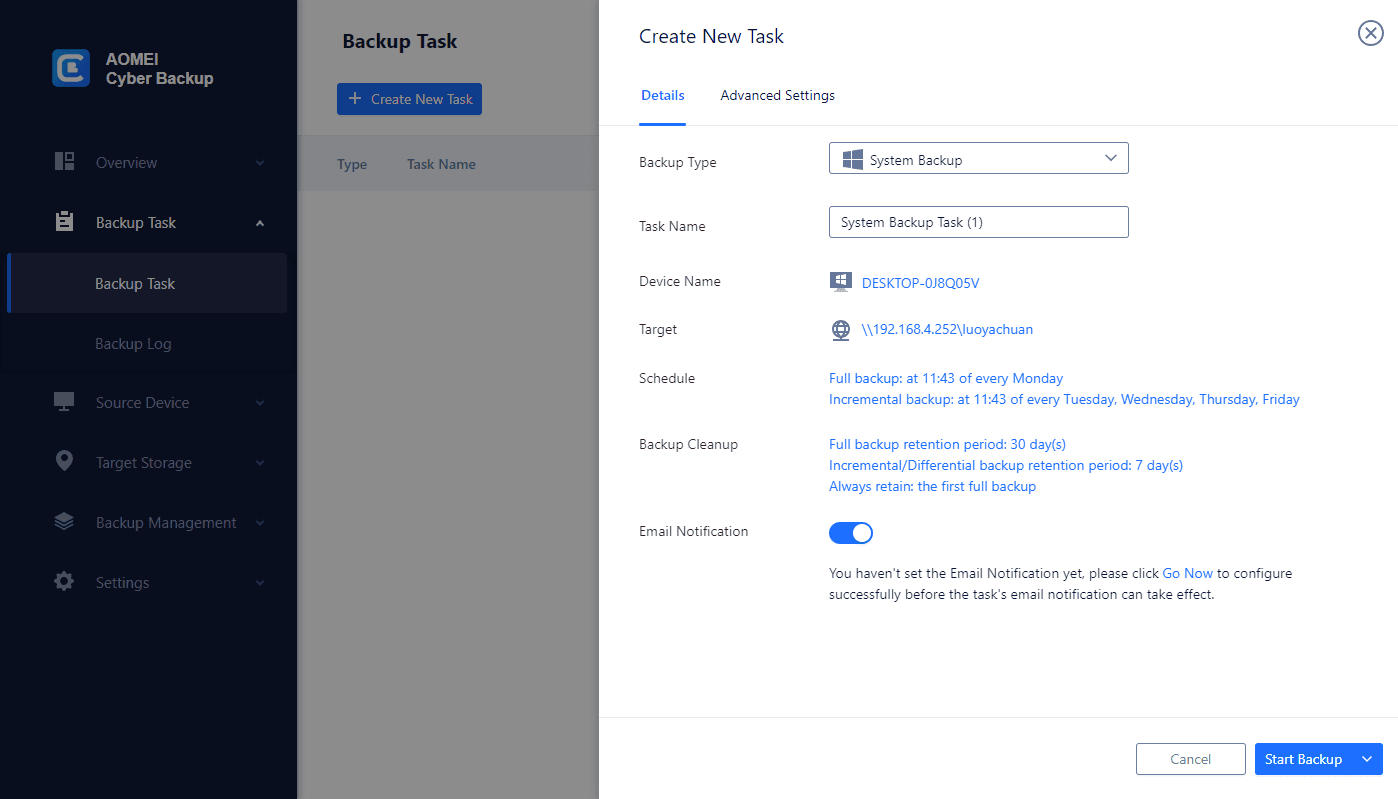
4. Configure retention policy to auto delete the old backup files and save storage space.
5. Click Start Backup to protect your system.
🚩 Steps to restore computers easily:
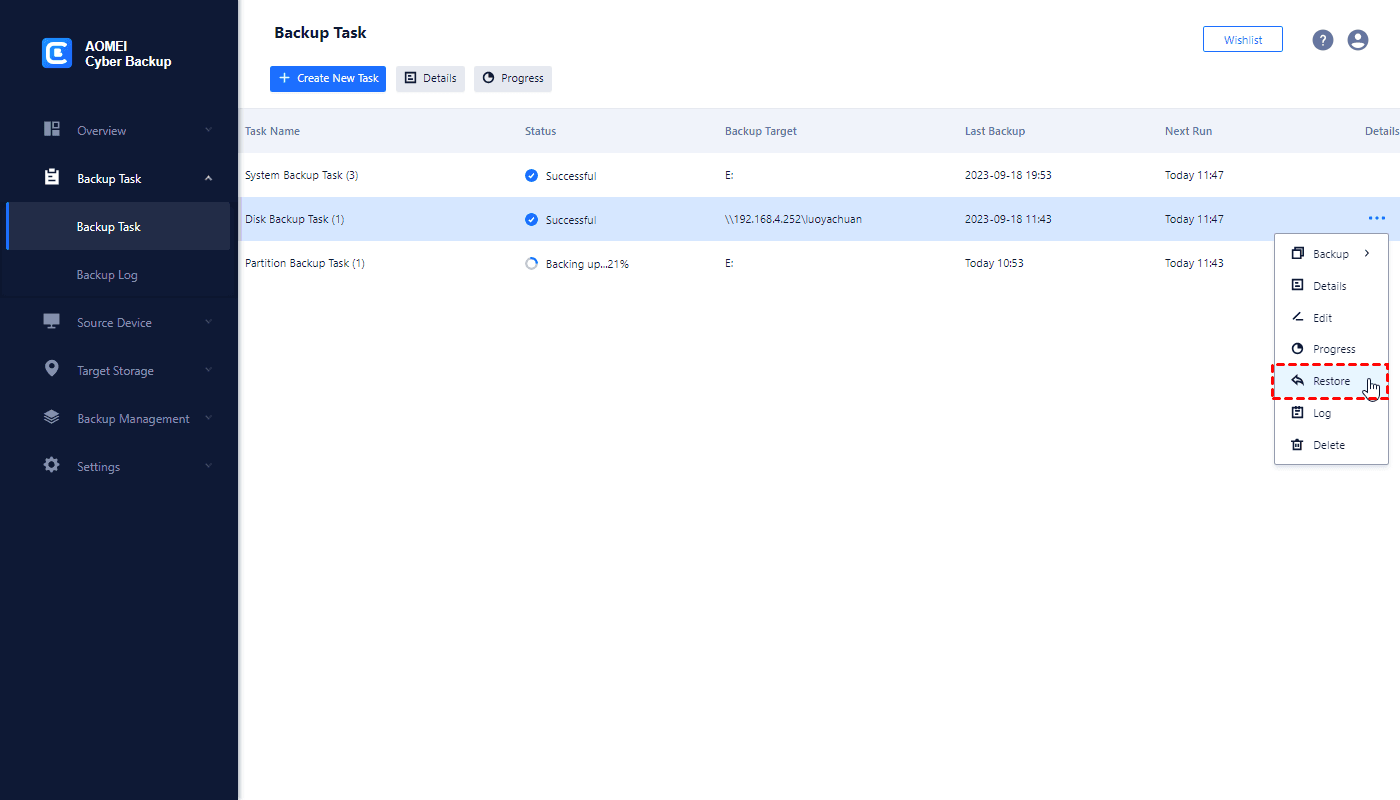
1. Go back to Backup Task and click … >> Restore on the left of the backup task to start setting up the Windows system recovery task.
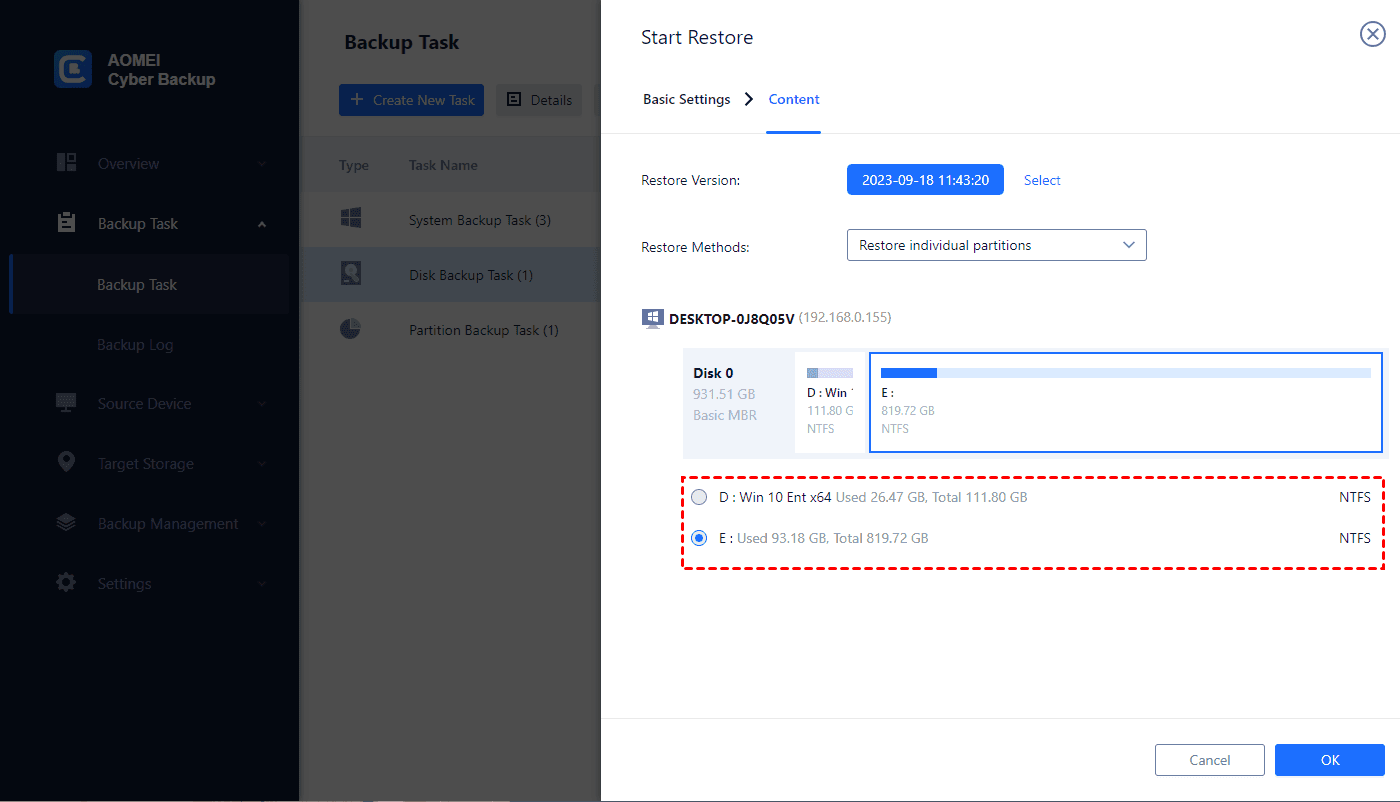
2. Choose the content to restore: In Restore Methods, you can choose to Restore the entire system or Restore individual partitions and click OK.
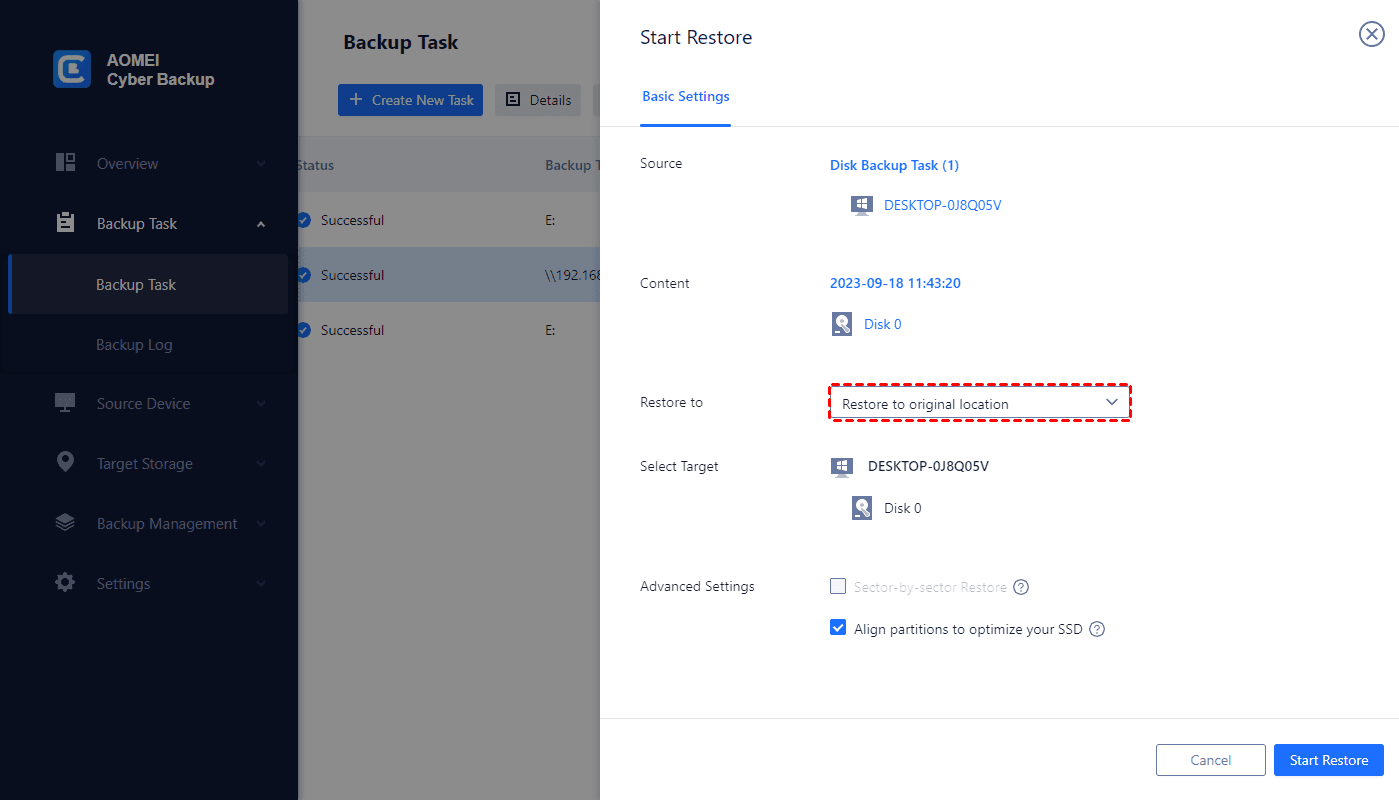
3. Choose location to restore to: Choose Restore to original location, you can easily restore the Windows system backup to its previous state.
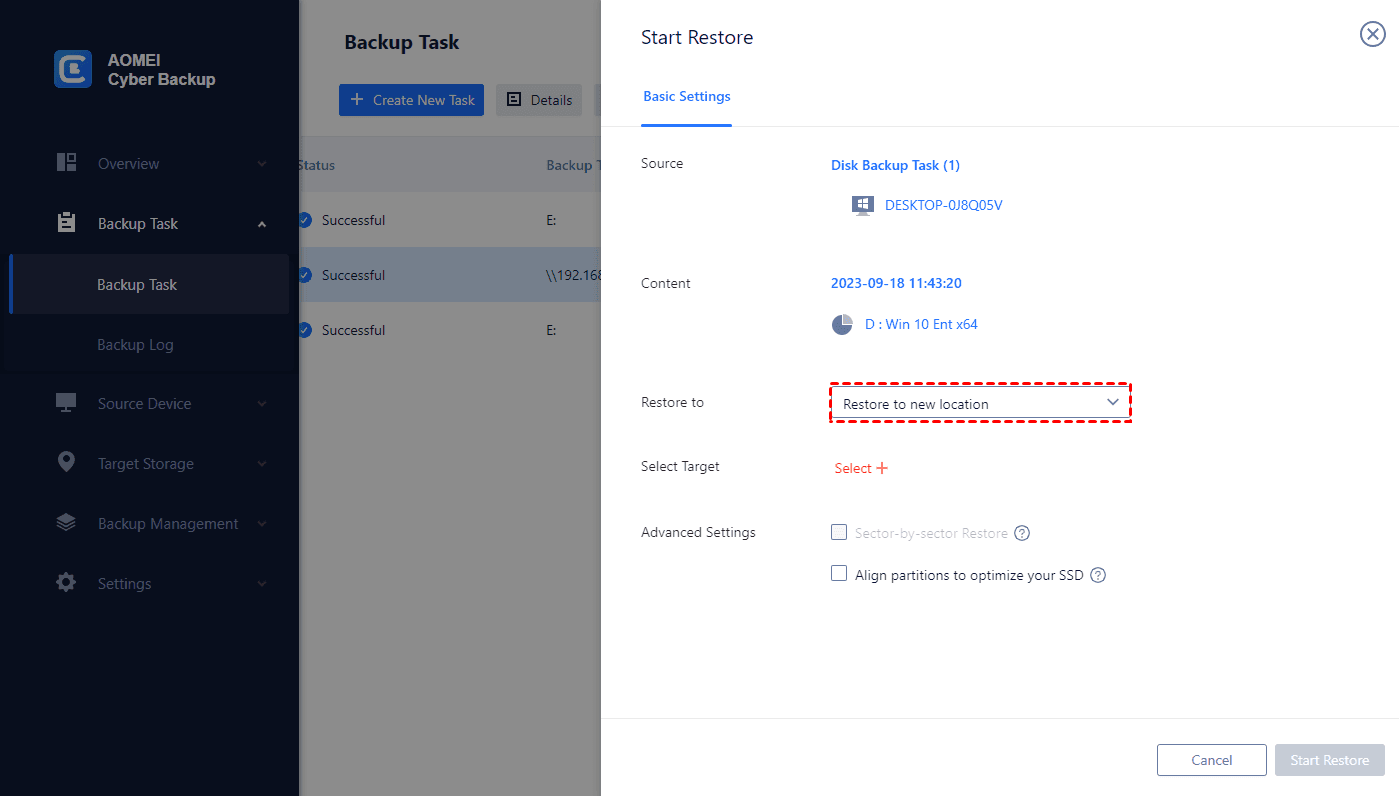
- Restore to new location (For an upgrade): It will create identical new system data from the backup to the same or another server/host.
Conclusion
Creating and using restore points in Windows 11 is a valuable practice for maintaining system stability and recovering from errors or issues. By following the step-by-step guide outlined in this article, you can easily create restore points and utilize them to restore your Windows 11 system to a previous working state. Regularly creating restore points provides a safety net that allows you to undo system changes and recover your system effectively. Ensure the stability and reliability of your Windows 11 computer by harnessing the power of restore points.

