Why Windows Backup Failed to Get an Exclusive Lock
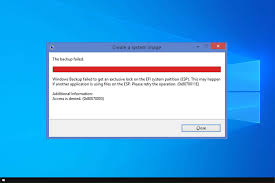
The occurrence of the "Windows Backup Failed to Get an Exclusive Lock" issue can be perplexing, disrupting the otherwise seamless backup process. Understanding the reasons behind this error is crucial for effective troubleshooting. Here, we delve into the key factors contributing to this problem:
- When multiple backup processes run concurrently, conflicts arise as they attempt to access the same files simultaneously. This conflict prevents the exclusive lock necessary for a successful backup.
- VSS plays a crucial role in backup operations. Conflicts within the VSS service can impede the acquisition of an exclusive lock during the backup process.
- Event Viewer logs, specifically Event ID 521 and Event ID 20, provide insights into the exclusive lock problem. Decoding these messages is crucial for identifying the root cause.
How to Fix Backup Failed to Get an Exclusive Lock
Fixing the "Backup Failed to Get an Exclusive Lock" issue is crucial for ensuring a seamless and error-free backup process on Windows. This problem often arises due to conflicts and technical issues, but fear not – here's a step-by-step guide to help you resolve this issue and get your backups back on track.
1. Analyzing Concurrent Backup Processes
Simultaneous backup processes can interfere with each other, leading to the exclusive lock problem. This conflict occurs when two or more backup jobs try to access the same files simultaneously.
Solution: Adjusting Backup Schedules
1. Access Backup Settings:
Open the Windows Backup settings on your system.
2. Adjust Schedules:
Ensure that backup schedules do not overlap.
Set staggered backup times for different jobs to avoid conflicts.
3. Monitor and Test:
Regularly monitor backup logs to check for any overlapping schedules.
Test the adjusted schedules to confirm conflict resolution.
2. Resolving VSS (Volume Shadow Copy Service) Conflicts
VSS conflicts can disrupt the process of acquiring an exclusive lock during backup. This often happens when the VSS service encounters errors or faces interruptions.
Solution: Restarting the VSS Service
1. Open Command Prompt:
Run Command Prompt as an administrator.
2. Stop VSS Service:
Type net stop vss and press Enter.
3. Restart VSS Service:
Type net start vss and press Enter.
4. Verify the Status of VSS Writers:
Use the command vssadmin list writers to check for errors.
Resolve any identified issues with specific VSS writers.
3. Decoding Event Viewer Error Messages
Event Viewer logs, such as Event ID 521 and Event ID 20, provide insights into the exclusive lock problem. Decoding these messages can pinpoint the root cause of the backup failure.
Solution: Proactive Measures
1. Decode Event Viewer Logs:
Investigate Event Viewer for error messages related to exclusive lock issues.
Understand the context and details provided in the logs.
2. Resolve Specific Error Messages:
Address issues highlighted in the logs with targeted solutions.
Use online resources or support forums for assistance if needed.
3. Proactive Monitoring:
Regularly check Event Viewer for early detection of potential issues.
Implement preventive measures based on identified patterns.
By following these comprehensive solutions, you can troubleshoot and fix the "Backup Failed to Get an Exclusive Lock" problem on your Windows system, ensuring a smooth and reliable backup process.
Alternative: Backup Your Windows with AOMEI Cyber Backup
AOMEI Cyber Backup offers complete system image backups, minimizing the risk of data loss and system failures. The reliable tool simplifies the backup process by scheduling system image backups and automating data protection.
💡 Discover the capabilities of AOMEI Cyber Backup:
✻ Flexible Scheduling: set daily/weekly/monthly backup to back up any changes regularly.
✻ Various Backups: schedule full or incremental backups of your system to guard against data loss.
✻ Quick Recovery: entire system or specific data to original or new computer quickly.
✻ Comprehensive Compatibility: compatible with various Windows operating systems such as Windows Server and Windows 11, 10, 8, 7.
You can download and install the system image backup software -AOMEI Cyber Backup from the button below:
✢ First, you need to install the AOMEI Cyber Backup Agent on your target device and connect to AOMEI Cyber Backup Management Server.
1. Navigate to "Backup" tab after opening this software, then choose "Create New Task" > "System Backup".
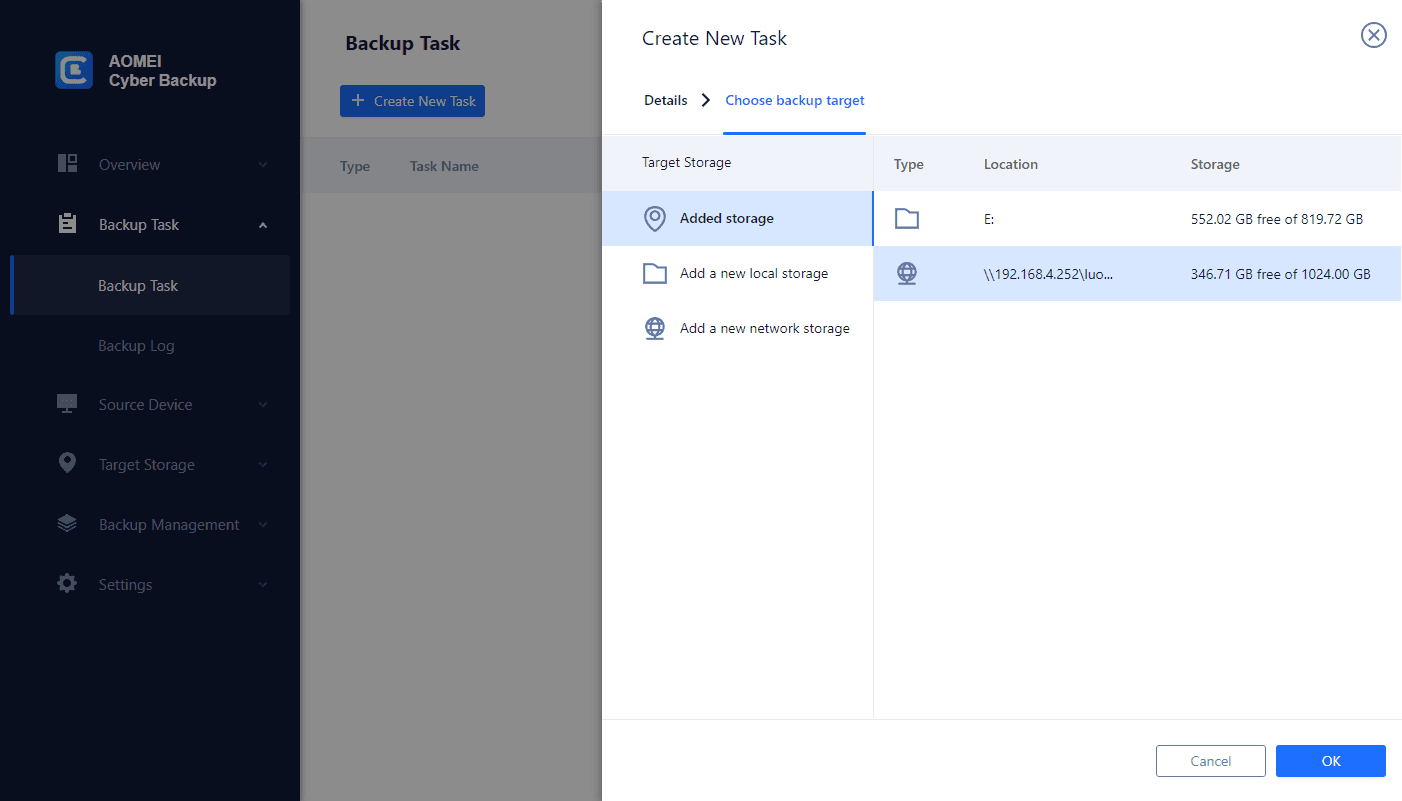
2. Select a system you want to back up. Then choose a destination to save the backup.
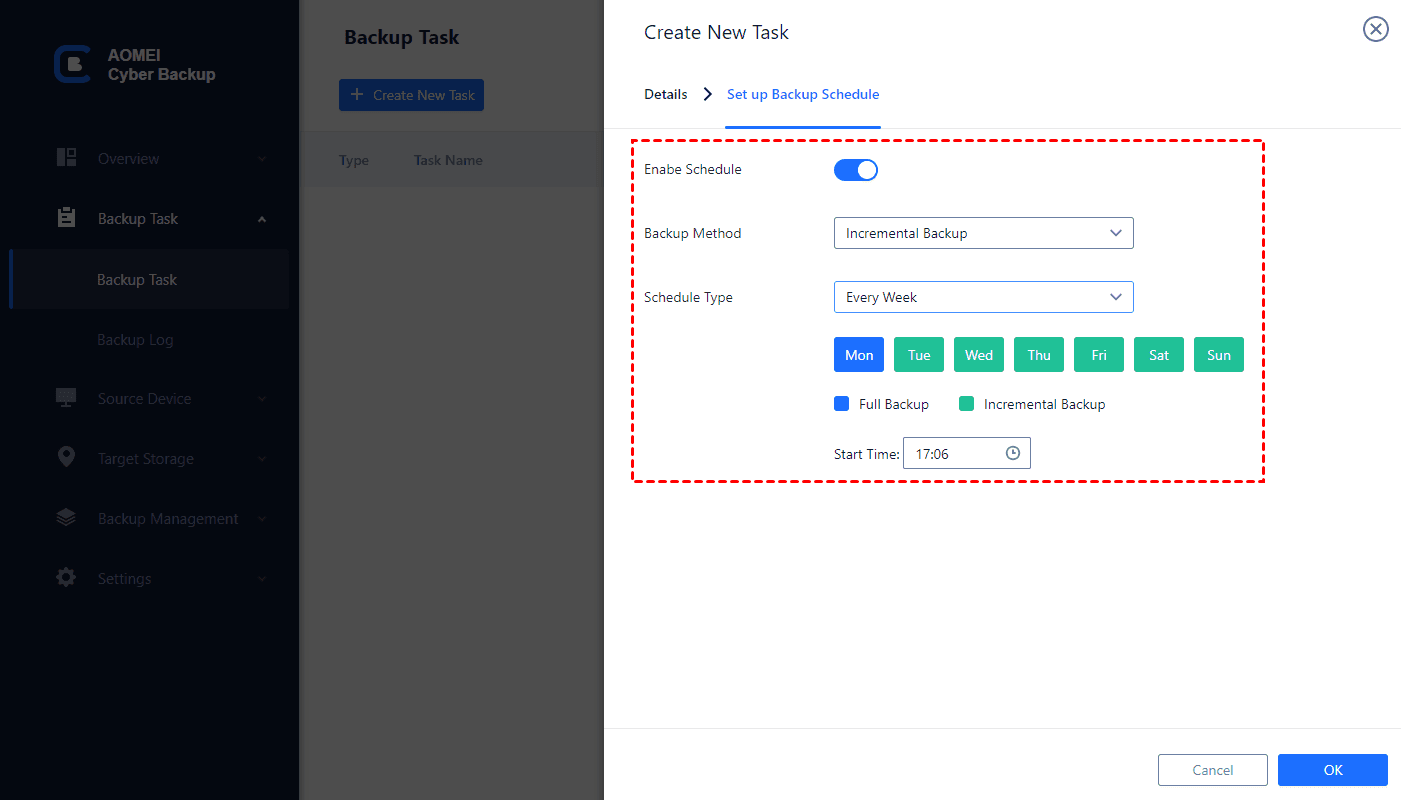
4. Schedule backup method as full / incremental / differential backup and run the backup tasks at daily / weekly / monthly.
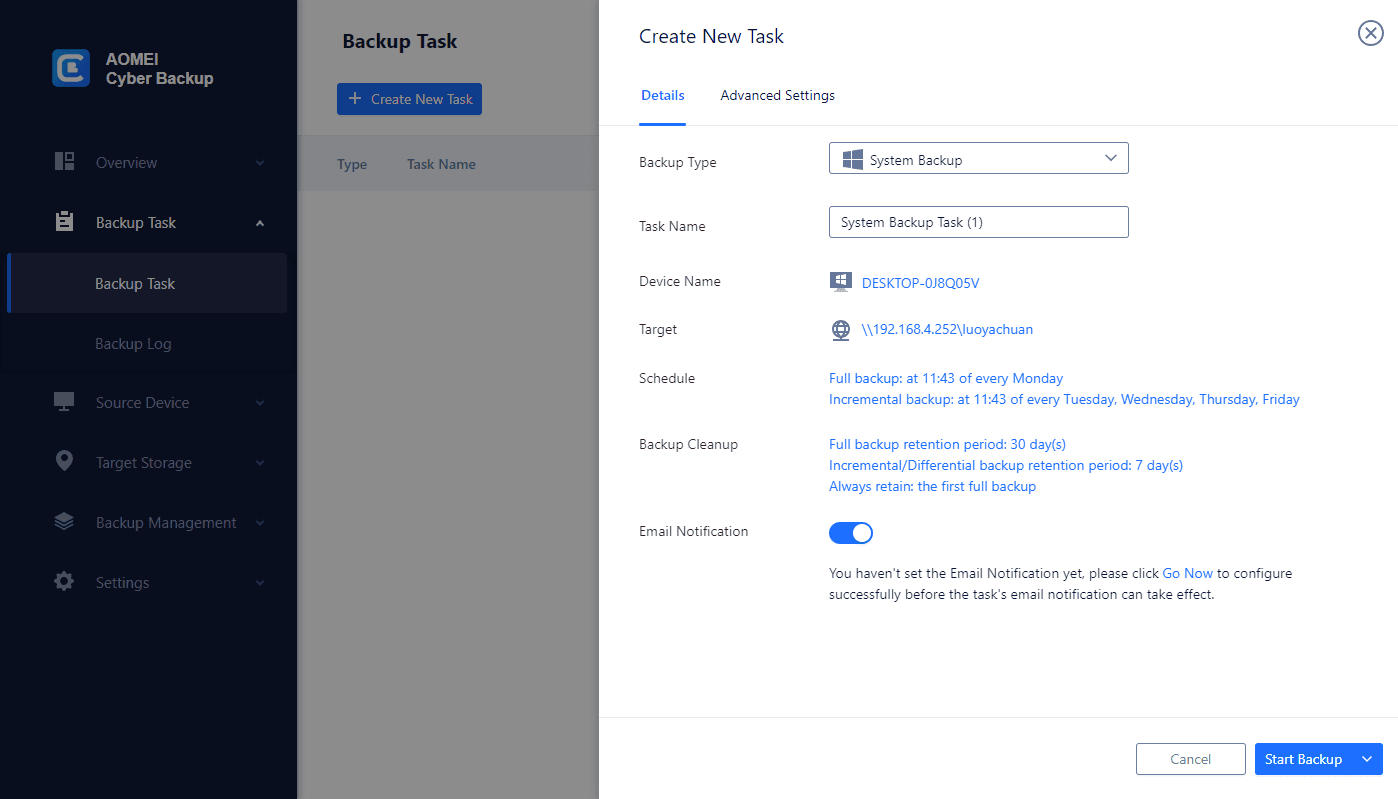
5. Configure retention policy to auto delete the old backup files and save storage space.
6. Click Start Backup to protect your system.
Conclusion
Understanding why Windows Backup failed to get an exclusive lock involves addressing simultaneous backup conflicts, resolving VSS service issues, and proactively interpreting Event Viewer logs. By following these solutions, users can overcome this challenge and ensure a smoother and more reliable Windows backup experience.


