[2 Ways] How to Backup iPhone to QNAP NAS
QNAP NAS provides you with a large number of storage space so that you can backup iPhone to QNAP. Follow this guide and backup iPhone to NAS in 2 ways.
By Demi / Updated on April 18, 2024
iPhone backup with QNAP NAS
I want to backup my iPhone and iPad to my Qnap NAS because my laptop has only limited storage. What’s the best and easiest way to backup everything (photos, videos, contacts, etc) to my Qnap NAS instead of my laptop’s internal storage.
- Question from QNAP NAS Community
Can you backup iPhone to QNAP NAS?
Since iPhone contains more and more private data related to you, to keep it safer, you may intend to backup your iPhone to your own server instead of iCloud or iTunes, and QNAP NAS can be one of nice tries for you.

You may know that QNAP NAS can be fully compatible with your iOS devices, like iPhone and iPad. However, how can you backup iPhone to QNAP NAS? Please keep reading this guide with the question, you will get detailed instructions about how to backup iPhone to QNAP NAS in two steps.
Preparation: Map QNAP network drive on Windows PC
To backup iPhone to NAS, you may need to map the shared folder on QNAP to be the network drives of your Windows PC first. Then, you can backup iPhone to QNAP NAS with third-party apps mentioned in the following guide.
The NAS shared folder can not only act as your backup solution, but also allow you to easily access and manage files from your Windows PC. Now, follow the steps below to map the network drive on Windows PC.
Step 1. Power on the NAS > Connect the NAS to your local area network > Download and install Qfinder Pro on your Windows PC.
Step 2. Launch Qfinder Pro > Select your NAS > Then, go to Tools > Map Network Drive.

Step 3. Select a shared folder > Click Map Network Drive > Specify your QTS username, password, and drive letter one after another > Click Finish to complete the task.

Now, it’s time to backup iPhone to QNAP. QNAP offers you official apps to backup iPhone photos to QNAP. To backup more types of iPhone files, you can try iOS backup tool recommended in the Way 2. Choose either tool in this guide to effortlessly backup iPhone to QNAP.
Way 1. Backup iPhone to QNAP NAS by Qfile (Photos Only)
QNAP offers you a number of iOS apps for NAS management, like Qfile app, Qphoto app, which allows you to easily backup photos from iPhone to your NAS. Here just for an example, we'll show you how to utilize the Qfile app to backup iPhone photos to QNAP NAS.
Step 1. Download and install the Qfile app on your iPhone > Login Qfile with your NAS username and password.
Step 2. Select the folder you want to upload files to > Tap the three-dot iocn on the upper-right corner > Tap Upload.

Step 3. You will be given four options, including Camera Roll, Camera, Downloads and Others > You can choose one option to select photos to upload them to QNAP.
Warm tip: You are also able to auto upload items from the Gallery or selected folders using Qfile. Just tap the three horizontal lines in the upper-left corner of Qfile > Choose Auto Upload Settings. Then, choose a way to auto upload photos depending on your needs.
Way 2. Backup more from iPhone to QNAP NAS via FoneTool
Your iPhone may consist of more important files than photos that you don’t want to lose. Therefore, it’s more suggested to backup iPhone to QNAP with FoneTool, which can be seen as one of the most powerful and best QNAP backup apps for iOS devices.
Overview of the features and advantages of FoneTool
✓ Backup more iPhone items. It allows you to preview and backup selective files to NAS. For example, you can backup contacts, photos, music, videos, messages, and contacts in an incremental way.
✓ Fast backup speed. With a stable USB connection between iPhone and computer, you can backup your iPhone at a superfast speed.
✓ Multiple backup destinations. Besides QNAP NAS, you can also backup iPhone to a local folder on Windows PC, an external hard drive, or any other USB.
✓ Wide compatibility. FoneTool supports iPhones from iPhone 4 to iPhone 15, iPad (including the latest iPad 2024), and iPod Touch. It works well with different versions of iOS as well.
Please free download FoneTool to your Windows PC, and follow the simple steps below to backup iPhone to QNAP NAS.
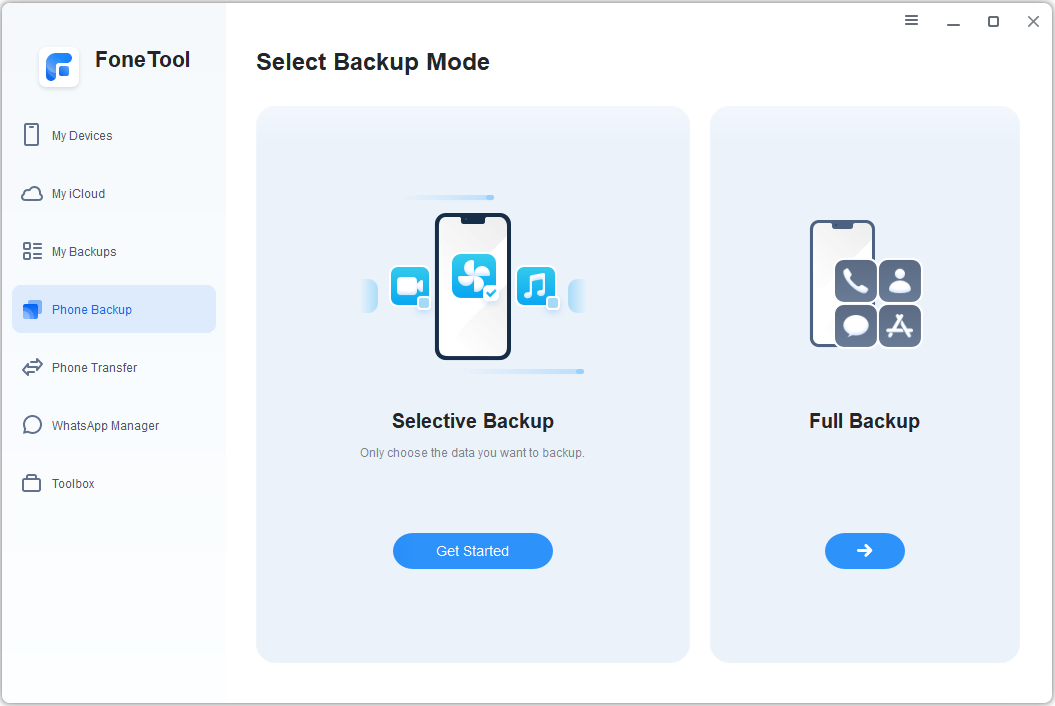
Step 1. Connect your iPhone to computer with USB > Launch FoneTool and click Phone Backup on its homepage. Go to Selective Backup and click Get Started.
Step 2. Click each icon to preview and select the wanted files you’d like to backup > Click OK to confirm.

Step 3. Click the storage path and change it to the position of your QNAP NAS > Click Start Backup to complete the task.

☛ If you want to manage or browse the backup file, just go to Backup History to make it. The backup file can also be restored to your previous iPhone or any other iOS device.
☛ Does Selective Backup still not enough for you? The other backup function - Full Backup in FoneTool will create a full iPhone backup for you.
Conclusion
That’s all for how to backup iPhone to QNAP NAS. Now, you don’t need to worry about the limited backup storage anymore. If this guide helps you, please share it with others.
