How to Download iPhone Photos to Windows 10/11 [Full Guide]
How do you download iPhone photos to Windows PC? Fortunately, this post will provide you with 5 effective methods to transfer photos from iPhone to a computer.
By May / Updated on July 12, 2023
Why Need to Download iPhone Photos to Windows 10/11?
In today’s digital age, capturing precious moments through photos has become an integral part of our lives. It’s common to have a large collection of photos stored on your iPhone. Why need to download iPhone photos to Windows 10/11? Some common reasons are listed below:
Free Up Storage Space: Transferring photos to a Windows PC frees up space on your iPhone so you can capture more memories without worrying about limited storage space.
Editing and Organization: By downloading your iPhone photos to Windows 10/11, you can easily edit them with powerful software that gives you better creative control over your photos.
Backup and Data Security: You can create backup copies of your iPhone photos by downloading them to your PC, ensuring that your photos are stored safely on your PC even if something happens to your iPhone.
How to Download iPhone Photos to Windows in Simple Ways
Now that you know why you need to move photos from iPhone to PC, how do you download iPhone photos to computer? Don’t worry! Here are 5 methods below, and you can choose one of them according to your needs.
Method 1: Download iPhone Photos to Windows 10/11 – Safe Way
When you need to download iPhone Photos to a Windows PC, one of the simplest ways is to use a safe and professional iPhone management tool. It’s highly recommended to use FoneTool in this case. With FoneTool, you can backup, transfer, and manage your iPhone on Windows at super-fast speed.
Highlights of Using FoneTool to Download iPhone Photos to Windows:
Selective Photo Transfer: FoneTool lets you selectively transfer specific photos or entire albums from your iPhone to your Windows PC, saving time and storage space.
High-Quality Transfer: With FoneTool, you can download iPhone photos to your Windows PC without worrying about any loss of resolution or sharpness.
Compatibility and Security: FoneTool is compatible with a wide range of iPhone models and Windows operating systems, ensuring a smooth transfer experience.
How to download iPhone photos to PC? Now click the download button to install FoneTool on your PC and then follow the steps below to transfer your photos from iPhone to PC.
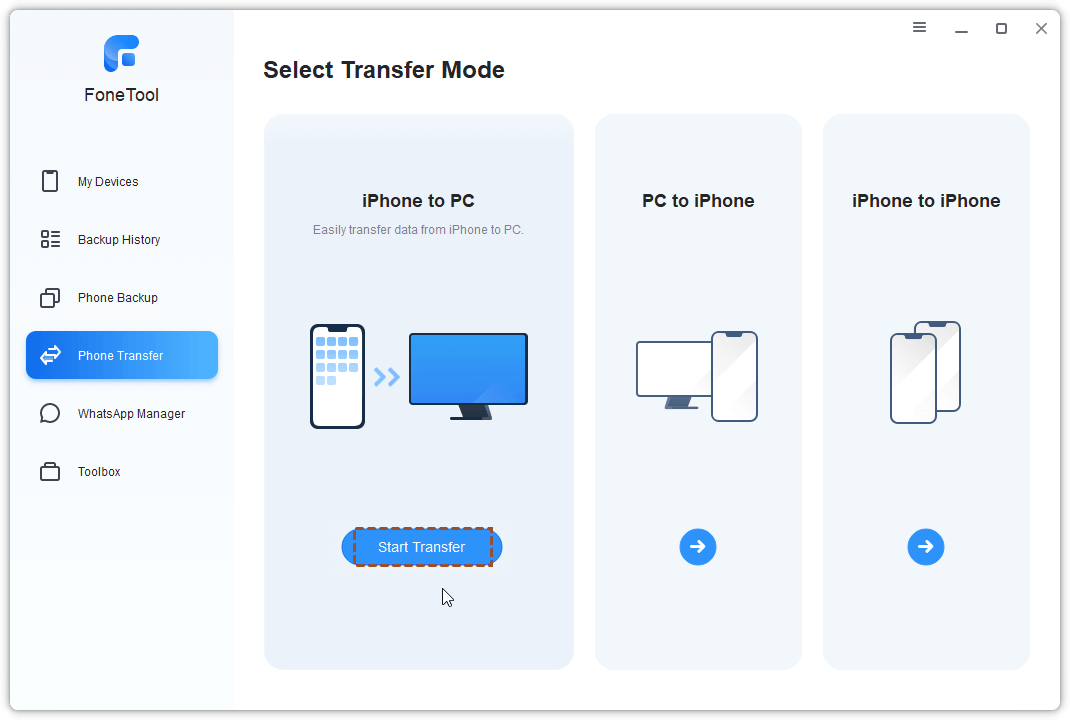
Step 1: Connect your iPhone to your PC using a suitable cable > Run FoneTool > Locate the Phone Transfer option > Choose the iPhone to PC mode > Click Start Transfer to proceed.
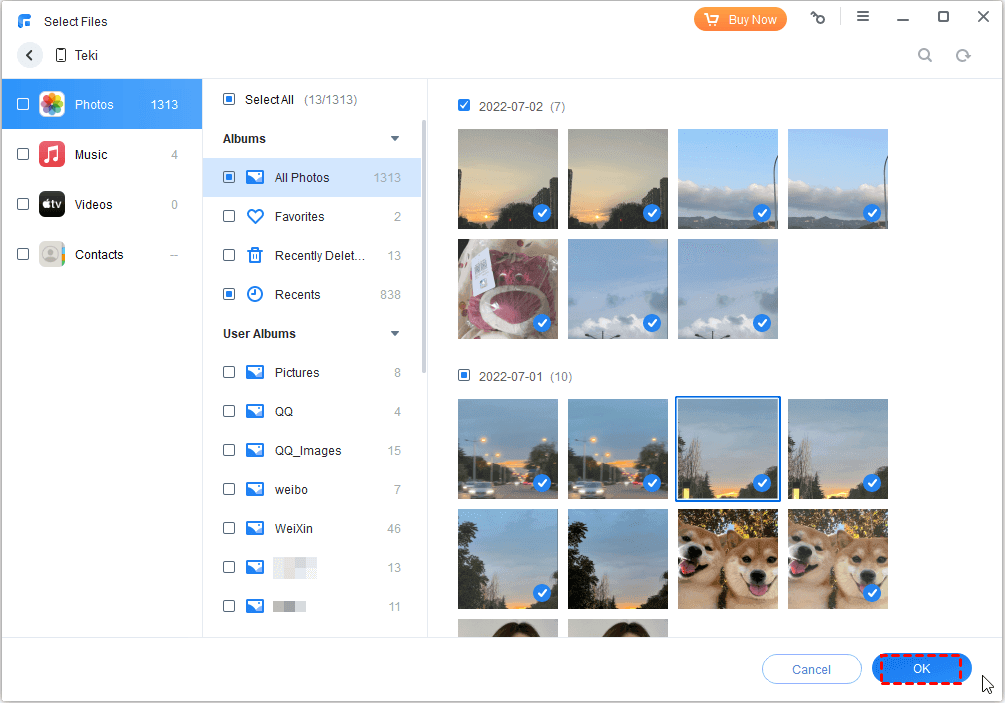
Step 2: Click the “+” icon to select the pictures you wish to transfer > Once you have made your selections, click OK to proceed.
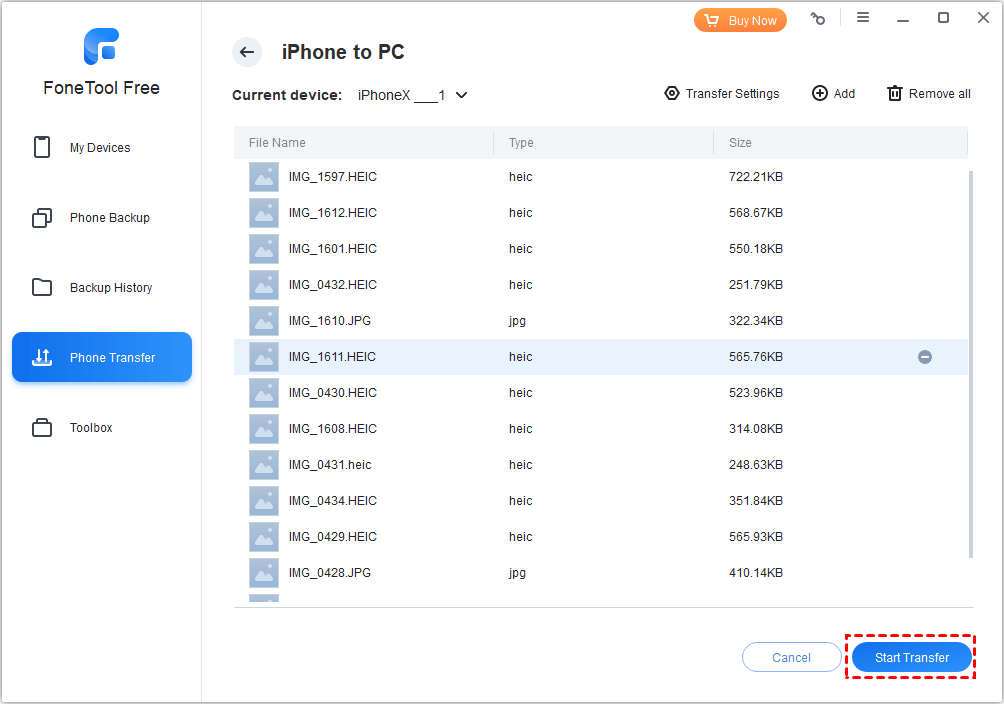
Step 3: Click the Start Transfer button > Select a destination to save the transferred photos > Click Transfer again to start.
- ★Tip:
- If you have many duplicate photos, FoneTool offers you the Photo Deduplication tool to help you scan and delete them on your Windows PC.
Method 2: Transfer Photos from iPhone to PC with iTunes
The second method to transfer iPhone photos to Windows 11/10 is to use iTunes. You can do this by making a full iPhone backup. Please follow the steps below to do that:
Step 1: Launch iTunes > Connect your iPhone to your computer > Locate and click the phone icon at the top of the iTunes interface.
![]()
Step 2: Navigate to the Summary tab > Under the Backups section, choose This Computer, and then click Back Up Now to initiate the backup process for your iPhone.

- ★Tip:
- By default, iTunes saves the backup file at the following location: C:\Users\Username\AppData\Roaming\Apple Computer\MobileSync\Backup.
Method 3: Download Photos to PC from iPhone via iCloud
If you don’t have a USB cable around, you can also use iCloud to download photos to PC from iPhone. Before that, ensure that your iCloud has enough space and then follow the full guide to do that:
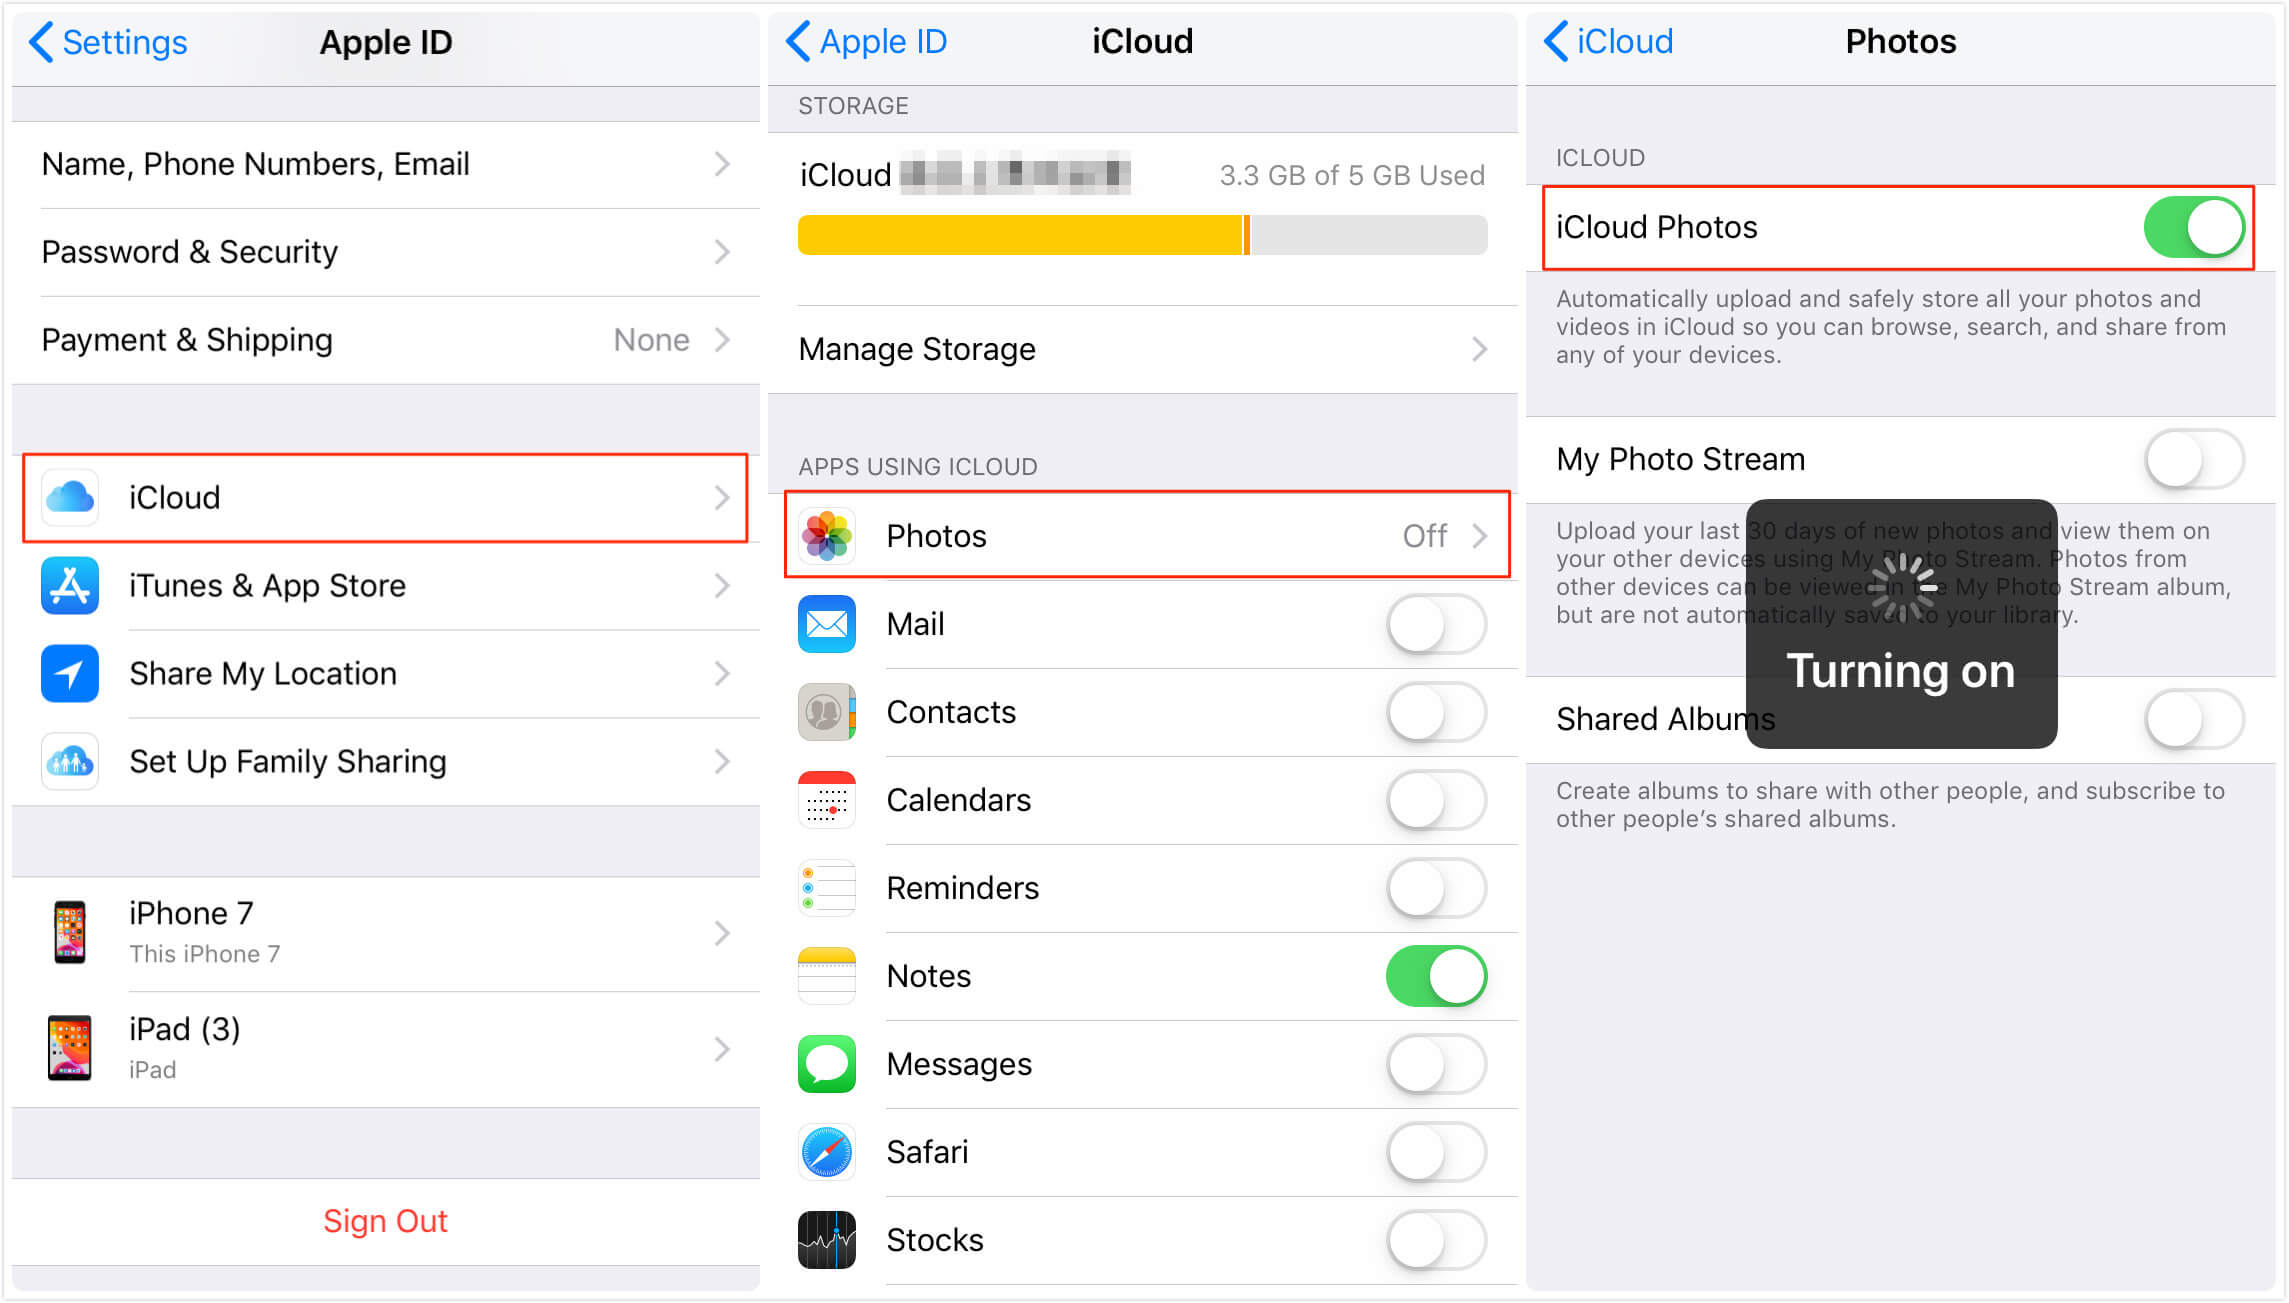
Step 1: Open the Settings app on your iPhone > Tap Apple ID (your name) > iCloud > Photos > Enable iCloud Photos. Then, your photos will be automatically uploaded to your iCloud account.
Step 2: Go to iCloud.com on your PC > Sign in with your Apple account > Click the Photos icon.

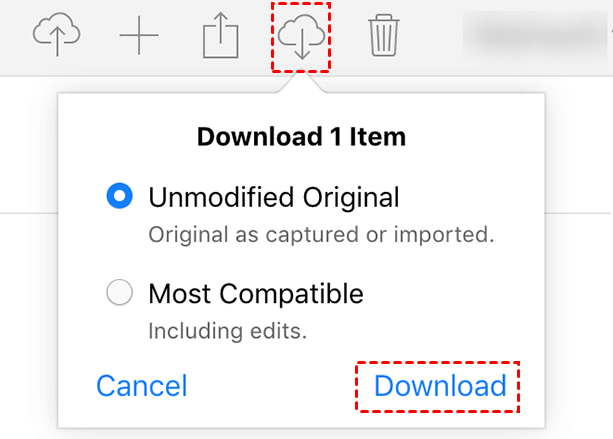
Step 3: Then you can check your iPhone photos that have been uploaded to your iCloud > Choose the desired photos > Click the download icon.
- ★Tip:
- iCloud only offers 5GB of free storage space. If you don’t have enough iCloud storage, you may experience the iPhone backup failed for not enough space in iCloud issue.
A Comparison of the 3 Software to Download iPhone Photos
Both of the three methods above can help you import iPhone photos to Windows 10/11, but you can choose a suitable way as you need. Here is a brief comparison of the three methods:
| Apps | System Supported | Transferring Speed | Transferring Large Files | Network Required |
|---|---|---|---|---|
| FoneTool | Windows 11/10/8/7 | Super-Fast | Yes | No |
| iTunes | Windows/Mac | Medium | No | Yes |
| iCloud | Windows/Mac | Slow | No | Yes |
Simply put, if you want to transfer photos from iPhone to PC quickly without worrying about network issues, the best way is to use FoneTool to import iPhone photos to Windows 10/11.
The Bottom Line
That’s all about how to download iPhone photos to Windows 10/11 in simple ways. If you don’t have a USB cable around, you can use iCloud to wirelessly transfer your iPhone photos to a PC without the need for a physical connection. However, it is important to note that iCloud relies on a stable network connection, so you may easily experience the iCloud backup stuck issue.
Therefore, for users who have a USB cable, FoneTool proves to be a convenient option to easily transfer iPhone photos to Windows PC. Try it out!
