[Detailed Steps] How to Share iCloud Storage with Family
Apple provides you with iCloud to help you sync and backup files. Now, you can share the iCloud storage with family members or friends. Here in this guide, you will know how to share iCloud storage with your family on iPhone or iPad.
By Demi / Updated on December 5, 2023
Once you registered a new Apple ID, you will be offered 5GB of free iCloud storage, but that will run out in a very short time. Luckily, since iOS 11, you are able to share iCloud storage with your elder parents or younger children to keep every family member from paying for extra iCloud storage.
Keep reading this guide, you will know how to share iCloud storage with family. If needed, an iCloud alternative for iPhone is also available for you and your family to sync and backup files.
How to share iCloud storage with family on iPhone/iPad
As part of Apple’s Family Sharing function, you can share your iCloud storage with your family members or friends. And in the very beginning, there are some preparations and tips you need to be aware of.
• You can only share an iCloud storage plan with a capacity of 200 GB or greater. If you are currently on the 50GB plan, you will be instructed to upgrade first.
• If you are worried about your privacy after joining a Family Sharing iCloud storage plan, you can rest assured because everyone in the family group uses their own account and all your data stay private.
How to set up Family Sharing
If you want to share iCloud sharing with family, you need to make sure you have enabled Family Sharing. If you have, then move on. If not, follow the steps below to set up Family Sharing first. Family members who you want to share iCloud storage with need to set up Family Sharing as well.
Step 1. On your iOS devices, go to the Settings app > Tap your profile > Family Sharing > Tap Setup Your Family and follow the onscreen instruction.
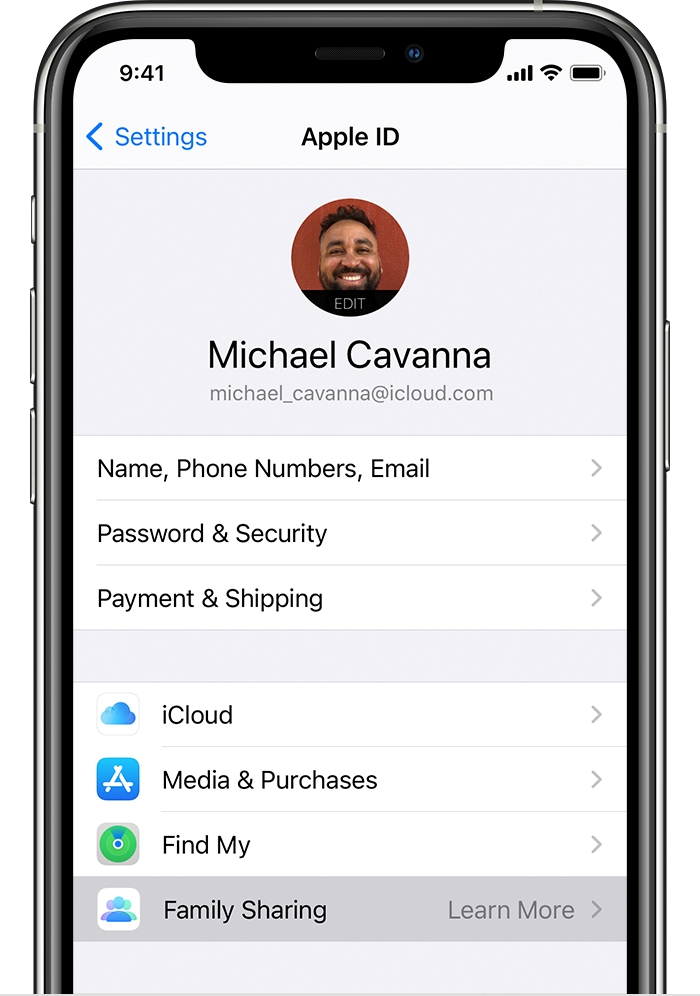
Step 2. To invite your family member, back to Family Sharing > Add Member > Enter the email address of your family member.
How to add a family member to a shared iCloud storage plan
It's simple and easy to add a family member to your shared iCloud Storage plan. If your family members are on Apple’s free 5GB plan, they’ll be added to your storage automatically. You can also manually add your family member by following the steps below.
Step 1. Go to the Settings app on the iDevice of the iCloud family organizer > Tap [your name] > Choose Family Sharing.
Step 2. Choose iCloud Storage > Tap Let Your Family Know.

Step 3. Tap the Send button to send the invitation to your family member so that you can share and distribute iCloud storage with only one family member > Tap Close.

How to accept an invitation to join a shared iCloud storage plan
You can accept or refuse an invitation to share an iCloud storage plan with a family member when you get it with the steps below.
On the family members’ iOS devices, open Messages > Tap iCloud invitation in the message > Tap Accept to join the iCloud storage Family Sharing plan.

Bonus: Free download iCloud alternative for iPhone/iPad
It seems cost-effective to spend $2.99 per month buying 200GB of iCloud storage and share with your family. However, what if 200GB of iCloud storage space is still not enough for your family? Will you spend extra dollars for more space?
It is highly recommended you one of the best iCloud alternatives - FoneTool to backup iOS devices without storage space limitations. Its incremental backup helps keep backup files of yours and your family's separate.
Compared with iCloud, FoneTool has got:
✔ Optional and unlimited backup storage space. It seems that you have got unlimited backup storage space because FoneTool allows you to backup iPhone to Synology and any other NAS, external hard drives, and so on.
✔ Two types of backup services. You can backup everything using FoneTool just like what you used to do via iCloud. You can also choose to backup only wanted files with FoneTool.
✔ Be free to browse and restore backup files. Different from iCloud, you can be free to browse backup files at any time you want. With only a few clicks, you can be free to backup and restore data.
✔ Offline and fast backup process. Without influence from the Internet, it just takes you just 3 seconds to backup 100 photos via USB connection using FoneTool.
You can download the tool to your computer by clicking the icon below and enjoy its fabulous services.
Three steps to backup iPhone/iPad selectively
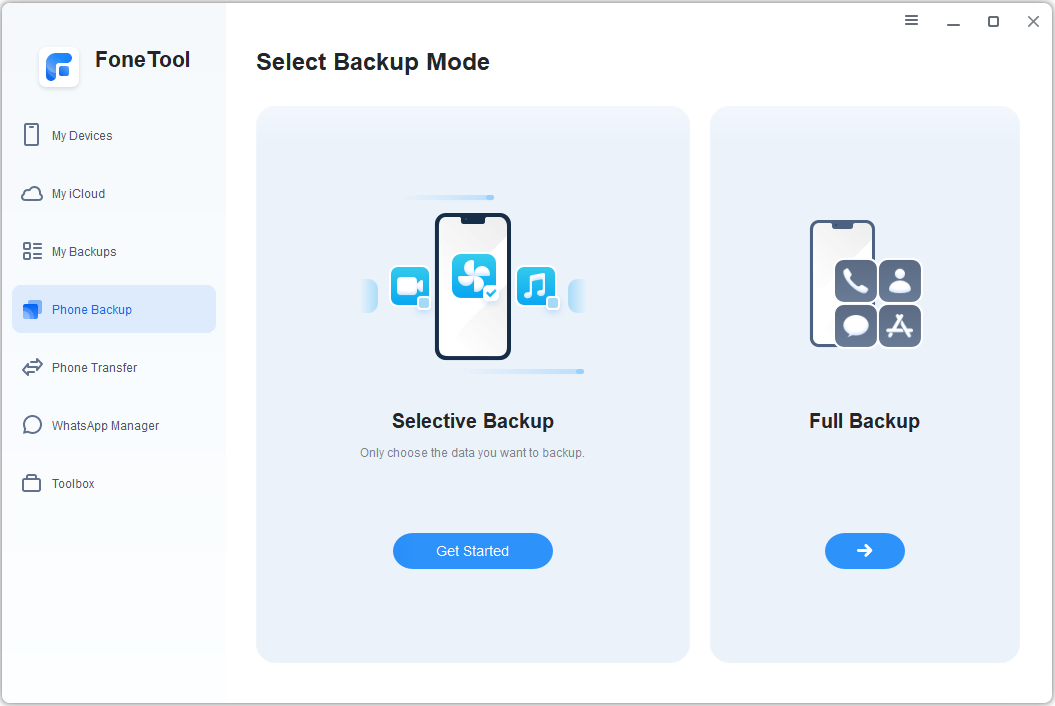
Step 1. Connect your iPhone/iPad to computer with compatible USB > Run FoneTool and click Phone Backup. Locate the Selective Backup. Click Get Started.
Step 2. Click each icon to preview and choose the wanted files you’d like to backup > Click OK to confirm.

Step 3. You can click Backup Storage Path to choose a destination to save your backup files (local folders, USB, NAS, etc.) > Click Start Backup to begin the task.

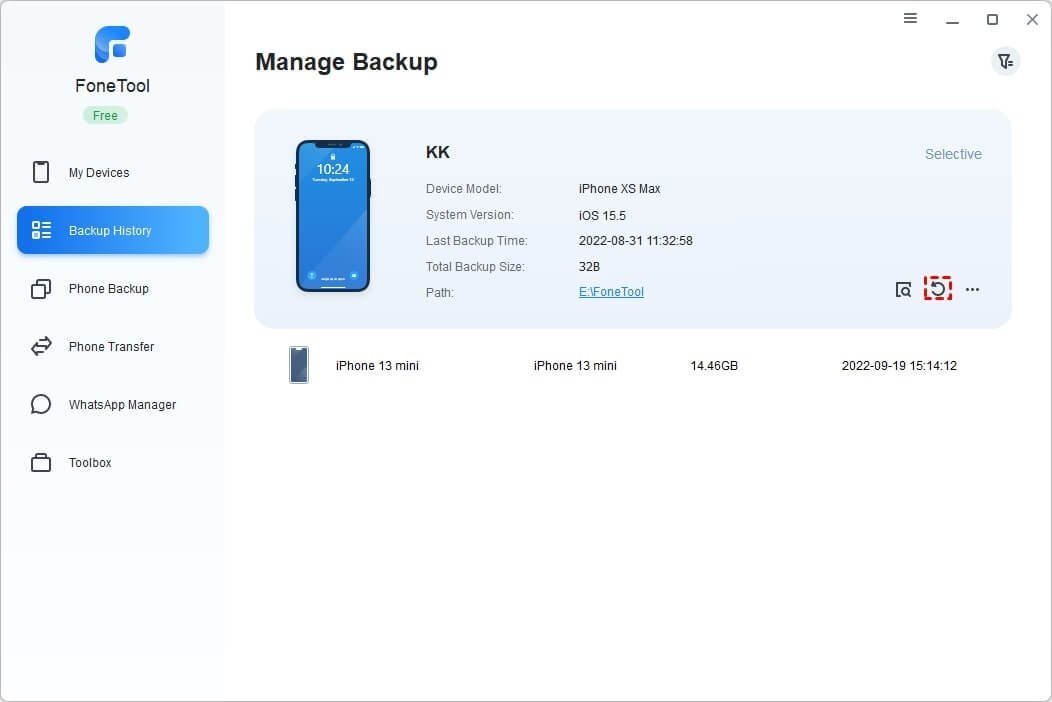
When the backup completes, you can go to the Backup History page to browse, restore, or delete the backup files.
FoneTool is also a powerful transfer tool for iOS devices. iCloud can only let you sync all data among devices signed with the same Apple ID. While with the help of FoneTool, you can transfer data from iPhone to iPhone with different Apple IDs with no effort.
Besides, you can also rely on FoneTool to manage your iCloud data, including selectively uploading files to iCloud, downloading files from iCloud, and delete files from iCloud.
Conclusion
Hope you have a clear idea about how to share iCloud storage with family after reading this guide. If you are just looking for an iCloud alternative, you can try FoneTool to better manage data on your iOS devices.
