Transfer Photos from PC to iPad Without iTunes 2024
Need to transfer photos to iPad from PC but there is no iTunes on your computer? 5 workable ways of how to transfer photos from PC to iPad without iTunes are listed in this post.
By Kathy / Updated on March 26, 2024
Can You Transfer Files from PC to iPad Without iTunes?
iTunes, is mainly used to manage photos, music, videos, etc. for Mac, PC, iPad, and iPhone. It can be an acceptable solution when you need to exchange photos between your PC and your iPad. However, what if your computer doesn't install iTunes or encounters iTunes errors during the process? Calm down!
![]()
This post illustrates 5 ways of how to transfer photos from PC to iPad without iTunes for free in detail. Keep reading and you can pick up the one that you need.
Method 1. Best and Free Way to Send PC Photos to iPad without iTunes
If you need to transfer a large number of photos/videos from PC to iPad, FoneTool might be the most ideal offline way. It doesn't need to connect to a Wi-Fi network or consume any cellular data. It is picked up out of various features and advantages.
- Why do you choose FoneTool?
 High transfer speed allows you to transfer 1000+ full-resolution photos within minutes.
- There is no data erasing or leakage during the whole transfer process.
- Various image formats are supported including jpg, png, gif, heic, bmp, jpeg, etc.
- Complete USB connections ensure the transfer process is stable and efficient.
- All iPhone/iPad models can be recognized even the latest ones.
Download the freeware and see how to transfer pictures from PC to iPad without iTunes using FoneTool.
Step 1. Open the FoneTool, and click the Phone Transfer on the interface, put the mouse on the icon under PC to iPhone, and click Get Started.

Step 2. Click the Photos icon > Drag all photos you want to transfer to the box.

Step 3. Confirm the photos and click Start Transfer to begin the task.

Method 2. Import Pictures to iPad/iPhone with Windows Explorer
If you don't want a third-party tool, Windows File Explorer also offers a convenient way for users to add images on PC to iPad.
Step 1. Connect your iPad to your PC using a USB cable > Unlock your iPhone and grant permission to Trust this computer if prompted.
Step 2. Go to your PC, Choose Internal Storage > Find the folder or create a new one to save the photos > Select the photos you need to move to iPad > Copy and paste them into the designated folder on your device.
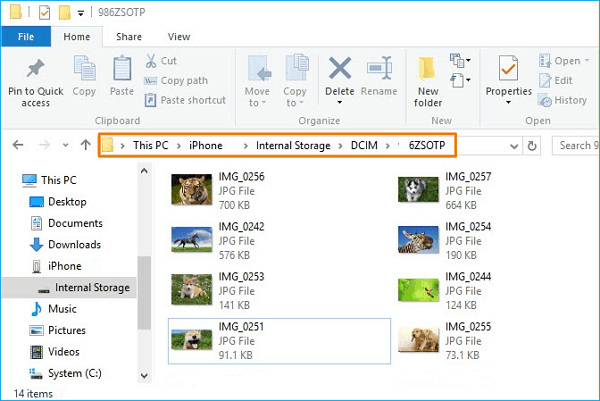
Step 3. Once the process is complete, you can view and access the targeted photos in the Photos app on your iPad.
Method 3. Copy Photos from PC to iPad Wirelessly
If you don't have a USB cable at the moment, you can turn to using an email to make it.
Step 1. Open your email program, add the photos you want to copy to iPad as attachments.
Step 2. Send the email to yourself from your computer.
Step 3. Check the email on your iPad and download the attachment to your iPad. Then, you can view the photos on your iPad.

Method 4. Add Photos to iPad from PC with iCloud
Or you can use iCloud to complete photos transfer from PC to iPad wirelessly. What you need to pay attention to is that iCloud offers only 5GB free storage. If your iCloud storage is full, you need to upgrade the storage plan or free up more space. Now see how to finish the process efficiently.
Before the transfer, you need to confirm that iCloud Photos is enabled on your iPad: Go to Settings > [your name] > iCloud > Photos to enable iCloud Photos.
Then you can choose ways to upload photos on PC to iCloud. Here we offers 2 ways for you to make it. If you need to save lots of full-resolution pictures to iCloud, the professional iCloud manager mentioned in Option 2 might be the most efficient tool.
Option 1. Upload Pictures on PC to iCloud via the Official Website
Step 1. On your PC, run a browser and go to iCloud.com and sign with your Apple ID and passcodd.
Step 3. Click Photos, and click Upload photos to choose photos you want to transfer to iPad.

Then, the photos will be synced from PC to iPad when Wi-Fi is connected, and you can check them in the Photos app.
Option 2. Quickly: Save Photos from PC to iCloud with FoneTool
When you need to upload multiple photos on your Windows PC to iCloud, a professional tool like FoneTool is necessary.
1. With the fast transfer speed, you can easily upload, download or delete iCloud/iCloud Drive data from PC.
2. It uses two-factor authentication to protect your iCloud data which is same as the encryption used by Apple. So you don't need to worry about your data security.
Now you can download it on your computer and learn from the steps to efficiently upload photos to iCloud.
Step 1. Launch FoneTool > Go to My iCloud > Log in with your Apple ID > Choose Manage iCloud.

Step 2. Select the photos you need under the Photos option > Click the Upload button from the top of the page to continue.

Step 3. Choose photos you need from the pop-up window > Click Open to confirm your choice and all targeted photos will be uploaded successfully.


Method 5. Transfer Photos from PC to iPad by Google Photos
You can use Google Photos as well, which offers 15GB of free space.
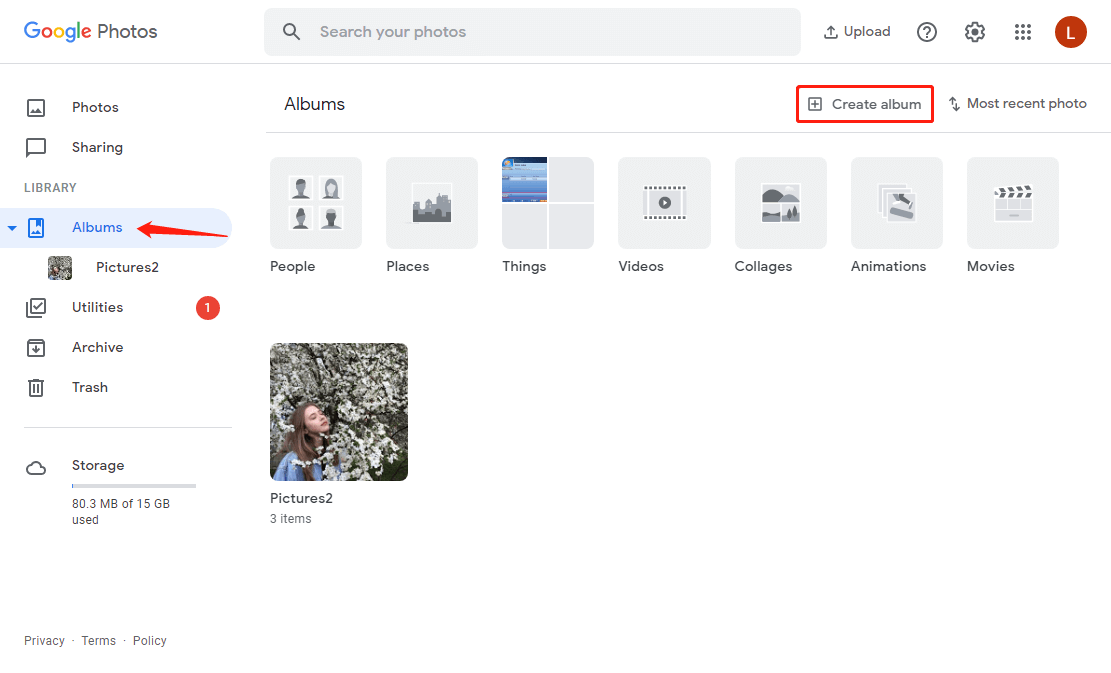
On your PC: Open a Google Photos window > log in to your account > Select Albums > create and name a new album > Tap Add Photos.
On your iPad: Open Google Photos on your iPad (If you don't have this application, you can download it in the Apple Store.), and find the photos to download.
Conclusion
This post illustrates how to transfer photos from PC to iPad without iTunes in 5 ways. With a USB cable to connect the iPad and PC, the best and easiest way is to use FoneTool. With a few photos to send, Windows Explorer and email can be workable solutions. If you want to use cloud service to make it, iCloud and Google Photos also work.
