Top 4 Fixes to iTunes Library Location Keeps Resetting
You may find your iTunes library location keeps resetting after you customize it and launch iTunes again. You can try the four useful methods to get it fixed. You can also try the iTunes alternative mentioned in this guide to avoid the issue.
By Demi / Updated on June 9, 2023
iTunes library location keeps resetting to default
I keep my media files in the iTunes library on my D:\Drive. And set iTunes to use D:\Data Files\iTunes\iTunes Media. When I quit iTunes and restart iTunes, it’s set back to the default on my Boot Drive. This never happened before and I have been using iTunes for years. What’s wrong?
- Question from Apple Community
It is acknowledged to all that to make sure your computer can work smoothly as long as possible, you’d better not save too much on drive C on your computer. Therefore, you may want to switch your iTunes library from drive C to drive D.
However, when you restart iTunes, the iTunes library has set back to the default location and the iTunes library location may keep resetting no matter how you set up it. Here comes this guide to help you out.
Part 1. 4 solutions to iTunes library location keep resetting
If you’re in the same situation, try the four simple solutions to get it fixed. If needed, you can also head to Part 2 to share media files between iDevices and computer without iTunes but via professional transfer software.
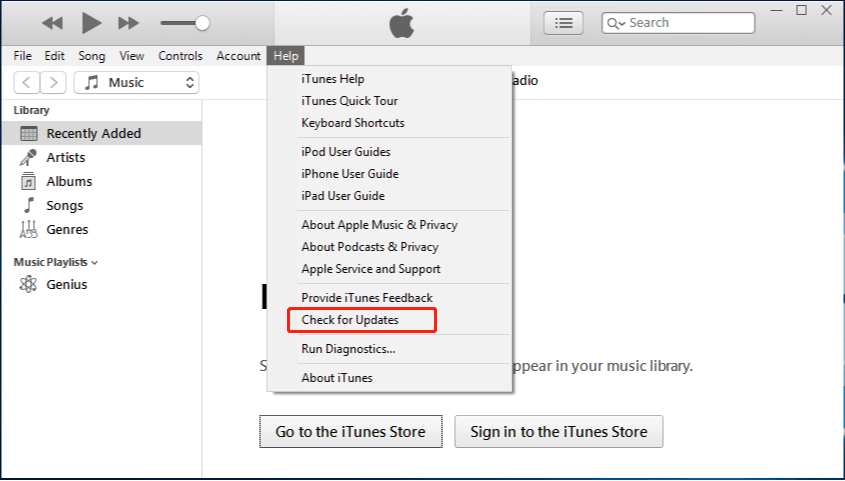
Tip 1. Update iTunes to the latest version
An outdated iTunes always contains kinds of bugs and unexpected errors, which may include the one that leads to iTunes keeping resetting library location. Therefore, it is suggested to check for iTunes updates first whenever you encounter an iTunes issue.
Just launch iTunes on your computer > Click Help from the menu bar at the top of its main interface > Click Check for Updates. If there is an update available, follow the onscreen instruction to update iTunes to the latest version to check whether the issue gets fixed.
Tip 2. Manually split iTunes library
To avoid iTunes library keeps resetting location, you can manually split iTunes library, which is one in which the active library file is kept in one place, usually the iTunes default folder while the content is kept somewhere else like an external hard drive. The detailed steps are as follows.
Step 1. Close iTunes > Press the Shift key while restarting iTunes > Keep holding the Shift key until a dialog box appears asking you to choose or create a library.

Step 2. Click Choose Library > Finally, follow the instruction to migrate iTunes library to somewhere you like.
Tip 3. Reset iTunes preferences
Chances are that an iTunes preference file corruption is causing a reset of the iTunes library location settings, you can try to reset iTunes preferences and change the default iTunes library location.
Step 1. Open a windows explorer and go to the users\username\Library?Preferences > Locate the iTunes preferences file which is named com. apple. iTunes. plist > Remove it from the preferences folder.
Step 2. Launch iTunes on your computer > Click Edit > Preferences > Select Advanced.
Step 3. Click Change next to the box to browse and choose a location to save your iTunes library.
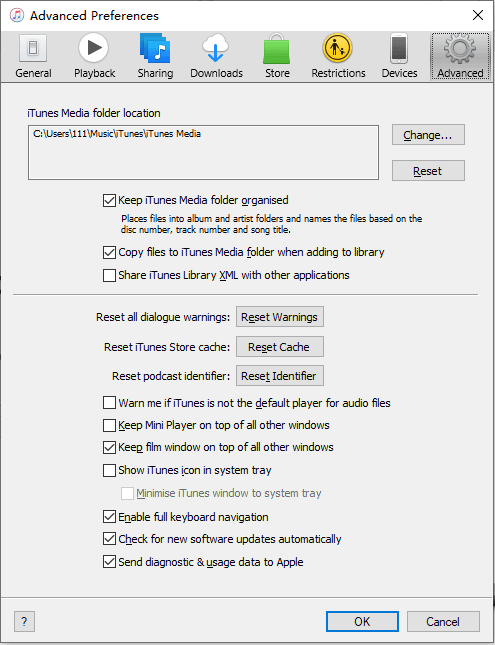
Warm tip: If you want to move your iTunes media files to the new default location, you can go to Files on iTunes > Library > Then select Consolidate Files to make it.
Tip 4. Fully reset iTunes library
Besides resetting iTunes preferences, you can also reset your iTunes library to fix any bugs and errors that result from iTunes library location keeping resetting and start over again.
Step 1. Open File Explorer on your computer > Navigate to C:\Users\Music\iTunes folder.
Step 2. Make sure you’ve enabled the file extension, and rename iTunes Library.itl to iTunes Library.old.

Step 3. Rename iTunes Music Library.xml to iTunes Music Library.old at the same time.
Step 4. Restart iTunes again and try to change your iTunes library location to see if it stops resetting.
Part 2. Transfer media files between iDevices and computer without iTunes
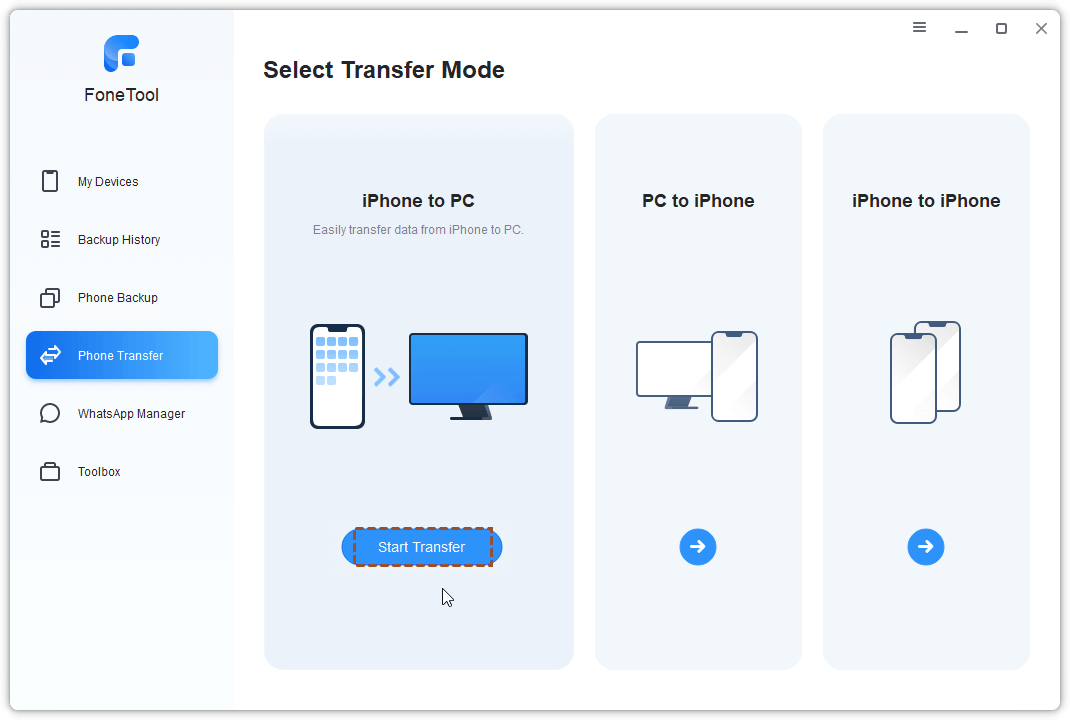
If you’re tired of looking for solutions and solving different iTunes errors, you can try an excellent iTunes alternative named FoneTool to transfer media files between iDevices and computer with no effort.
• It enables you to transfer both purchased and non-purchased music and videos.
• Different from the syncing function in iTunes, it doesn’t erase any media files or any other existing files on your device during the transfer.
• You can be free to save your media files to any local folder on your computer, you can even transfer music from iPhone to external hard drive.
• It provides you with powerful transfer functions, enabling you to transfer from iDevices to iDevices, iDevices to computer, and vice versa.
Get the tool by clicking the icon below, let’s take transferring music from iPhone to computer as an example.
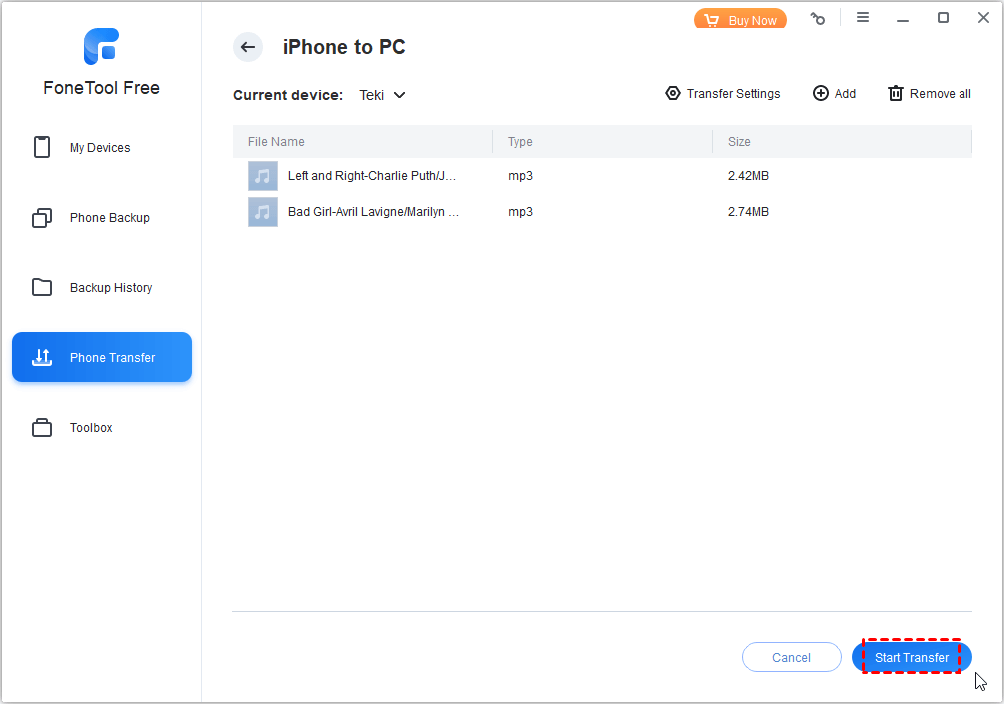
Step 1. Connect your iPhone to computer with USB > Launch FoneTool and click Phone Transfer on its homepage > Mouse over iPhone to PC > Click Start Transfer.
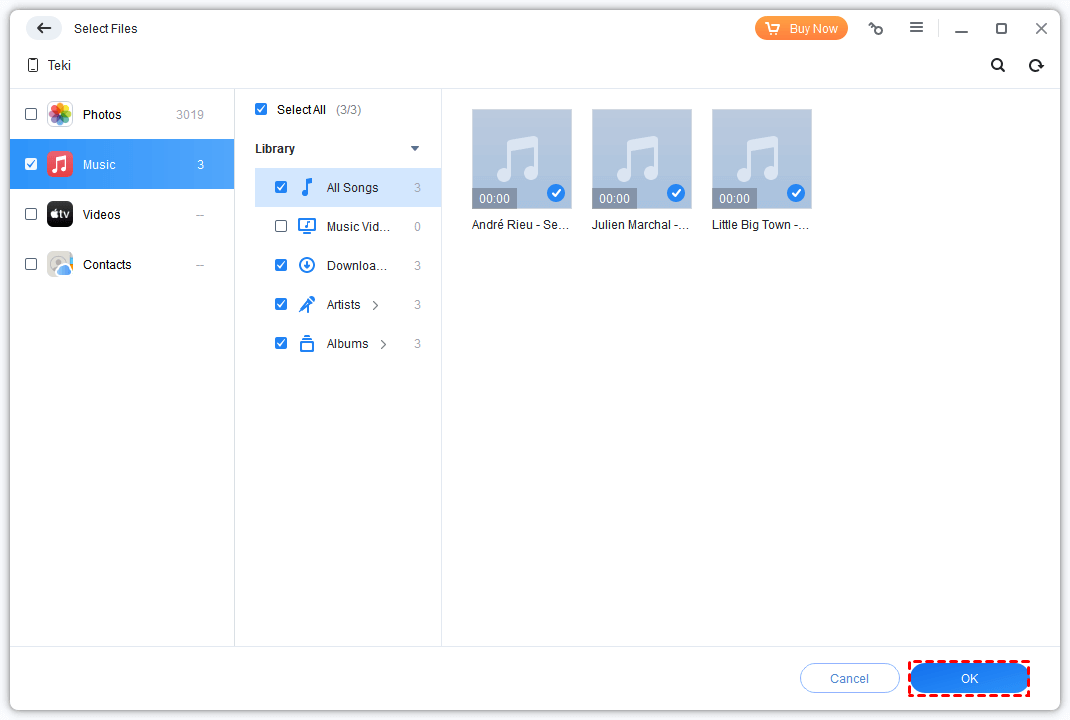
Step 2. Click the plus icon to browse and choose songs that you want to transfer > Click OK to confirm.
Step 3. Click Start Transfer button. You can choose a destination to save the files on Transfer Settings, and click Transfer.
If you intend to enjoy these songs on iPad or iPod, you can rely on the Transfer to iPhone function to add music to iPod/iPad without iTunes.
Conclusion
Hopefully, you can fix the issue iTunes library keeps resetting location with one of the four methods introduced in this guide. It’s also recommended you FoneTool save your media files on iOS devices to anywhere you like on your computer. If this guide helps you, it will be appreciated if you can share it with others.
