Move iOS Backup to External Drive on Windows/Mac: 3 Ways
This passage will tell you how to move iOS backup to external hard drive on Windows/Mac and introduce how to back up your iPhone without iTunes/iCloud for free.
By Kathy / Updated on October 17, 2023
Can you move iOS backup to external hard drive on Mac/Windows?
When the backup of iPhone/iPad occupies lots of device storage, have you ever considered moving iOS backup to external drive to solve no enough space on computer issue? You can follow some instructions to migrate the backup with Finder on Mac, but how about Windows?
Although there exist some restrictions between iOS devices and Windows PC, it is also feasible to move iPhone/iPad backup to external drive on Windows 10 or other Windows PCs.

- Where are iPhone/iPad backups stored in Mac/Windows:✎...
- Finder backups are stored in ~/Library/Application Support/MobileSync/Backup/ on Mac by default.
- iTunes backups are usually stored in C:\Users\user\AppData\Roaming\AppleComputer\MobileSync\Backup on Windows.
How to move iPhone/iPad backup to external drive
Now we will give you guidance on how to move iOS backup files to external drive on Mac and Windows PC. For Windows users, you need to download iTunes for your computer. While Mac users can operate the moving process via your Finder.
If you want to directly back up your iDevice to an external hard drive on Windows, please skip to the next part to use the handy tool.
Move iOS backup to external drive with iTunes on Windows
When you sync your iPhone or iPad with iTunes, a backup of your device is automatically created and they are typically stored on the root system drive. And now you can follow the steps below to move your backup files on Windows.

Step 1. Plug the external drive into your computer.
Step 2. Launch the Start menu, tap Computer and then go to the "C:\Users\user\AppData\Roaming\Apple Computer\MobileSync\Backup" directory.
Step 3. Choose all backups by holding down the Ctrl-A keys.
Step 4. Drag and drop all backup folders you need to move to the external hard drive.
- Notes:✎...
- If you need to restore iPhone from iTunes backup in external drive, you should move the whole backup folder from your drive to the default location in C:/ drive on your computer.
- If your computer doesn’t have enough room to hold the backup then you can mount the external drive as the dir where it looks for backup files, how you go about mounting it depends on your operating system.
Move iOS backup to external drive with Finder on Mac
For Mac users, when you want to transfer iPhone or iPad backups from your Mac to an external hard drive with Finder, just follow these steps.
Step 1. Make sure that your external hard drive is connected to your Mac. Then Create a new folder on the external drive and name it iOS Backup.
Step 2. Locate the Finder backup of your iPhone or iPad: Launch the Finder app on your Mac > Tap your device > Choose Manage Backups under the General tab > Right-click on the backup you need to move > Tap Show in Finder, then you will see a list of device backups.

Step 3. In the Finder window that appears, choose the Backup folder, then press Command + C to copy it. After that, turn on the external drive and hit Command + V to paste it.
Step 4. Enter the admin password if it asks and wait for the moving process to complete.
Create a symlink to let your MacBook know the new backup location
This is an essential step to move iOS files to external drive. And when you finish creating, you will give Finder a new path to get to the backup folder.
For macOS Mojave or later users, it's important to change the permissions for Terminal on your Mac. Otherwise, you won't have permission to follow the remaining steps of this process. And here’s how:
Step 1. Launch System Preference > Security & Privacy > Privacy > Click the lock to make changes at the bottom left of the screen if this screen is locked > Key in your system password and tap Unlock.

Step 2. Choose Full Disk Access on the left-hand side of the screen, then click on the "+" symbol to add Terminal to the list of applications with full control on your MacBook.
Step 3. In the Finder screen that's displayed, type Terminal in the search box > In the search results, highlight Terminal >Click Open.
Then you need to learn how to use Terminal, and the correct pathway varies for each individual due to different hard drive and backup folder names.
Step 1. Find Terminal using Spotlight
Step 2. Type the code below. (You should change the hard drive name and the backup folder name according to the note below to show the name of your hard drive and backup folder .)
ln -s /Volumes/**External**/ios_backup ~/Library/Application\ Support/MobileSync/Backup/**4f1234a05e6e7ccbaddfd12345678f1234b123f**

Explanation of the code:
Volumes: A hard drive.
External: The name of a hard drive, and you must change "External" to your external drive’s name.
ios_backup: The renamed backup folder you dragged into your external hard drive.
~/Library/Application\ Support/MobileSync/Backup: It tells the operating system where the backup is.
4f1234a05e6e7ccbaddfd12345678f1234b123f: The name of the device backup folder.
Step 3. Then tap Return and quit Terminal.
Upon completion, you'll notice a new folder within your MobileSync directory named "Backup" or the series of numbers and letters representing your device. You can know it’s a symlink because there will be an arrow in the bottom left corner.
![]()
Then you must make sure that it worked before deleting your old backup file on your computer.
Step 1. Open Finder on your Mac's Dock > Click your device on the left side of the window > Tap Back Up Now on the General tab
Step 2. Open the iOS backup folder on your external drive > Check to see that the date and time on the latest backup are for the one you just completed
Once the pathway relocation has been successful, and you have verified that the backup is indeed taking place on your external hard drive, then you can delete the folder of the targeted backup from your Mac.
How to directly backup iOS to external hard drive on Windows
ITunes can't directly choose backup storage path. So it is not the best choice if you want to back up iPhone to an external storage. And sometimes, some issues may occur such as "iTunes error 4013." So here we would like to introduce an iTunes Alternative - FoneTool to back up iPhones more easily and flexibly.
FoneTool is professional iPhone/iPad backup software. Unlike iTunes/Finder, you can manage the path to store your backup in the place you want directly with this tool. It also offers selective backup to protect the important data in your iDevice.
Besides, FoneTool can run stably with all models of iPhone/iPad on Windows 11/10/8/7 PC, which help you transfer files from iPhone/iPad to external hard drive efficiently and easily.
Now tap the blue button to download FoneTool, and plug your external hard drive into computer, connect your iPhone/iPad to computer with a USB cable. We will guide you on how to back up iOS device to external hard drive on Windows.
Fully backup iPhone/iPad to an external drive
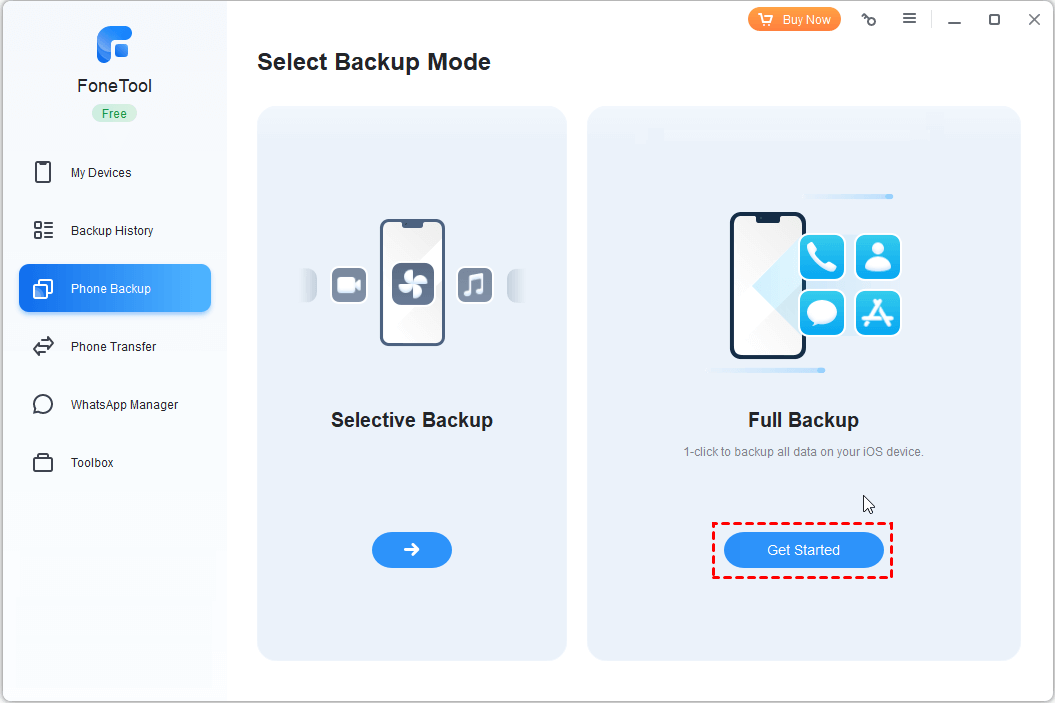
Step 1. Open FoneTool on your computer > Choose Phone Backup > Click Full Backup and tap Get Started.
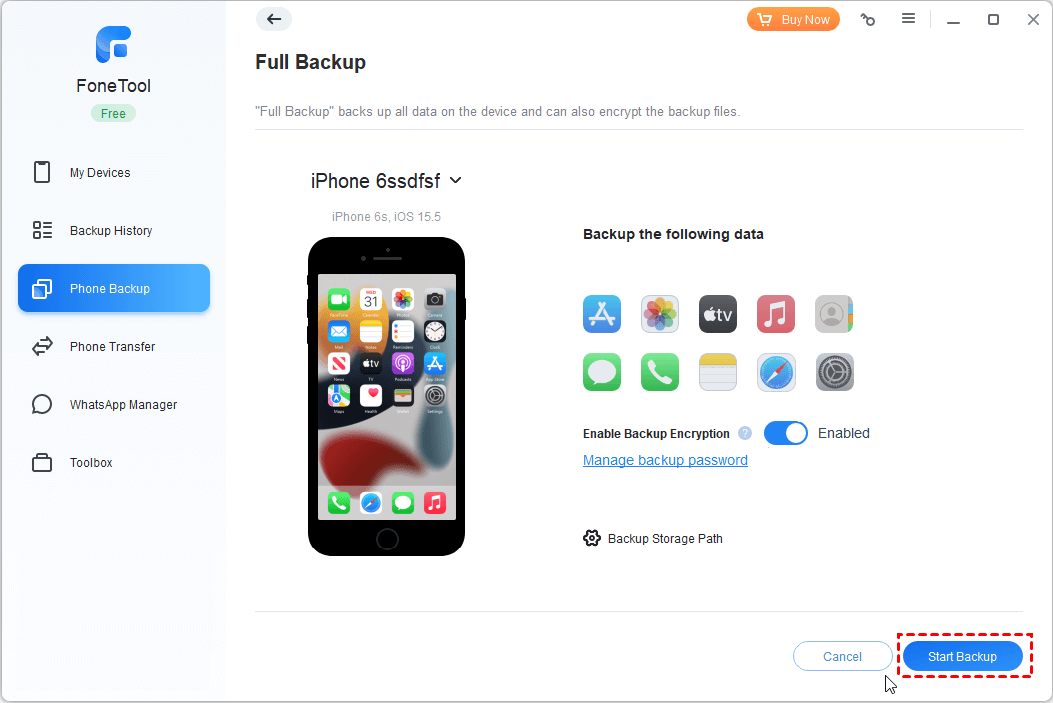
Step 2. Hit Backup Storage Path to select your external hard drive as the backup location. You can enable the backup encryption according to your needs. Then click Start Backup.
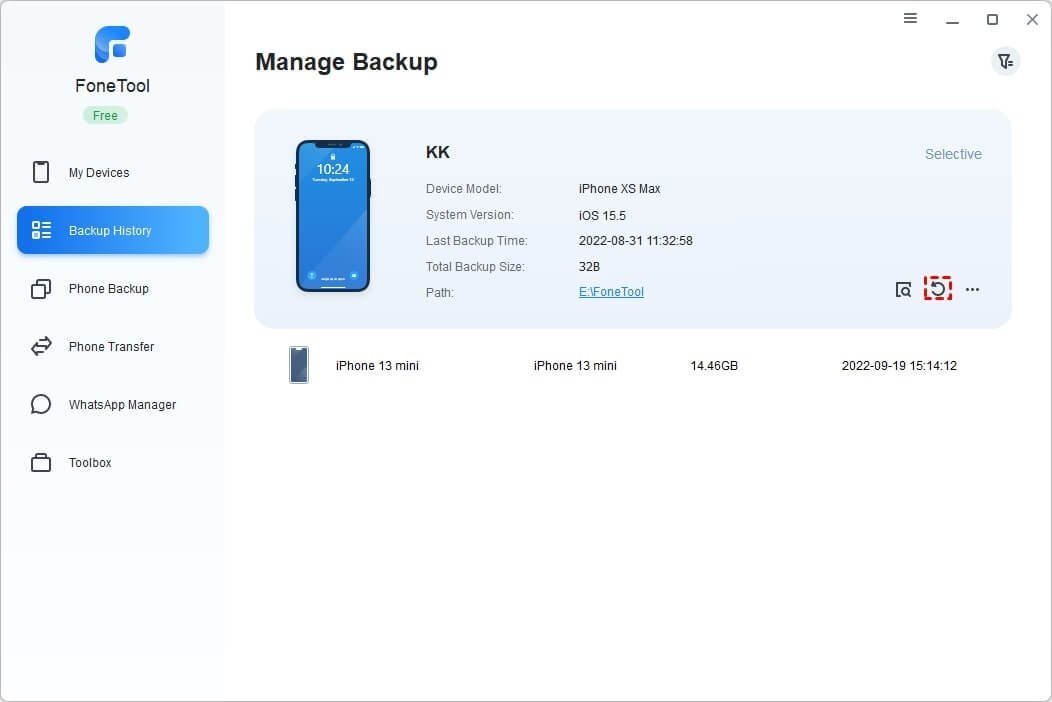
Selectively backup iOS device to external hard drive
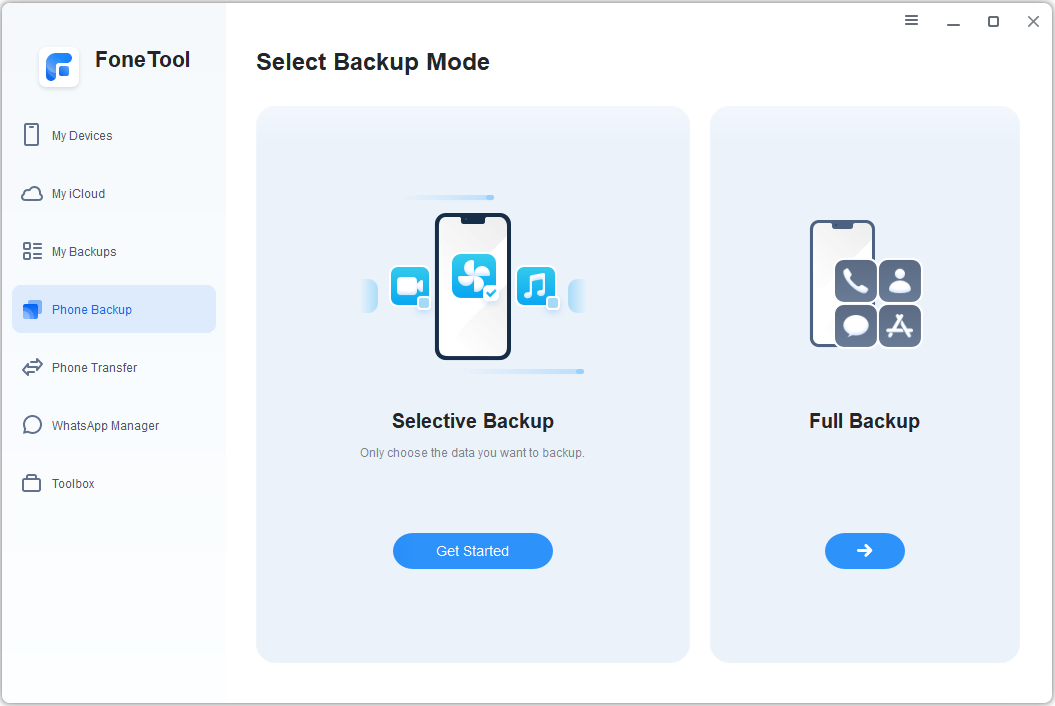
Step 1. Select Phone Backup on the FoneTool, and choose Selective Backup. Then tap Get Started.
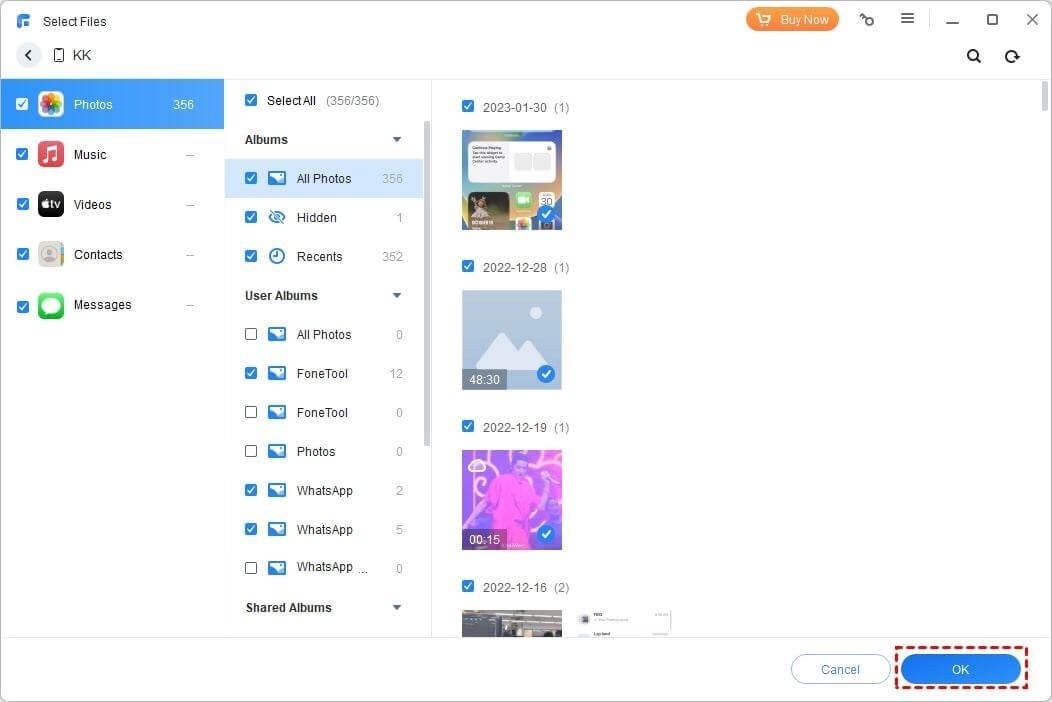
Step 2. Click an icon to preview iPhone data. Select what you want to move and click OK.
Step 3. Click the Backup Storage Path to change iPhone backup location to external hard drive, then click Start Backup to copy everything you have selected to the drive.

Conclusion
From the post, hope you can get how to move iOS backup to external drive with your Mac or Windows PC. And if you encounter any iTunes error, FoneTool can be your ideal choice to meet your needs. Besides, it will let you transfer photos from external hard drive to iPhone/iPad quickly.
