Top 6 Fixes to Music Didn’t Transfer to New iPhone 15/14
It's disappointing that music didn’t transfer to your new iPhone 15/14. The top six solutions is worth trying to get rid of it.
By Demi / Updated on February 5, 2024
Music didn't transfer to the new iPhone 15.
Some music in iTunes (which was not purchased) didn’t transfer to my new phone from iCloud. I no longer have the computer with iTunes library that contained this music imported from CDs. This music is still on my old iPhone. How can I get these tunes onto my new iPhone?
- Question from Apple Community
It is necessary to transfer data from the old iPhone to the new iPhone when you have got a new iPhone. But it is frustrating if music didn't transfer to new iPhone, especially if you are a music fanatic. Don't worry, this guide is for you. Try to fix the issue with the six solutions below or transfer music with a powerful tool mentioned in this guide.
Why did your music not transfer to your new iPhone?
Before trying every solution, you may want to figure out why your music didn’t transfer to new iPhone. The followings are the main causes that result in the issue.
• Poor Network connection. If you migrate songs to new iPhone under an unstable network connection or a problematic network, the task may be failed.
• Wrong settings. Whether you restore music to new iPhone from iCloud or iTunes, it’s a prerequisite to set up your iPhone even iTunes on PC properly.
• Not enough space on your iPhone. If you find just a few music didn’t transfer to iPhone, it is possible that the storage space ran out.
• Corrupted music files. If the music files have been corrupted before, you may be not able to transfer them to new iPhone successfully.
Top 6 fixes to music didn’t transfer to new iPhone 15/14
You don’t need to be panic when encountering the problem since you can try these simple solutions to get them back. Just try the six solutions one after another until the music appears on your new iPhone, or you can turn to the next part to transfer music to new iPhone directly.
Solution 1. Check network condition
The first thing you need to do is to check the network condition on your new iPhone. You can go to any webpage or send a message to check whether the network is working, since the transfer process requires a stable network condition.
Just in case, you can reset network settings to avoid errors. Go to Settings > General > Reset (or Transfer or Reset iPhone > Reset for iOS 15) > Reset Network Settings.

Resetting network settings doesn’t erase data but the passwords of Wi-Fi and Bluetooth connection history. You’ll be asked to enter WiFi password when you connect it next time.
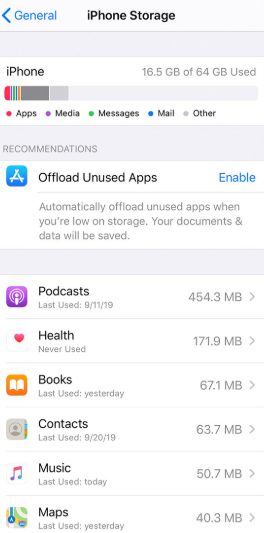
Solution 2. Check your iPhone storage
Is it possible that your iPhone storage full? The high-resolution music and videos can easily take up much storage space before you realize it. In that case, you’d better check your iPhone storage by going to Settings > General > Usage > Storage. Please make sure you leave enough space to save music.
Solution 3. Switch on & off Sync Library with Apple Music
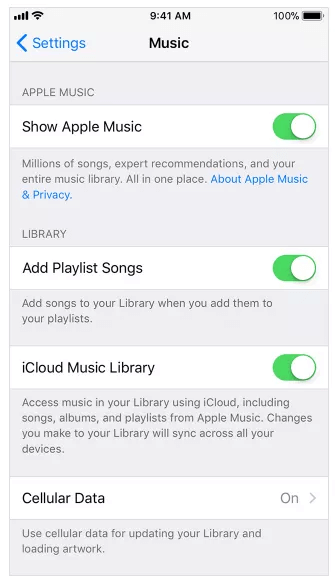
If you subscribe to Apple Music, make sure the Sync Library is on, so that you can get access to Apple Music and music you downloaded.
To know how to restore Apple Music library, you can switch off Sync Library and turn it on again to have a try. Just go to Settings on your new iPhone > Music > Turn off and on Sync Library.

Wait for a few minutes, and you can refresh your iPhone to check if all music files have been saved on your new iPhone.
Solution 4. Disable iCloud Music Library
If you encounter the issue when transferring music to new iPhone from iTunes, the issue may have to do with an enabled iCloud Music Library. Therefore, please disable iCloud Music Library.
Go to Settings on your iPhone > Music > Toggle off iCloud Music Library.
Notes:
• You won’t see the option “iCloud Music Library” unless you subscribed to Apple Music.
• Disable iCloud Music Library will delete all songs from Apple Music. If you want to keep them on iPhone, please turn to the next solution to turn off iTunes Match with detailed steps.
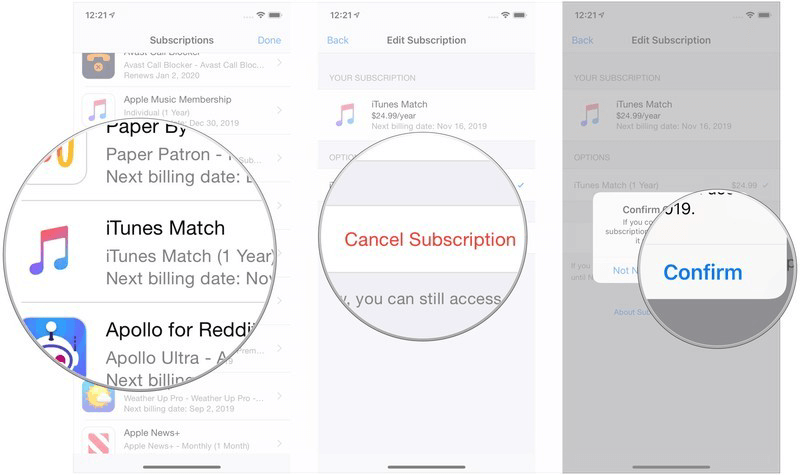
Solution 5. Turn off iTunes Match
Just like what iCloud Music Library does with your iPhone, please turn off iTunes Match on iPhone or iTunes to avoid music didn’t transfer to new iPhone.
▸On iPhone: Go to Settings > Tap iTunes & App Store > Choose your Apple ID > Tap Subscriptions > Locate iTunes Match and choose Cancel Subscription.
▸On iTunes: Select Account > Choose View My Account > Enter your Apple ID password > Scroll down to locate Cloud > Turn off iTunes Match.
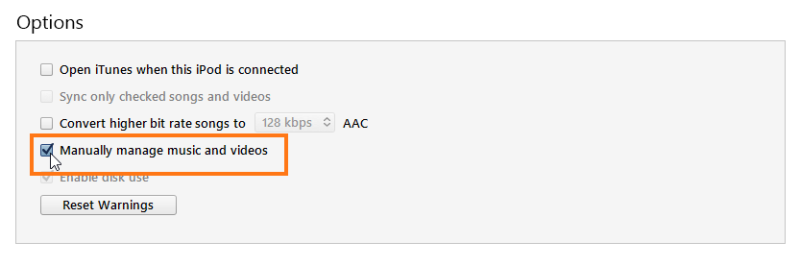
Solution 6. Turn on Manually manage music and videos in iTunes
To transfer music from iTunes to iPhone, you can turn on the option “Manually manage music and videos” in iTunes. Before turning on the option, please make sure you have downloaded the latest version of iTunes.
Step 1. Connect your iPhone to computer > Launch iTunes > Click the phone icon in the upper-right corner.
Step 2. Choose Summary > Check Manually manage music and videos > Click Apply to save the change.
Scan and transfer music to new iPhone via FoneTool
Is music still missing on your new iPhone? Chances are that these music files have already been on your iPhone but you cannot locate it. No matter you’re in either of the situations, it is recommended to try FoneTool, one of the best transfer tools for iOS devices, to help you find hidden music and transfer music to new iPhone. Optionally, you can also transfer music from iPhone to iPhone directly using FoneTool.
What you can benefit from FoneTool
✓ Preview and selective process. You’re able to browse all music files on your new iPhone to check if they’re on your iPhone. You’re also allowed to transfer selective music to computer, then get them backup to iPhone.
✓ Purchased and non-purhased music transfer supported. FoneTool supports you to transfer both purchased and non-purchased music from any folder of computer to iPhone. iPhone to iPhone transfer and iPhone to computer transfer is also available.
✓ Fast Transfer speed. It just takes a few minutes to finish transferring 100 songs.
✓ Wide compatibility. FoneTool support iPhone (from iPhone 4 to iPhone 15 series), iPad (including iPad 2022), and iPod. It can also work well with iOS, like iOS 17/16.
Free download FoneTool to computer by clicking the icon below. Then, follow the steps below to transfer music to new iPhone in 2 steps.
Step 1. Scan/transfer music from iPhone to computer
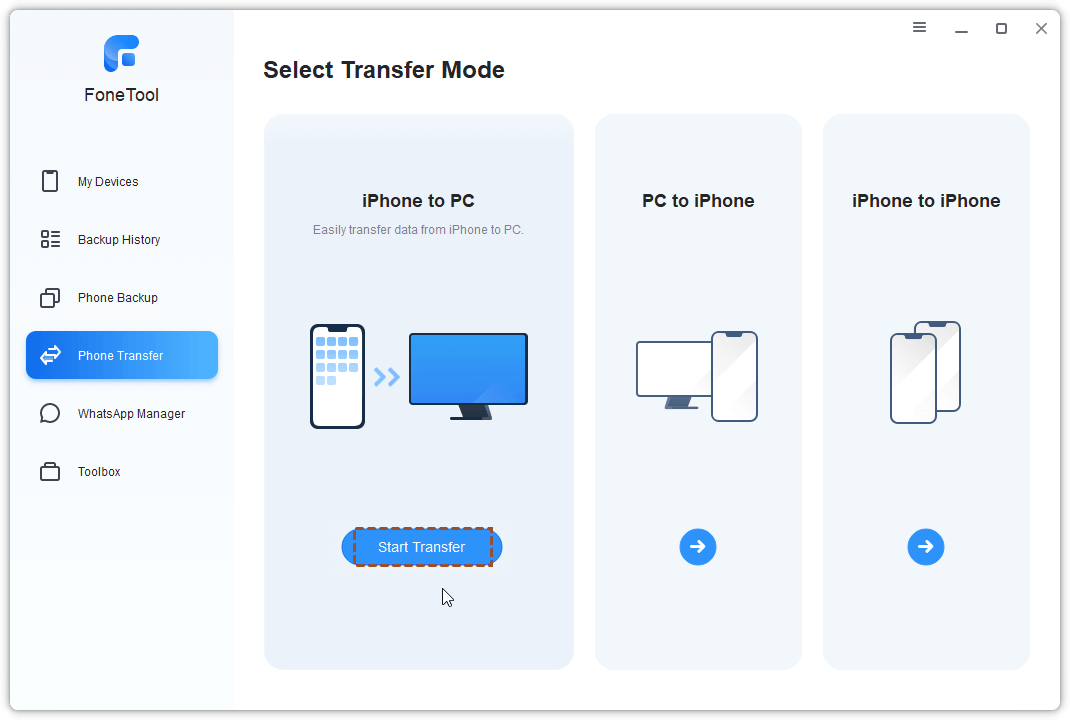
1. Connect your iPhone to computer > Launch FoneTool> Choose iPhone to PC.
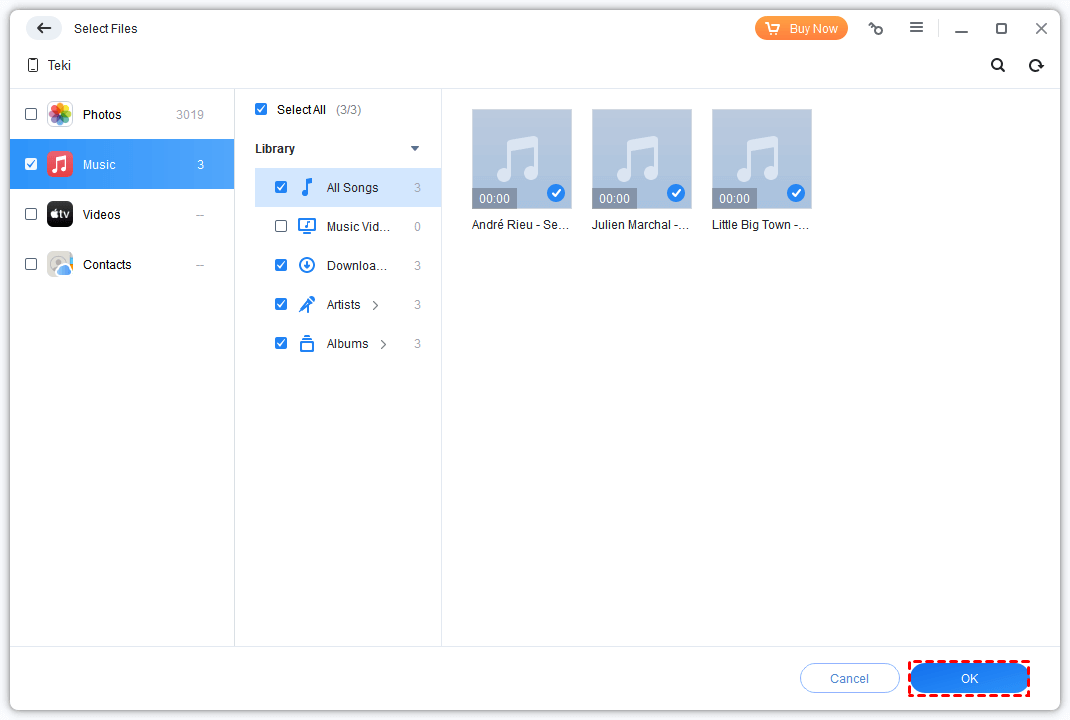
2. Click the + icon > Check the Music icon to browse and select the music you cannot access on iPhone > Click OK to confirm.
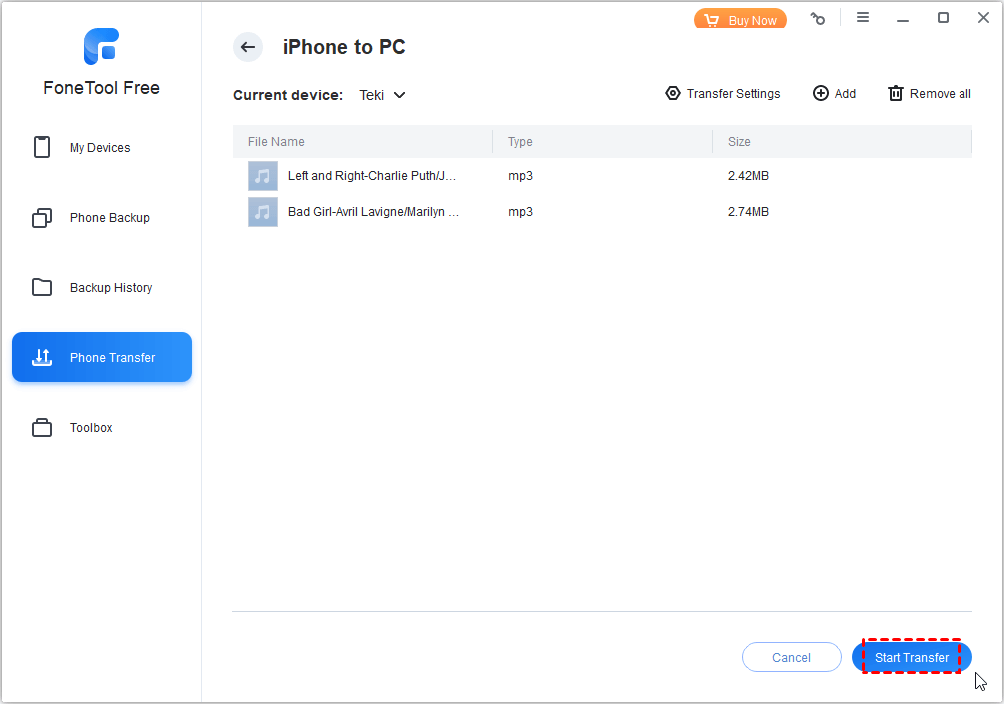
3. Choose a storage path as you like from Transfer Settings > Click Start Transfer to begin.
Step 2. Transfer music from computer to new iPhone
You can transfer the hidden music to new iPhone again, or if music didn’t transfer to new iPhone, you can also follow the steps to transfer music on iTunes or any files from computer to iPhone.
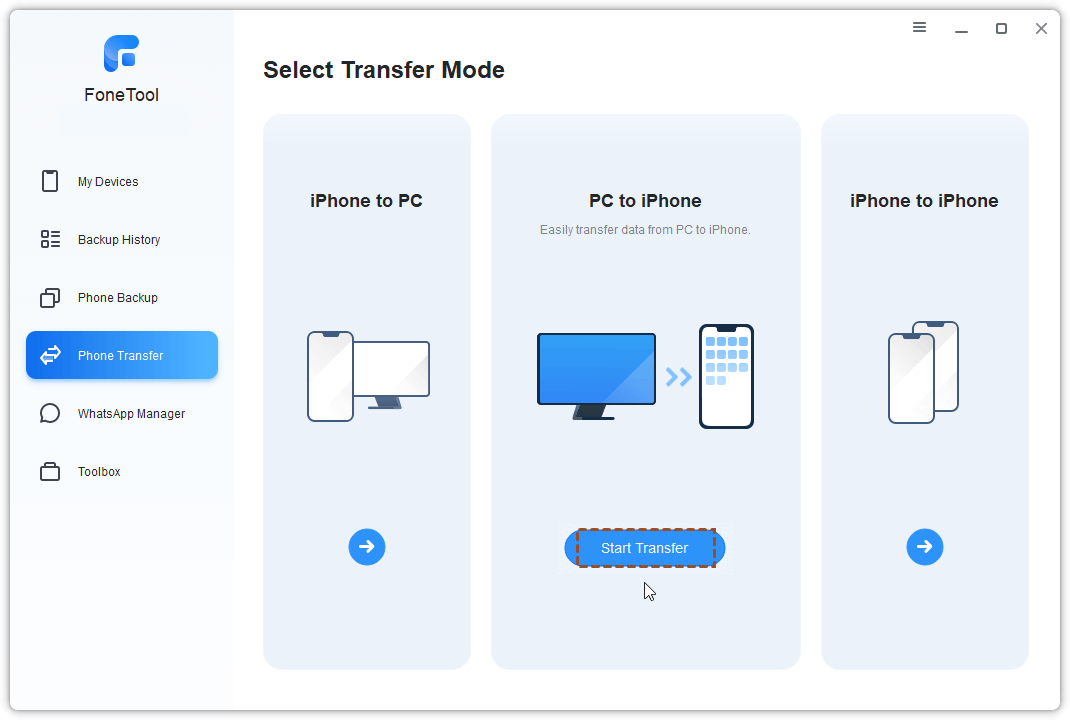
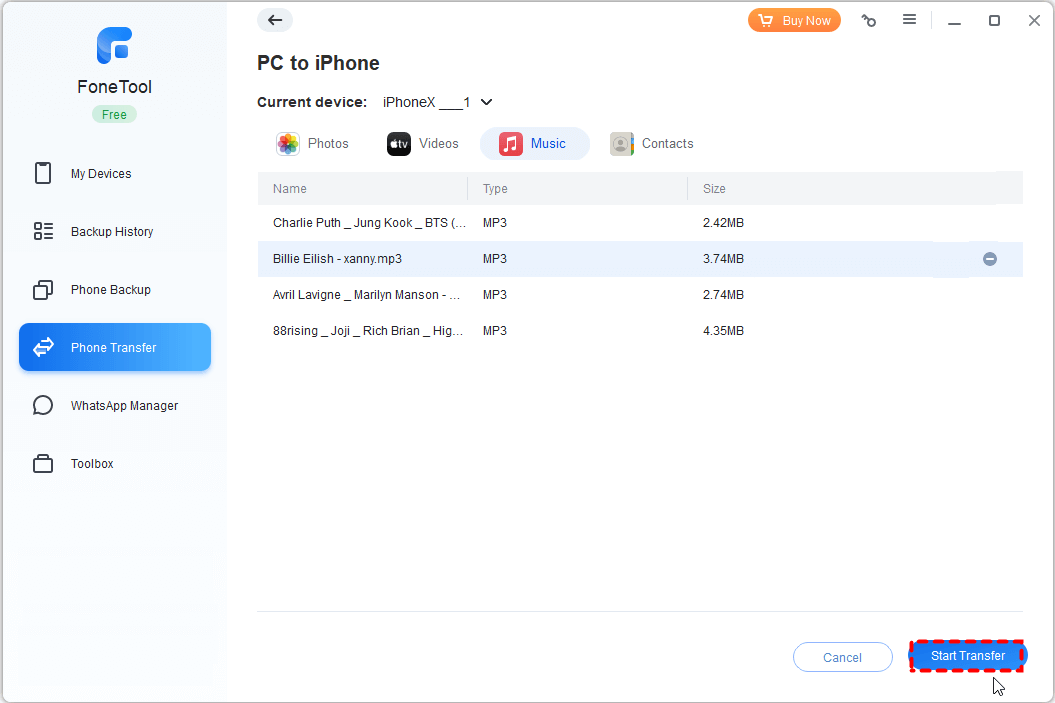
1. Keep your iPhone connecting to computer > Click PC to iPhone on the homepage of FoneTool.
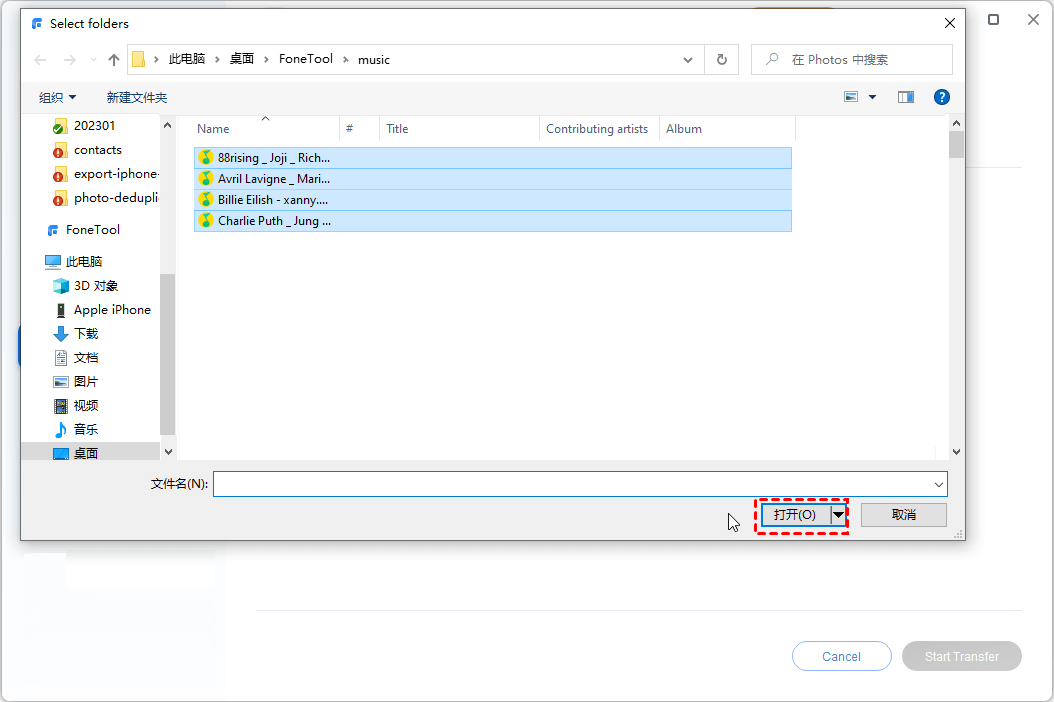
2. Click the + icon > Open files on your computer to choose the wanted music you’d like to transfer to new iPhone.
Tip: Just in case, you can browse and select iTunes music from C:\Users\YourUserName\Music\iTunes\iTunes Media.
3. Choose Music as the destination to save these music files > Click Start Transfer to send music to your new iPhone.
When the transfer is completed, head to the Apple Music on your new iPhone to enjoy them. FoneTool is such a powerful tool, the function iPhone to iPhone enables you to transfer everything from iPhone to iPhone, which is pretty helpful when you got a new iPhone.
How to transfer music from iPhone to iPhone wirelessly with FoneTool app
You can also transfer selective music from iPhone to iPhone wirelessly with FoneTool app. Different from AirDrop, you are allowed to transfer multiple files at a time using FoneTool app. You can scan the QR code below to go to the App Store to get the app directly. Follow the steps below to transfer music as you like.

Step 1. Put your two iPhones close to each other > Enable Wi-Fi on both iPhones > In the FoneTool app, go to Connect Device > Tap the device name of your iPhone to establish a connection.
Step 2. On your old iPhone, tap File Transfer to select the music you'd like to transfer > Tap Send to share the music files to the target iPhone.

Step 3. On your new iPhone, receive the music tracks, and you can find these songs in your Music app.
Conclusion
That’s all for music didn’t transfer to new iPhone. Optimistically, you can get rid of the issue with one of the six solutions above. To avoid any troubles, FoneTool is also a nice try.
Hope this guide is useful for you, it would be appreciated if you can share this guide with others.
