Top 4 Easy Ways to Sync iPhone Photos to Windows 10/11
Do you want to sync iPhone photos to Windows 10/11? Read this post and you will learn 3 easy ways to transfer photos from iPhone to Windows with iTunes, File Explorer, and other tools.
By May / Updated on September 12, 2023
How can I sync iPhone photos to a PC?
Is there any way I sync my iPhone photos to Windows 10? I try to connect my iPhone to my Windows PC, but why are my photos not syncing between my iPhone and PC? How do I get my iPhone photos to sync with my PC? Thanks a lot!
- Question from an iPhone user
Why Need to Sync iPhone Photos to Windows 10/11?
Photos on iPhone tend to take up a large portion of the device’s storage space, which can affect its performance. So, it is necessary to free up iPhone storage space to optimize the storage space on iPhone and increase its speed. However, given the importance of photos, the recommended method is to sync iPhone photos to Windows 10/11. The benefits of doing this are as follows:
Free up iPhone Storage: By syncing your iPhone photos to Windows PC, you can free up space on your device and let you capture new memories without worrying about running out of storage space.
Backup: Syncing your iPhone photos to Windows helps you create a backup of your photos. In the event of accidental loss, device damage, or data corruption, a backup ensures that your photos are safely stored on your Windows PC.
How to Sync iPhone Photos to Windows 10/11 in a Normal Way
If you want to selectively transfer photos to Windows 10 from iPhone, FoneTool is a great choice. FoneTool is a free and reliable iPhone data transfer tool and manager that allows you to edit and view the transferred photos directly on your Windows PC.
Highlight of Using FoneTool to Sync iPhone Photos to Windows:
Two-Way Sync: FoneTool supports two-way photo syncing, allowing you to transfer photos from your iPhone to Windows 10/11 and vice versa.
Selective Photo Sync: When you want to transfer only a specific set of photos instead of the whole gallery, you have the flexibility to select specific photos to sync with FoneTool.
Edit and View Photos: FoneTool allows you to edit and view iPhone photos directly on your Windows PC without additional software.
Fast Transfer Speed: FoneTool ensures fast and efficient photo transfer from iPhone to Windows 10/11, saving you time and effort.
So, how to sync photos from iPhone to Windows 10/11 using FoneTool? Here is a step-by-step guide to do that:
Step 1: Download and install FoneTool on your Windows PC > Connect your iPhone to the PC using a USB cable.
Step 2: Launch FoneTool and select Phone Transfer from the left pane > Hover over iPhone to PC and click Start Transfer.
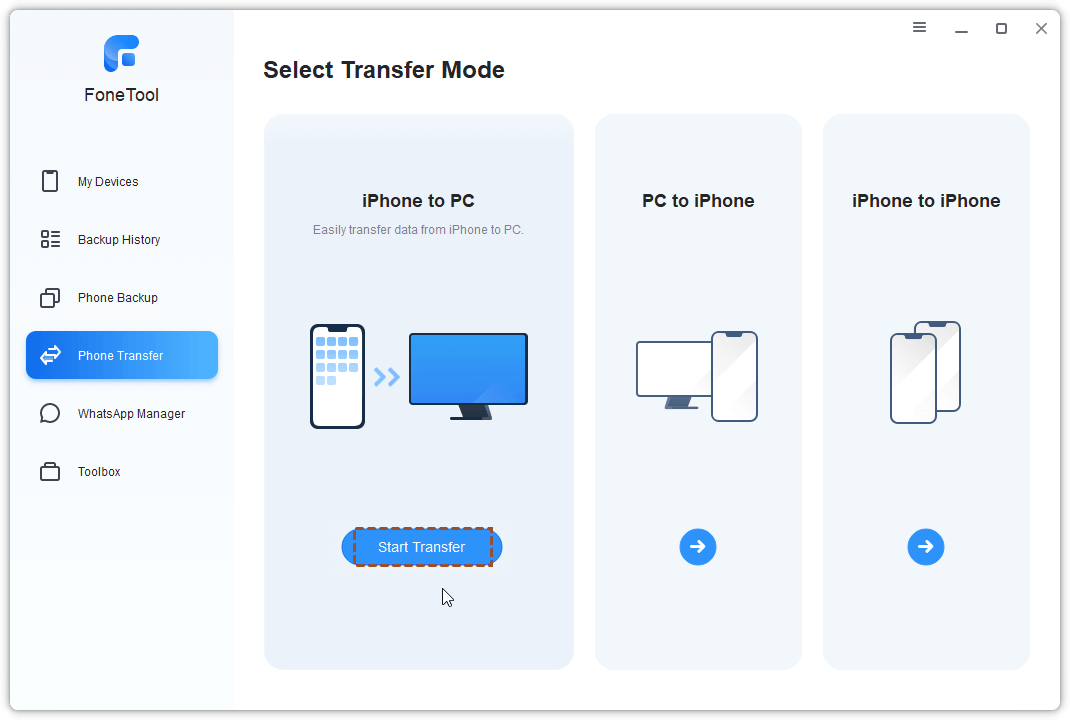
- ★Tip:
- If you need to transfer photos from PC to iPhone or from old iPhone to new iPhone, you can choose the PC to iPhone or iPhone to iPhone options.
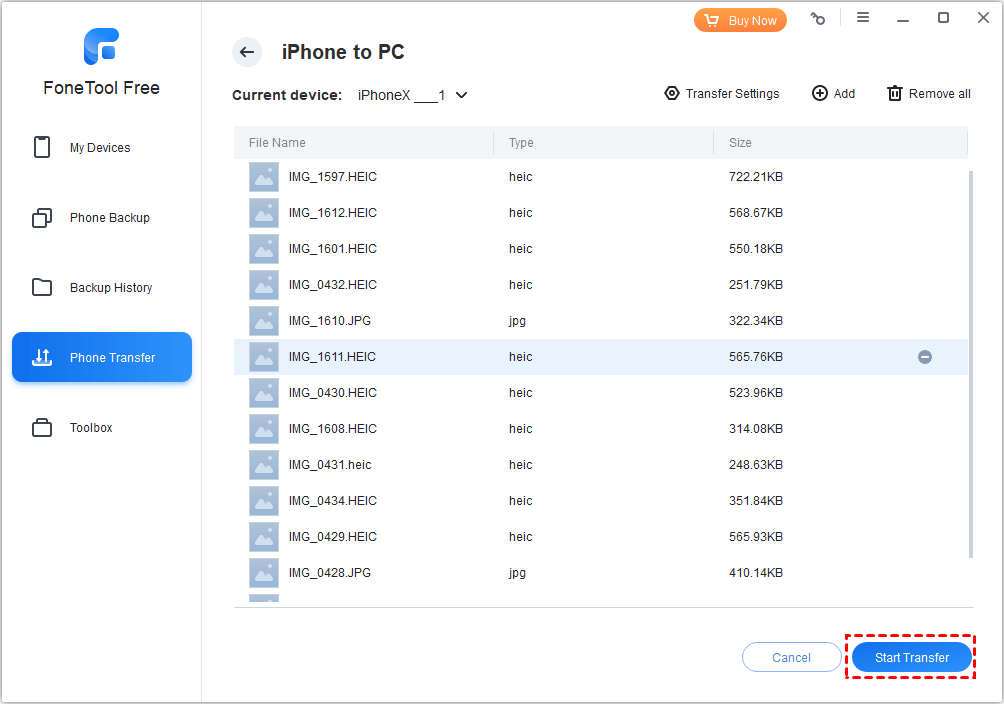
Step 3: Click the Plus icon to preview and select the photos you want to transfer from your iPhone > Click OK to go back to the iPhone to PC window.

Step 4: Specify a location to save the transferred photos in the Transfer Settings > Click Start Transfer to begin the transfer process.
How to Sync iPhone Photos to Windows 10/11 in Simple Ways
In addition, there are 3 useful ways to help you sync photos from iPhone to Windows 10/ 11 PC. Scroll down for more details.
Method 1: Backup iPhone Photos to Windows 10/11 with iTunes
iTunes provides a convenient way to make a full iPhone backup on your computer. If you want to transfer photos from iPhone to Windows 10 with iTunes, follow the guide below:
Step 1: Download the latest iTunes and connect your iPhone to your computer.
Step 2: Click the phone icon located at the top of the iTunes window > Navigate to the Summary tab > Click the Back Up Now button to initiate the backup process.

Step 3: iTunes saves the backup file by default in the following directory:
C:\Users\Username\AppData\Roaming\Apple Computer\MobileSync\Backup.

- ★Tips:
- 1. If you want to access and view the iTunes backup photos, you can utilize the iPhone backup extractor.
- 2. Using iTunes, you can create a comprehensive backup of your iPhone photos, contacts, messages, apps, and other data.
Method 2: Download iPhone Photos on Windows 10/11 via iCloud
If you want to transfer photos wirelessly from your iPhone to your Windows PC, iCloud is a great option. By enabling iCloud Photo Sync, you can easily sync all your photos from your iPhone to your PC at once. However, it’s worth noting that if you want to copy specific items rather than sync your entire library, iCloud may not meet your specific requirements. Here’s how to sync iPhone photos to PC via iCloud:
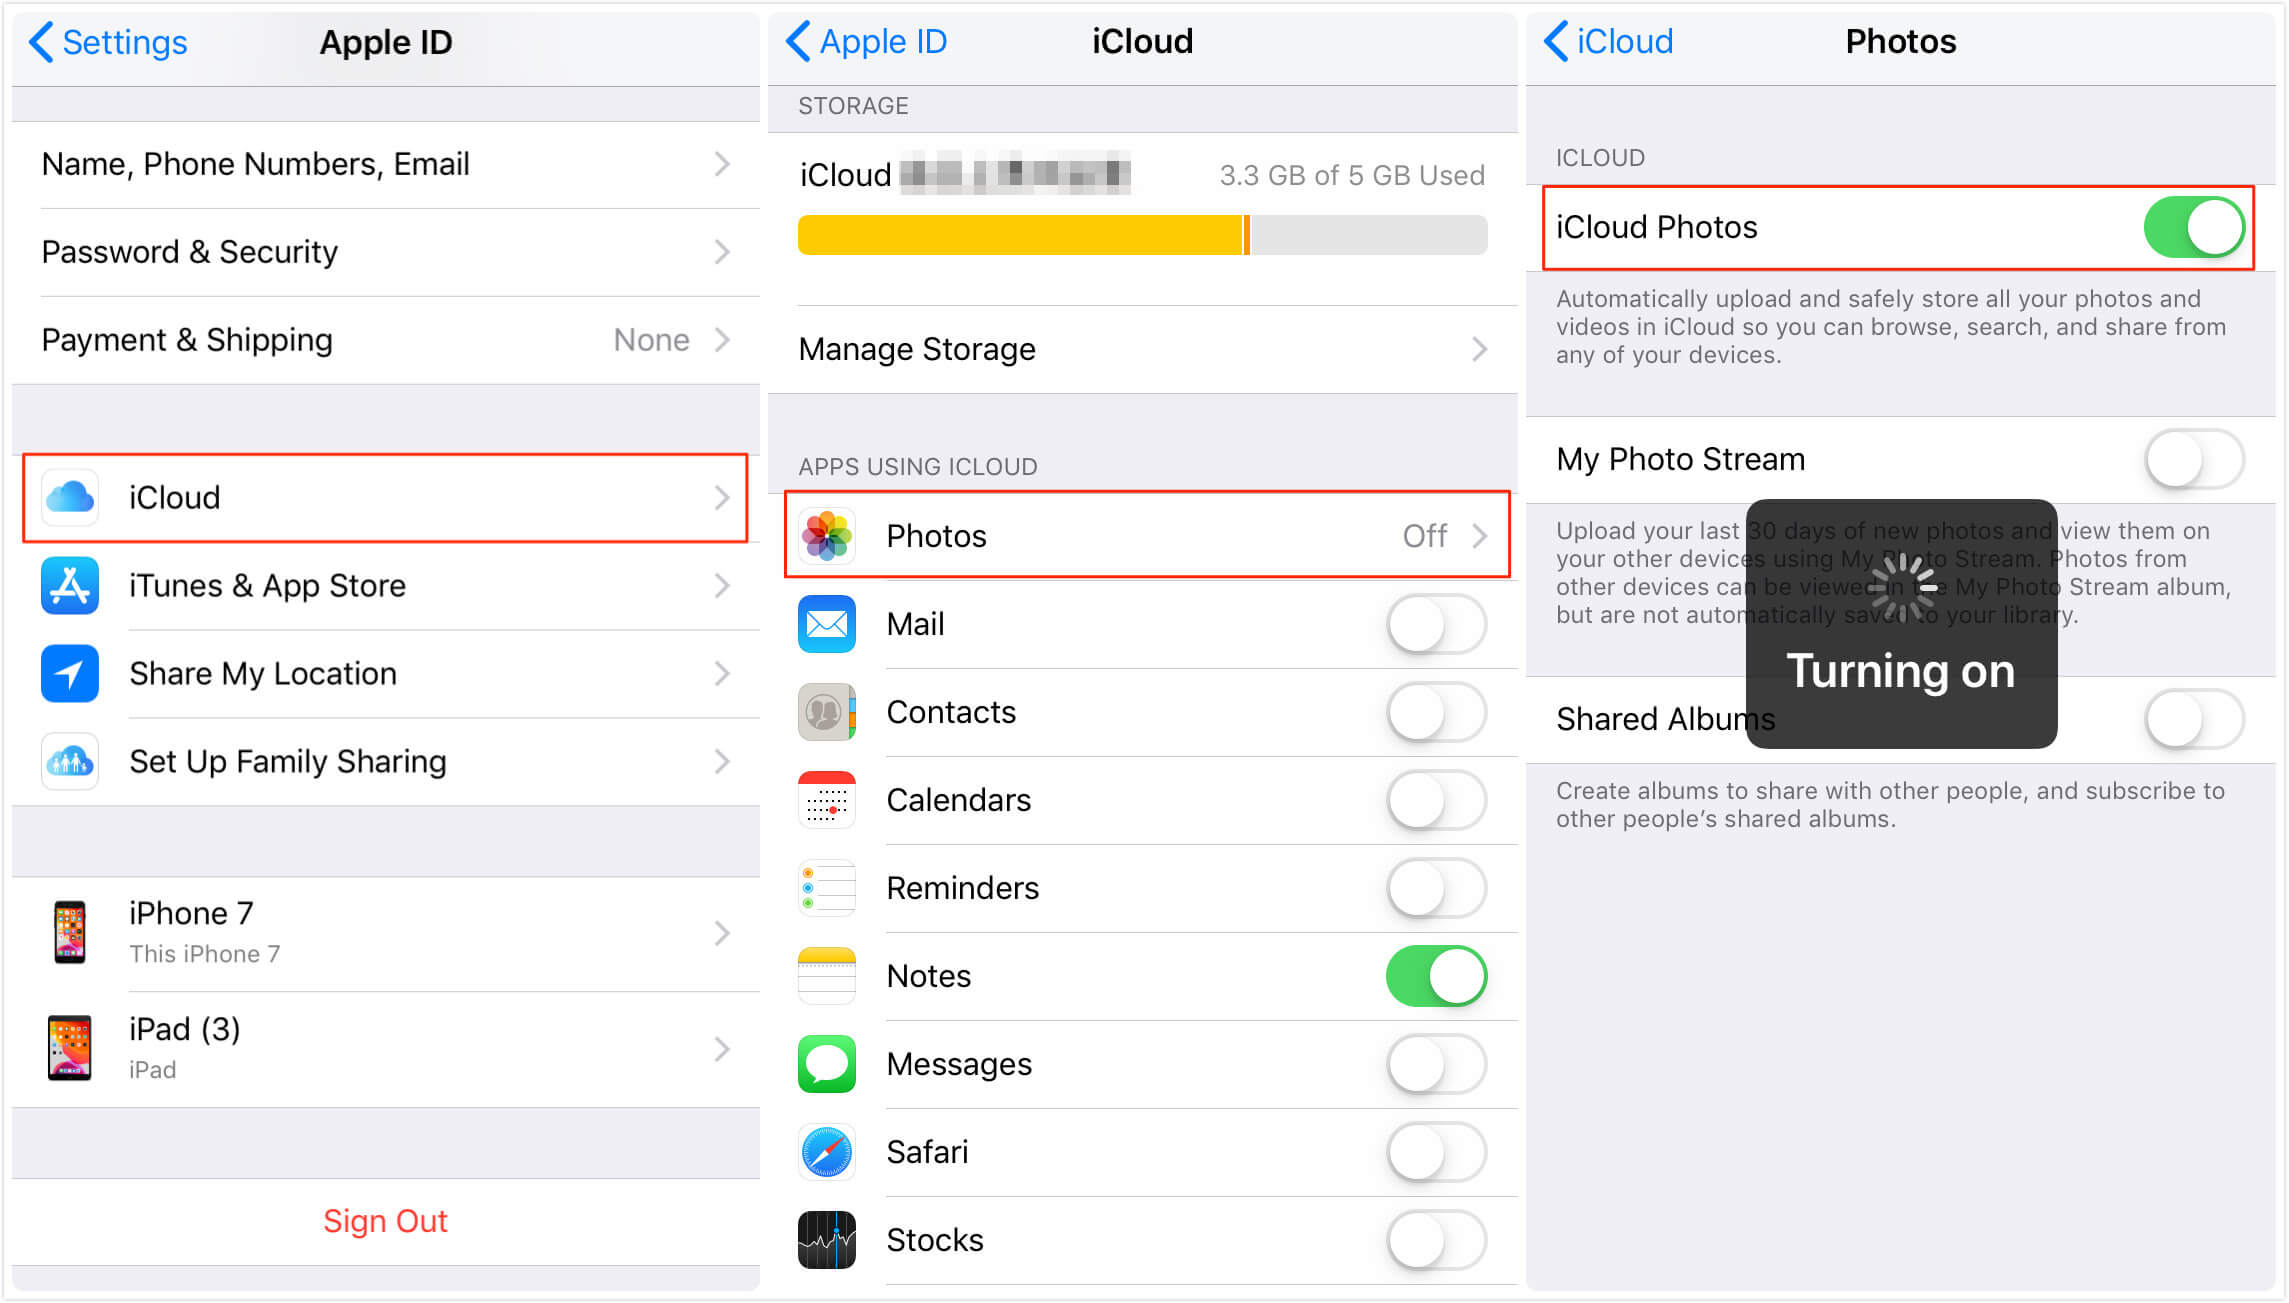
Step 1: Go to the Settings app on your iPhone > Tap Apple ID (your name) > iCloud > Photos > Enable iCloud Photos.
Step 2: Open a web browser on your Windows PC and visit the iCloud website > Sign in using your Apple ID and password > Choose the Photos icon.

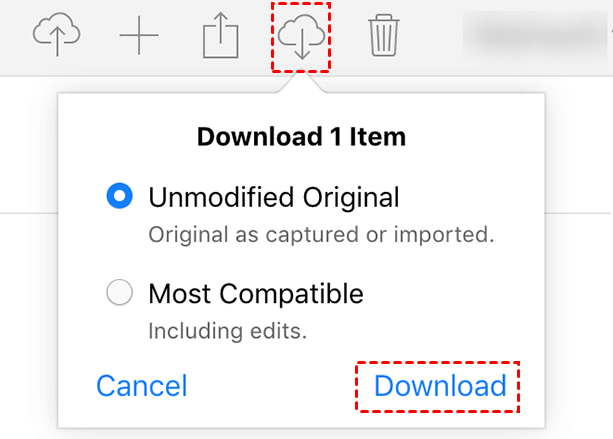
Step 3: Check and view the photos that have been uploaded to your iCloud > Select the photos you want to download to your PC > Click the download icon located at the top of the page > Click Download to confirm.
It is worth noting that iCloud only offers 5GB of free storage space for each user. If you have a large number of photos, you may easily experience the iCloud photos not syncing to PC or iCloud backup stuck issues.
Method 3: Sync iPhone Photos to Windows 10/11 PC via Photos App
Microsoft Photos is a Windows built-in app that facilitates seamless transfer of photos from external devices. You can use it to connect your iPhone to your PC, effectively turning your iPhone into a USB external storage device. Please follow these steps to initiate the transfer:
Step 1: First connect your iPhone to your PC using a USB cable> Open the Photos app on your PC > Click Import and select From a USB device.

Step 2: Preview and select the specific photos you want to transfer from iPhone and click Import Selected.

The Bottom Line
That’s all about how to sync iPhone photos to Windows 10/11. If you’re seeking a wireless way to transfer photos from your iPhone to your PC, iCloud can provide the assistance you need. If you need a quick way to import your iPhone photos to Windows 10/11, FoneTool is the best choice. With a USB cable, FoneTool helps you transfer photos safely and quickly. Try it out!
