Solved! 5 Fixes to The iPhone Could not Be Restored
You may receive the error message “The iPhone could not be restored.” with a number behind it when restoring backup from iTunes to your iPhone. Just try the solutions in this guide to get out of it.
By Demi / Updated on June 8, 2023
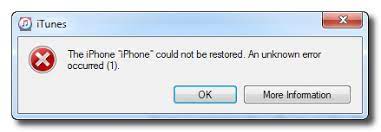
The iPhone "iPhone" could not be restored
After updating my iPhone to iOS 16, my iPhone started to flash the apple logo. When I tried to restore it, it will download the software, but in the end, I would get the following message: The iPhone “iPhone” could not be restored. An unknown error occurred (4013). Looking for assistance.
- Question from Apple Community
You may have known that most of the iOS software problems can be solved by restoring your iPhone to factory settings or from a backup. If you choose to restore iTunes backup to iPhone, you may receive an error message saying “The iPhone “iPhone” could not be restored”. Usually, a number follows behind, such as 4013, 9, and so on.
That may be the reason why you come to the passage. Here in this guide, you can get five effective solutions to get out of the error message “The iPhone could not be restored.”
Why the iPhone could not be restored?
The problems always occur when you restore iPhone to repair damaged system files, restore data to a new iPhone from a backup, or restore your iPhone to transfer ownership. In general, there are various reasons why iPhone could not be restored.
The most typical reasons are the unstable connection between the iPhone and the computer, outdated iTunes version, and software glitches.
5 fixes to “The iPhone could not be restored”
Here are five solutions to help you out of the “iPhone could not be restored” issue. You can try them one after another until your trouble gets solved.
Try another USB cable or port
If iTunes shows you “The iPhone could not be restored, the device cannot be found.”, then, you may need to check the connection between your iPhone and computer. You can try a different USB cable and USB port on the computer.
It is also suggested to connect only iPhone to your computer because any other USB devices may conflict with your iPhone. In other words, you need to disconnect other USB devices from computer during the restore process. The USB devices include but are not limited to cameras, scanners, readers, and so on.
Check for iTunes update
If you are using an outdated iTunes, it may bring kinds of issues, and could not restore iPhone may be one of them. Just in case, you can simply get out of the error by updating iTunes to the latest version.
Open iTunes on your computer, click Help from the menu bar on the top of the screen > Select Check for Updates. Follow the onscreen instructions if you need to update iTunes.
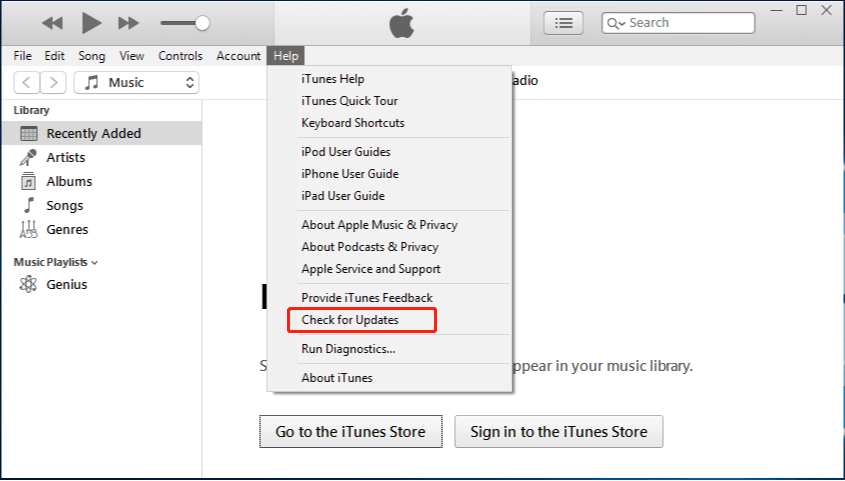
Make sure you have the latest version of iTunes installed, then, try again to check whether your problem has gone.
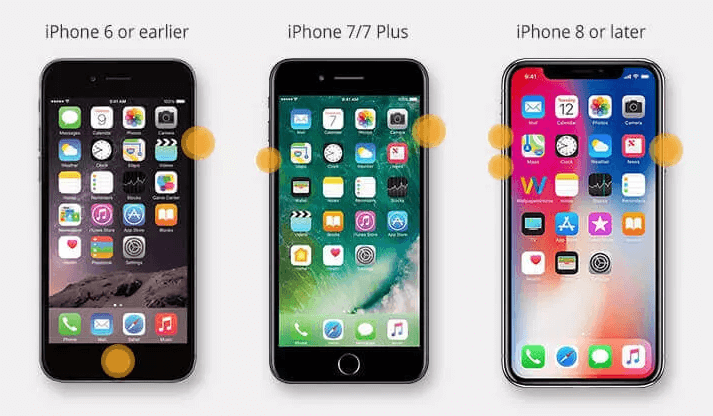
Force restart iPhone
Sometimes, a simple force restarting your iPhone is also needed for its software to refresh and adjust itself. Here are the steps to force restart your iPhone.
For iPhone 8 and later: Press and quickly release the Volume + button > Perform the same operation on the Volume - button > Press and hold the Power button for seconds until the Apple logo appears.
For iPhone 7/7P: Press and hold both the Power button and Volume - button > Release both buttons when you see the Apple logo.
For iPhone 6 and earlier: Press both the Power button and the Home button for seconds until you see the Apple logo.
Turn off Firewall and antivirus software
If any antivirus or firewall software is running in the background, your iTunes might be restricted from accessing certain services, which may cause iPhone could not to be restored.
Therefore, you can turn off iTunes, and disable antivirus software on your computer. Since the steps and methods vary for every software, it is best to familiarize yourself with your antivirus program’s settings and follow the process accordingly.
Restore iPhone after putting it into recovery mode
If none of the methods above works, you may need to put your iPhone into recovery mode and restore it with iTunes again. Here are the detailed steps.
Step 1. Turn off your iPhone > Put your iPhone into recovery mode. The steps differ from the model of the iPhone you’re using.
• iPhone 8 and later: Quickly press and release the Volume + button > Quickly press and release the Volume - button > Press and hold the Side button until you see the recovery mode screen.
• iPhone 7/7Plus: Press and hold both the Power and Volume - button > Release both buttons when the recovery mode screen appears.
• iPhone 6 and earlier: Press and hold both the Home and the Top/Side button for seconds > Release both buttons when the recovery mode screen appears.
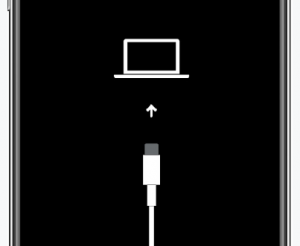
Step 2. Connect your iPhone to computer and open iTunes > Click the phone icon in the upper-right corner > When a window prompt, click on Restore and wait for the process to finish.
Restore iTunes backup to iPhone with FoneTool
Since iTunes cannot work properly from time to time, you can let a third-party iOS data management tool help you restore iTunes backup to iPhone without wasting time getting out of the error message “iPhone could not be restored.”
FoneTool is highly recommended. It allows you to restore iTunes backup with no effort. Besides, it helps you backup iPhone to PC fully or selectively. You can also rely on it to transfer files between iPhone and computer.
How to Restore iTunes Backup to iPhone
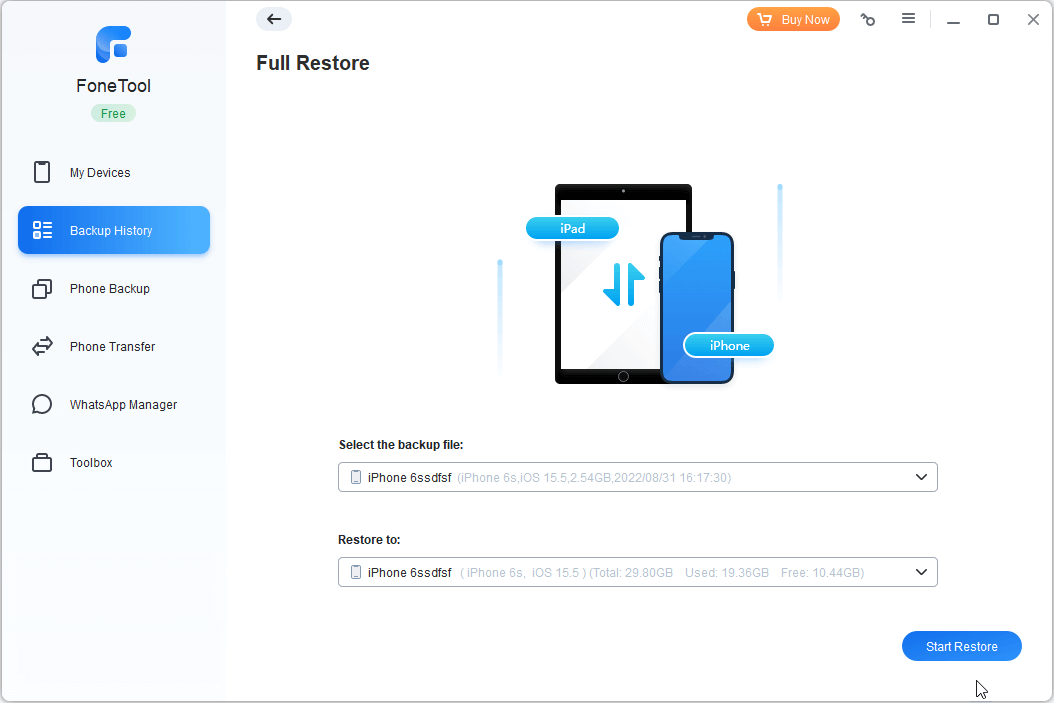
Step 1. Connect your iPhone to computer with USB > Launch FoneTool and choose Import Backup Files to find your iTunes backup.
You can go to \Users\(username)\AppData\Roaming\Apple Computer\MobileSync\Backup\ to find your iTunes backup on your computer.
Step 2. Choose the latest iTunes backup from the folder > Click Start Restore to begin the task.
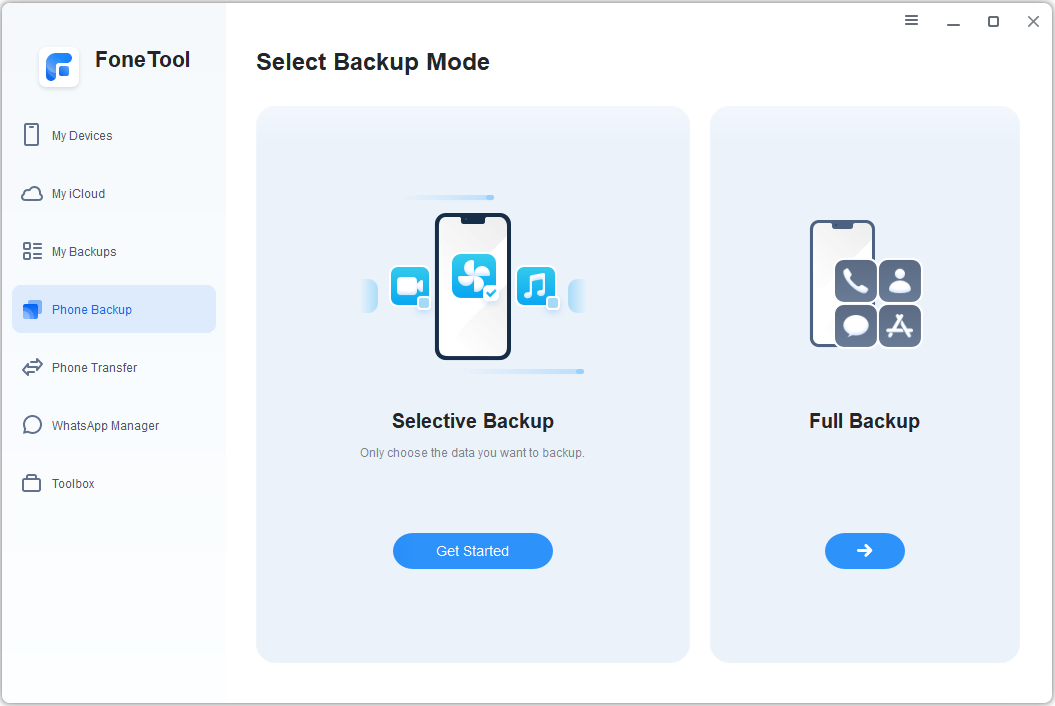
As you can see in the picture above, you can make use of the Full Backup to backup everything on your iPhone to computer.
More Powerful Functions of FoneTool
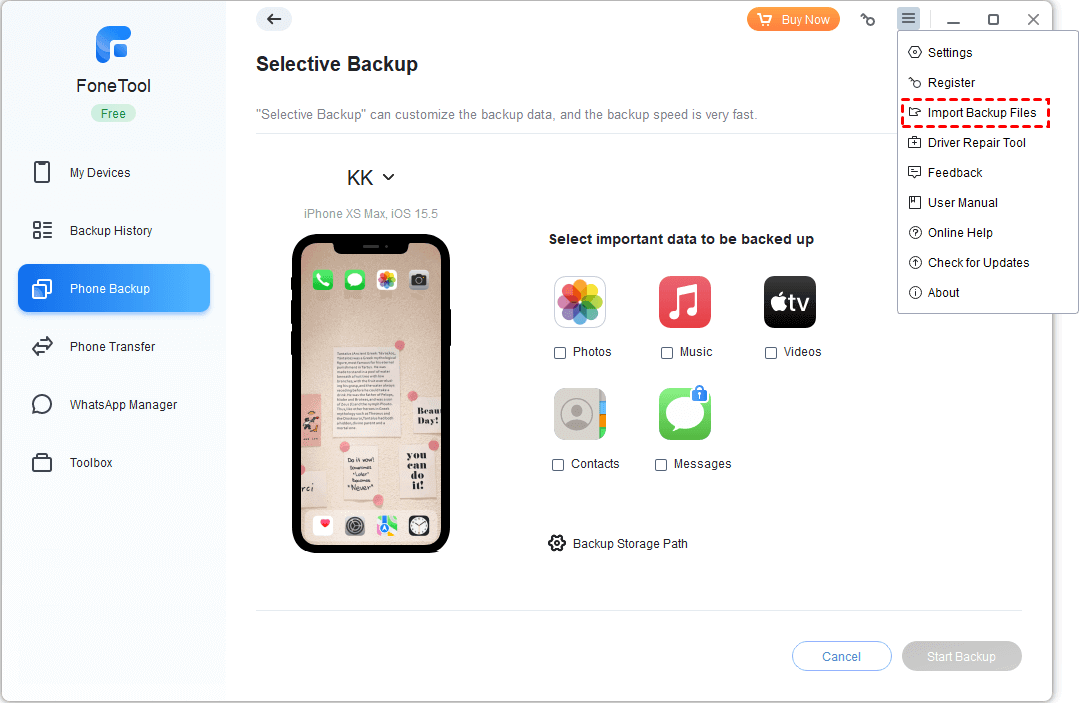
Selective Backup: Different from iTunes, FoneTool provides you with two ways to backup your iPhone data. The Selective Backup function enables you to preview and select the wanted files to backup to computer, external hard drives, etc.
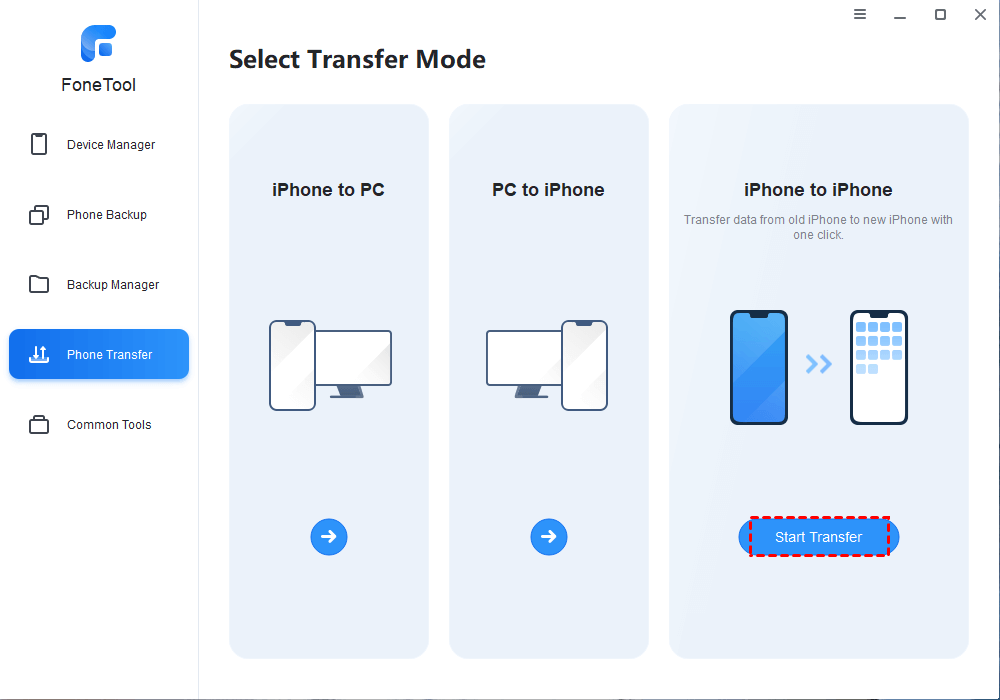
Transfer functions: When you switch to a new iPhone, the iPhone to iPhone transfer can help you transfer everything to the new iPhone directly without backup. The other two transfer functions can satisfy your daily demands to share files among iOS devices and computer.
Conclusion
Hopefully, you can get out of the issue “The iPhone could not be restored” after trying the solutions in this guide. If you have been tired of the shortcomings of iTunes, it’s time to try a more professional data management tool, like FoneTool to keep your iPhone data safe and make everything simpler.
