How to Remove “This iPhone Has Not Been Backed Up in 2 Weeks” Message
This post mainly introduces how to get rid of the “This iPhone has not been backed up in 2 weeks” notification. Besides, two options are offered to help you backup your iPhone. If you keep receiving this notification, read this post to learn how to troubleshoot it.
By Ellie / Updated on June 14, 2023
How can I remove the “iPhone Not Backed up” message?
Recently, I keep getting the ‘iPhone Not Backed up’ message, saying that ‘This iPhone hasn’t been backed up in 2 weeks’. It literally popped up every minute (sometimes more frequently) to remind me despite me dismissing it. This drives me crazy. How can I remove this message? Thanks in advance!”

How to remove the “This iPhone has not been backed up in 2 weeks” notification
Normally, when your iPhone is connected to power, locked, and on Wi-Fi, your iCloud Backup will automatically backup your iPhone. When you receive a “This iPhone has not been backed up in 2 weeks” notification, it means that your iCloud is out of storage. Therefore, iCloud can not backup your iPhone for you automatically, that’s when the notification will appear. In this section, we’ll teach you two ways to remove the “iPhone has not been backed up” notification.
Solution 1. Expand your iCloud storage
Since the notification appear because of the inadequate iCloud storage. The first solution we give here is to upgrade your iCloud storage. Go to Settings > Apple ID > iCloud > Manage Storage > Upgrade. Then you can choose your upgrade options.

As you can see, the free iCloud storage Apple offers to you is 5 GB. If you need more, you have to pay for it and the price is not very competitive. Of course, you can choose to upgrade iCloud, or you can also use the free iCloud alternatives.
Solution 2. Disable iCloud Backups
The second option here is to disable iCloud backups directly, so you won’t receive the annoying notification anymore. Go to Settings > Apple ID > iCloud > iCloud Backup > Disable iCloud Backup.

Before you do this, you need to know that once you disable iCloud backup, you may be in the position of losing all your iPhone data in the event of an unexpected accident. Therefore, we strongly recommend you backup your iPhone in other ways.
iCloud alternatives to backup your iPhone [two options]
If you don’t want to pay for larger iCloud storage, but at the same time, want to keep your data safe, here in this part, we provide you with two options to backup your iPhone without iCloud.
Option 1. Free iOS backup tool FoneTool
The first option on how to back up the iPhone without iCloud is using the free iOS data backup tool FoneTool. Why choose FoneTool?
- Diverse backup methods. It enables you to backup selective photos, music, videos, contacts, and messages from your iPhone to a computer or fully backup your iPhone.
- Multiple functions. It allows you to backup your iOS devices, as well as transfer data freely between iOS devices and between iOS devices and computers.
- Free of data loss. When you need to restore your iPhone from computer backups, it will not erase any data existing on your iPhone already.
- Preview data. You are allowed to preview your photos, music, videos, etc., before deciding which to transfer.
- Fast speed. You are able to backup more than 2000 contacts in 20 seconds, faster than using most other backup software.
- Wide compatibility. It is perfectly compatible with iOS devices, which means you’re able to backup your iPads and iPods as well.
Here we’ll guide you through how to selectively backup your iPhone.
Step 1. Download and install MBackupper on your Windows PC. Connect your iPhone to the computer via a USB cable and then launch MBackupper.
Step 2. Click Phone Backup > Locate Selective Backup and click Get Started.
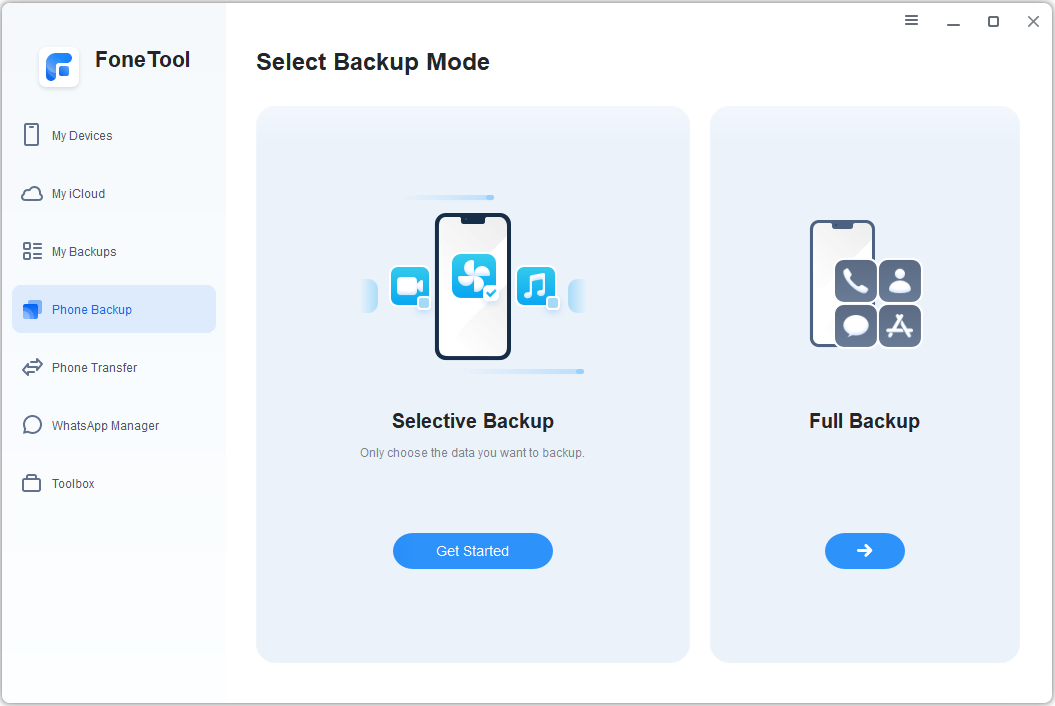
Step 3. Select the data you want to backup.
![]()
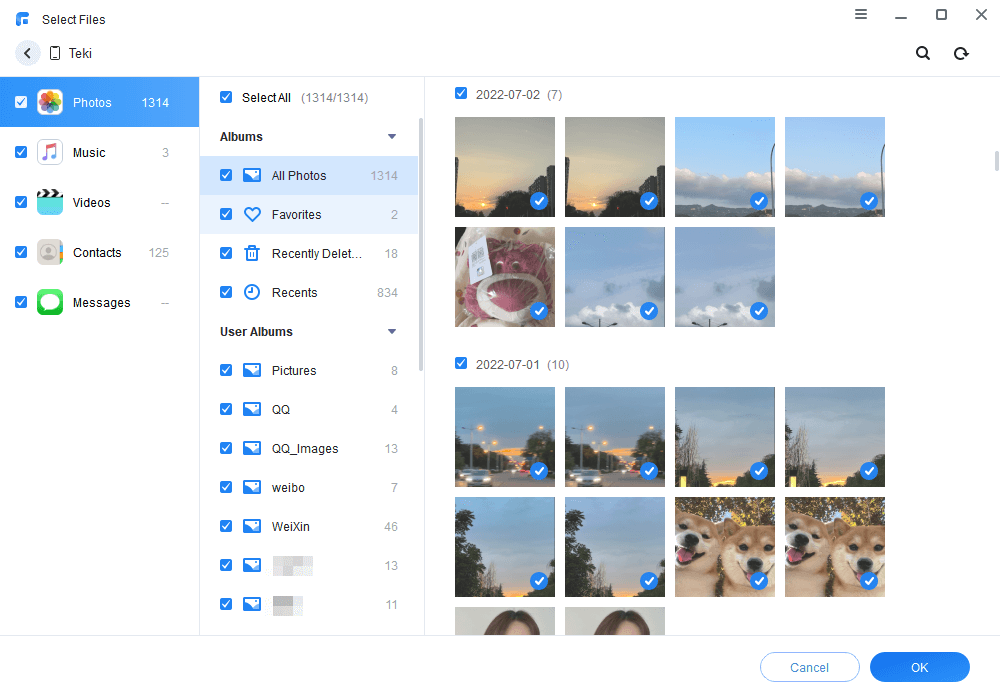
Step 4. Click each icon to preview and select the items and click OK to confirm.
Step 5. Choose a storage path and click Start Backup to save the backup to your computer.

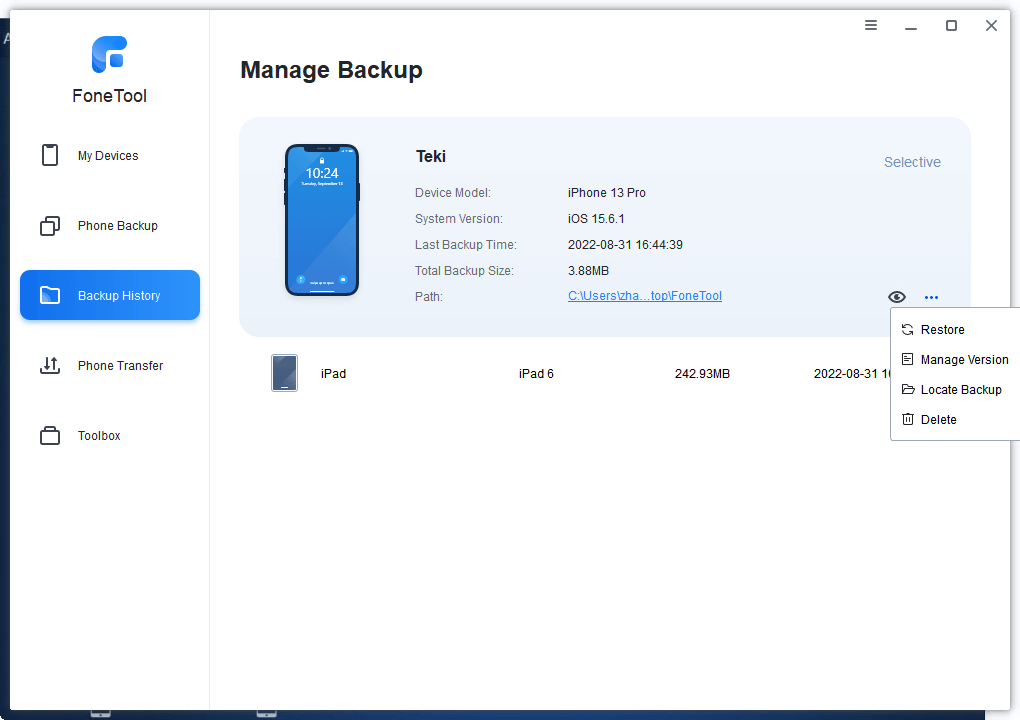
Note: If you ever need to restore the data to your iPhone, you can plug in your iPhone and go to Backup History. Locate your backup files and choose Restore.
Option 2. Backup your iPhone via iTunes
Another way to backup your iPhone data on your computer for free is to use iTunes.
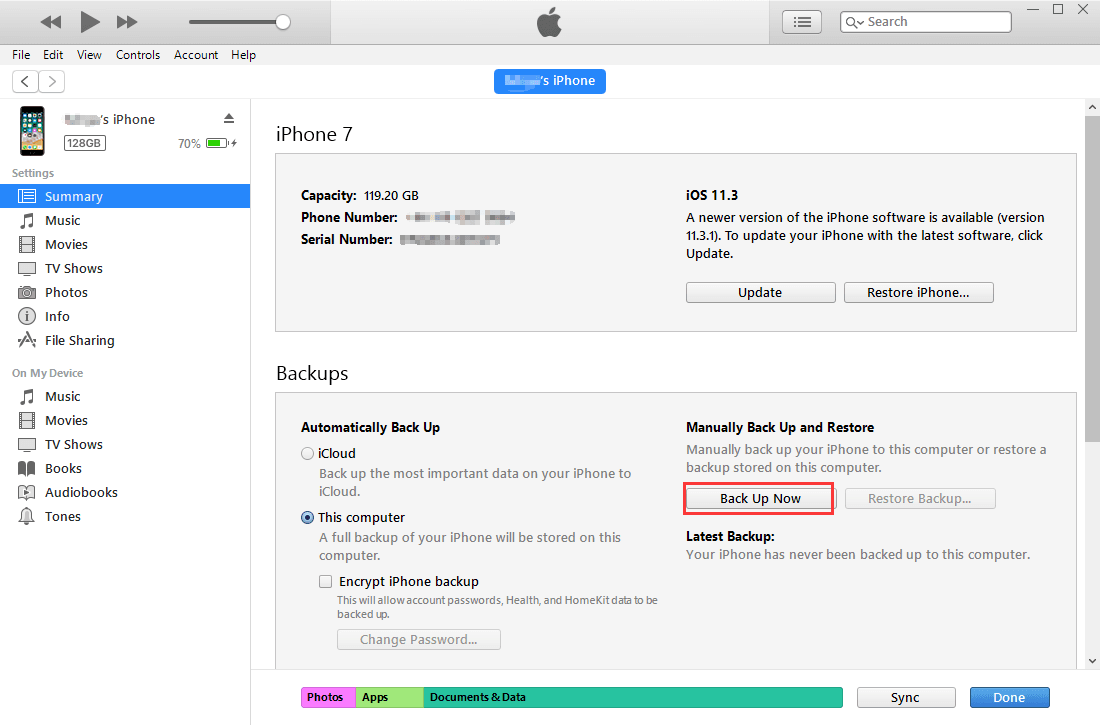
Step 1. Make sure you have the latest version of iTunes on your computer. Then connect your iPhone to the computer.
Step 2. Click the Device tab.

Step 3. Tick This computer, and then click Back Up Now.
Step 4. On Mac, you can find the iPhone backups here: Menu bar of iTunes > Edit > Preferences > Devices > Backup > Reveal in Finder. On Windows computer, go to Disk C > Users > Administrator > AppData > Roaming > Apple Computer > MobileSync > Backup.
Note: When restoring backups to your iPhone using iTunes, it will erase all the data existing on your target iPhone. So please make sure you’ve exported all the important data you need before you do this.
Conclusion
This post mainly introduces two ways to remove the “This iPhone has not been backed up in 2 weeks” notification. The first method is to upgrade iCloud storage and the second is to disable your iCloud Backup. The former costs your money and the latter put your iPhone data in danger. Therefore, we offer you two free iCloud alternatives to help you backup your iPhone. If you’re tired of iCloud notifications, try them.
