Full Guide| Transfer iOS App to Another Developer Account/Apple ID
If you want to transfer iOS apps to another Developer account or Apple ID, this ultimate guide provides you with detailed tutorial steps to ensure you complete the process successfully.
By May / Updated on February 27, 2024
How do I Move An App from One Developer Account to Another?
You may need to transfer an iOS app from one Apple developer account to another due to a sale of app ownership or other reasons, or you may want to transfer an iOS app from one Apple ID to another. You can get a step-by-step tutorial on how to transfer an iOS app between an Apple developer account and a normal Apple ID in this article.
Part 1. How to Transfer App to Another Apple Developer Account
When you wanna Apple transfer app to another developer account, the app will still retain all reviews. Follow the steps below to complete the process step by step.
Step 1. Verify the App Can Be Transferred
In your developer account, click the Transfer Apps button on the App Summary page. Only team delegates can start this process. Confirm that you meet the Apple app transfer criteria to transfer your app to another developer account in the checklist provided on the next screen.
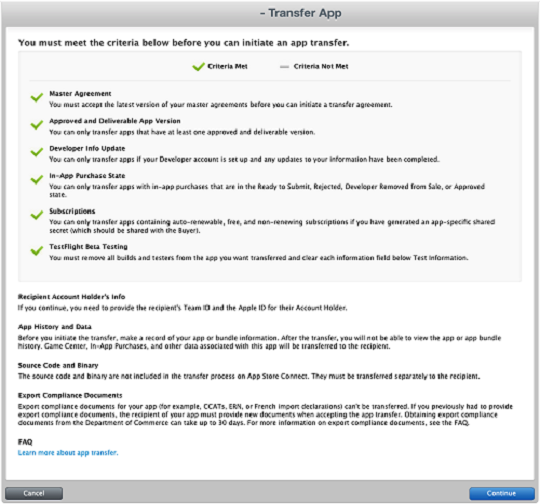
All of the above conditions are shown as green check marks, which means that the verification has been passed and you can continue with the transfer task.
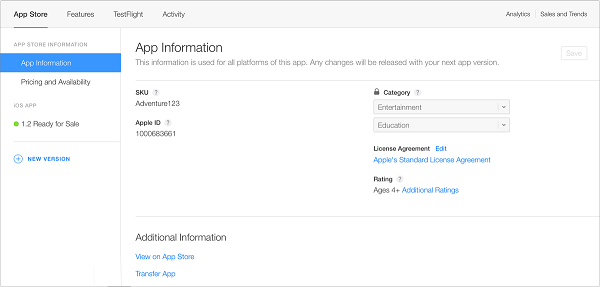
Step 2. Initiate the App Transfer
If you have more than one user on your account, make sure that the user initiating the application transfer is the account holder to whom it was assigned. If you're the only person associated with your Apple Developer account, the account holder role is automatically assigned to you. Next, you can start the application transfer.
1. Sign in to App Store Connect and click My Apps. Select the app you want to transfer in the list of apps and scroll to Additional Information, click Transfer App > Done.
2. If the app is eligible, tap Continue. If the application doesn't meet any of the criteria, fix the problem first.
3. Enter the recipient's Team Agent's Apple ID and Team ID, and then tap Continue.

4. Read the terms, select I have read and agree to the above agreement, and click Request Transfer to continue.
5. Click Finish to return to the application information page.
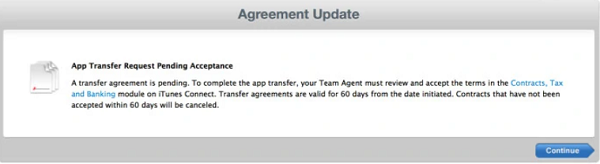
6. The application will enter the Pending Application Transfer state until the recipient accepts it.
Step 3. Another Account Accepts the Transferred App
Next, the account holder of the account to which the app is transferred needs to follow the steps below to accept the iOS app transfer.
1. Sign in to App Store Connect again as a team agent. You'll receive a notification letting you know that the app transfer is ready to be accepted.
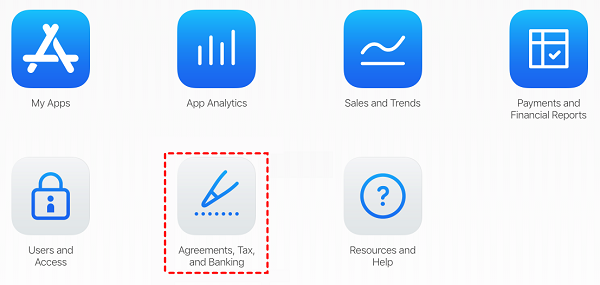
2. Then click on Agreements, Tax, and Banking.
3. Under App Transfer, tap View next to the app.
4. Fill in the application information, read the terms, select I have read and agree to the above agreement, and click Accept.
Once the transfer is over, the app belongs to the recipient. It no longer appears in the original App Store Connect account.
Part 2. How to Transfer iOS App to Another Apple ID
Can I share an app with another Apple ID? Of course! You may just want to get the app while you're on another iOS device instead of taking App ownership. It's simple, and here are three ways to help you easily transfer iOS apps from one account to another. Scroll down for more details!
Way 1. Transfer All Apps to Another Apple ID with Ease
FoneTool is a powerful iPhone transfer app designed for fast transfer between iOS devices. With FoneTool’s intuitive interface, you can easily transfer a wide range of apps from your old iPhone to your new iPhone without Apple ID.

- Transfer apps and others to iPhone after setup without data erase.
- Secure and ultra-fast iOS transfer without data loss.
- Support multiple data transfers, including WhatsApp, Photos, etc.
- Support different Apple IDs, transfer data from one Apple ID to another.
- Support the latest iOS version and devices.
Now click the download button to install FoneTool on your PC and follow the instructions to learn how to transfer apps to another iPhone account.
Step 1. Connect both iPhones to your PC using USB cables > Tap Trust on your iPhones’ screen > Launch FoneTool.
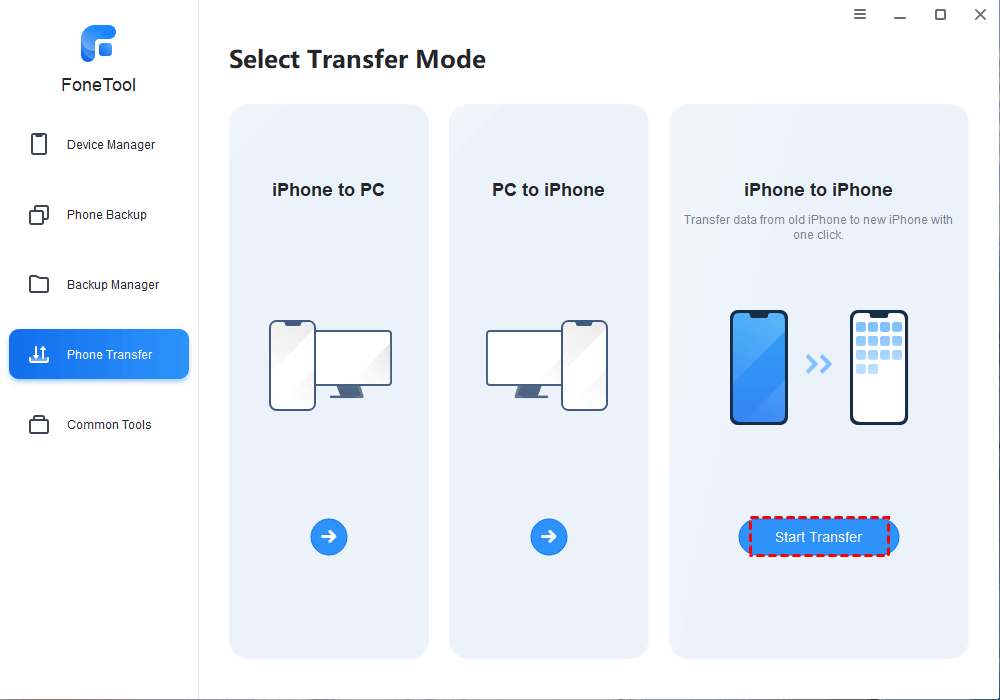
Step 2. In the main interface, choose Phone Transfer > Locate the iPhone to iPhone mode > Click the Start Transfer button.
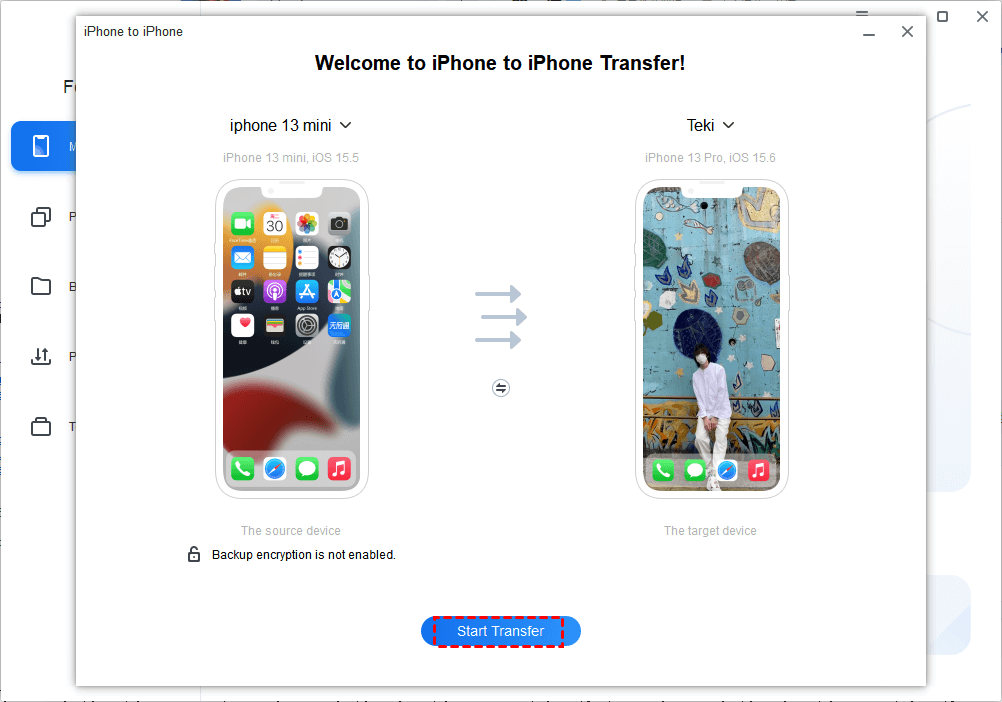
Step 3. Make sure the source and target devices are in the right position > Enable backup encryption to safeguard private data during backup > Click Start Transfer.
In addition to transferring apps between iOS devices, you can also transfer data from iPhone to computer or external hard drive.
Way 2. Transfer iOS Apps to Another Apple ID via QuickStart
Quick Start is a useful feature introduced by Apple, which allows you to transfer all data from iPhone to iPhone, including transferring iPhone apps to a brand-new iPhone. Before you begin, you have to make sure that Bluetooth is activated on both devices.
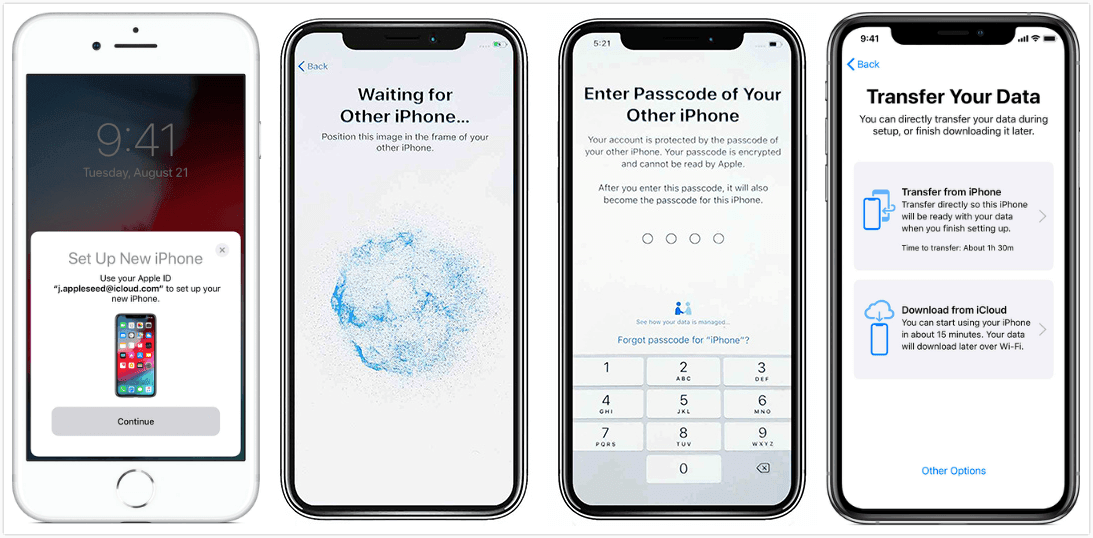
Step 1. Activate your new iPhone and position it near your old iPhone. The QuickStart screen will appear on your old device, offering the option to use your Apple ID to set up the new device.
Step 2. Confirm the Apple ID and select Continue, and follow the provided instructions to set up your new iPhone.
Step 3. When you get to the Transfer Your Data screen, tap Transfer from iPhone, then click Continue to start directly moving your data from the old device to the new one.
1. If you meet the “QuickStart cannot be working” issue, you can go to Way 1 to use FoneTool to move your Apple apps to another iPhone.
2. QuickStart lets you transfer all content and apps from the old iPhone to the new one. To transfer individual apps between iPhones, consider using the AirDrop feature.
Way 3. Transfer iOS Apps to Another iOS Device with AirDrop
Airdrop is a built-in tool for Apple devices that facilitates file and software sharing between Apple devices such as iPhones, iPads, and Mac PCs. Now make sure Bluetooth, Wi-Fi, and AirDrop are activated on both iPhones, and start learning how to transfer one app to another iPhone step by step:
Step 1. On the source iPhone, press and hold the app icon you wish to share, then choose the Share App option.
Step 2. In the popup menu that appears, choose AirDrop and select the name of the new iPhone.
Step 3. On the target iPhone, click View to initiate the app download from the App Store.
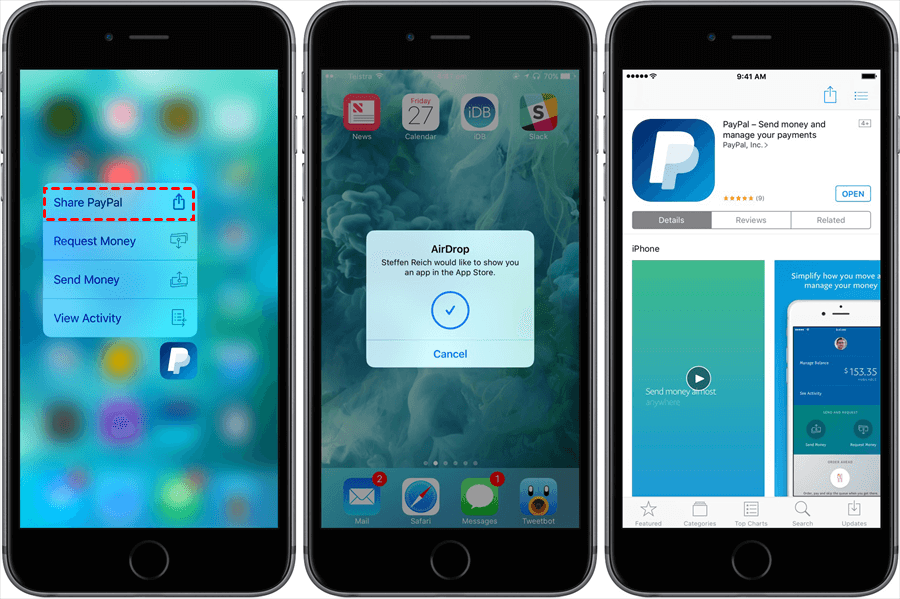
This straightforward process ensures the desired app is seamlessly transferred between the two devices.
The Bottom Line
With the insights from the guide above, you can easily transfer iOS app to another Apple Developer and Apple ID. Apple officially provides a way to change the ownership of the app, you just need to follow the above tutorial step by step.
If you just want to transfer iOS apps to another iOS device for use, then we highly recommend you to use FoneTool, the intuitive interface and stable performance allow any user to quickly transfer iOS apps and other data to a new account, even transfer iPhone data to PC. Free download FoneTool now and completely change your iPhone to iPhone data transfer process.
