[4 Ways] How to integrate iPhone with Windows 11
windows 11 iphone integration, how to connect iphone 12 to windows 11, windows 11 iphone sync, how to connect iphone to windows 11
By Demi / Updated on June 8, 2023
Do you have an iPhone and want to connect it to your Windows 11 computer to share and transfer contacts, photos, media files, etc. more easily between iPhone and Windows PC? This article is tailored to your needs. The four best ways to Windows 11 and iPhone integration are outlined in this post.
🔊 The four methods introduced in this guide are perfectly compatible with all models of iPhone, like iPhone 13/12/11/XR/8/7, as well as iPad and iPod.
Way 1. iPhone to Windows 11 integration via File Explorer
Without installing any third-party software, you can directly connect iPhone 13/12/11 to Windows 11 PC and head to the Windows File Explorer to access the files in iPhone, like photos and videos in the Camera Roll. Follow these steps to achieve iPhone to Windows 11 integration.
Step 1. Make sure your iPhone is detected by the Windows 11 computer, and trust this computer.
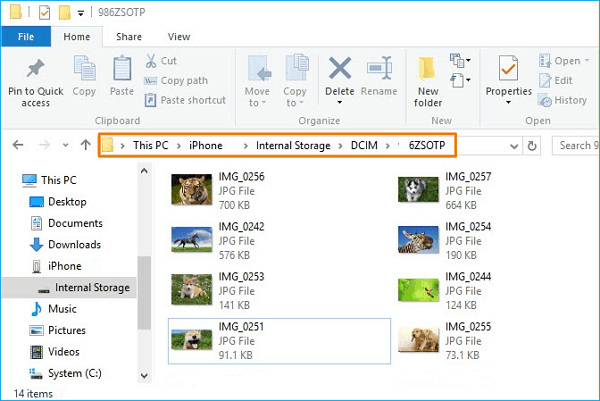
Step 2. Double-click This PC to open File Explorer > Locate and open your iPhone under Device and drives > Double-click on it to open and see your Internal Storage.
Step 3. In its internal storage, you can view all your photos and media files. You can copy and paste the wanted files to your Windows 11 computer.
Alternatively, you can also right-click your iPhone and choose Import pictures and videos to quickly get access to your iPhone files.

Way 2. iPhone to Windows 11 integration with iTunes
Another effective way to sync iPhone data with Windows 11 computer is to make use of iTunes. With the help of iTunes, you can easily sync data between Windows PC and iPhone and create full iPhone backup on PC.
Just for an example, this part will tell you how to transfer music from iPhone to computer and how to backup iPhone to computer with iTunes.
How to transfer music from iPhone to computer with iTunes
Step 1. Make sure you have the latest version of iTunes installed on Windows 11, and sign with your Apple ID. Connect your iPhone to computer.
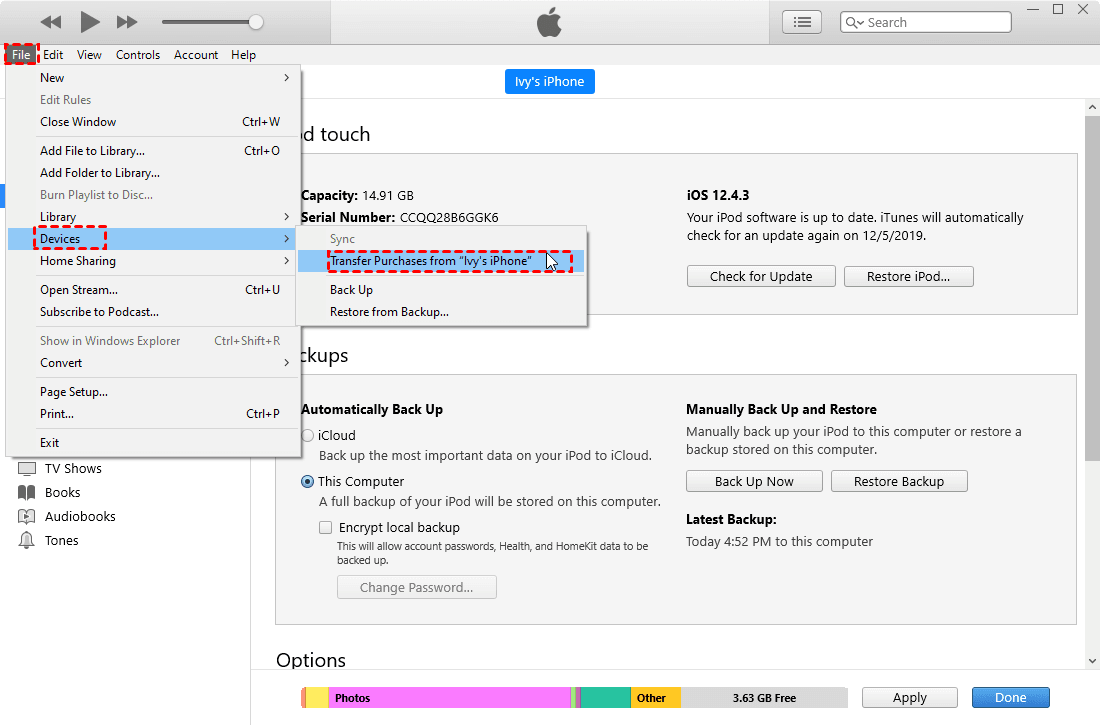
Step 2. Open iTunes, click File from the menu bar > Choose Devices > Transfer Purchases from xxx iPhone > Wait until the process to complete.
When it is finished, you can download the music to your Windows 11 computer by clicking Recently Added > select the wanted purchased music and click Download button.
How to backup iPhone to Windows 11 with iTunes
Step 1. Connect your iPhone to computer > Run iTunes and click the phone icon.
Step 2. Click Summary in the sidebar > Optionally, select Encrypt iPhone backup to protect your privacy.
Step 3. Click Backup Now to start a manual backup.

Way 3. iPhone to Windows 11 integration using iCloud
If you are used to backing up your iPhone via iCloud, you can integrate iPhone with Windows 11 by visiting the website of iCloud on computer without connecting both devices. Here are the detailed steps.
Step 1. Go to the website of iCloud on your Windows 11 computer and sign in with your iCloud account.
Step 2. Click each icon to view and select the files, like mail, contacts, photos, you want to download.

Way 4. iPhone to Windows 11 integration by FoneTool
You can also connect your iPhone to Windows 11 and integrate iPhone with Windows 11 with the help of professional third-party tools such as FoneTool. The feature-rich iOS data manager for Windows can satisfy all your demands when it comes to iPhone to Windows 11 integration. Free download the tool on your computer, and let’s take a look at its transfer and backup functions.
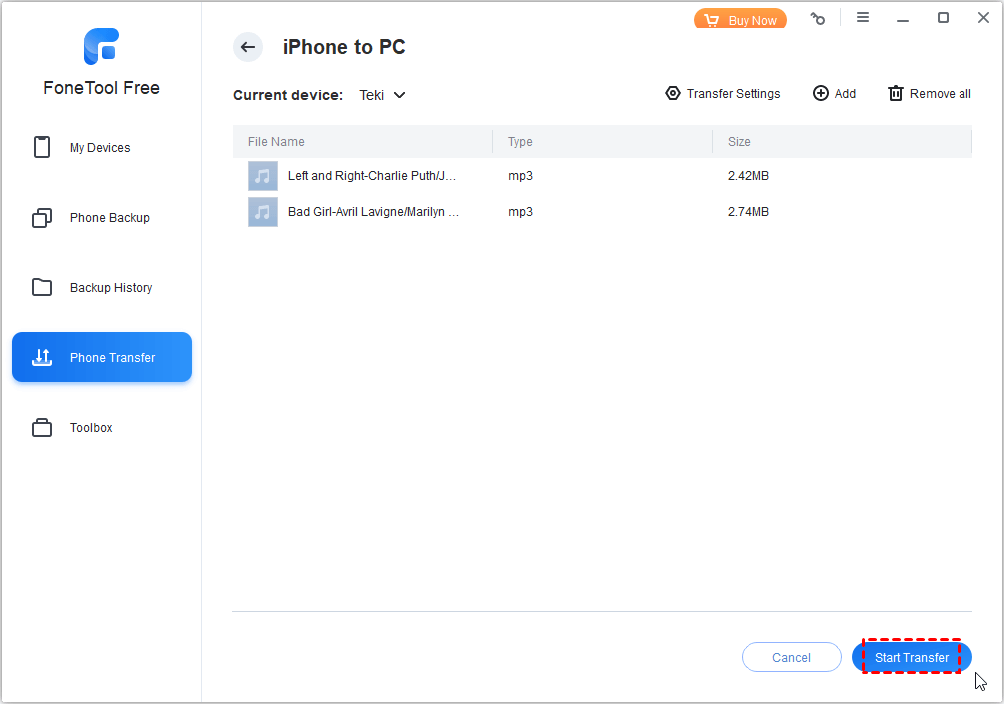
Transfer selective files from iPhone to Windows 11
When it comes to file sharing between iPhone and Windows PC, you can rely on FoneTool to make it as simply as ABC. As for music, FoneTool allows you to transfer both purchased and non-purchased music. Just for an example, follow the steps to transfer selective files from iPhone to computer.
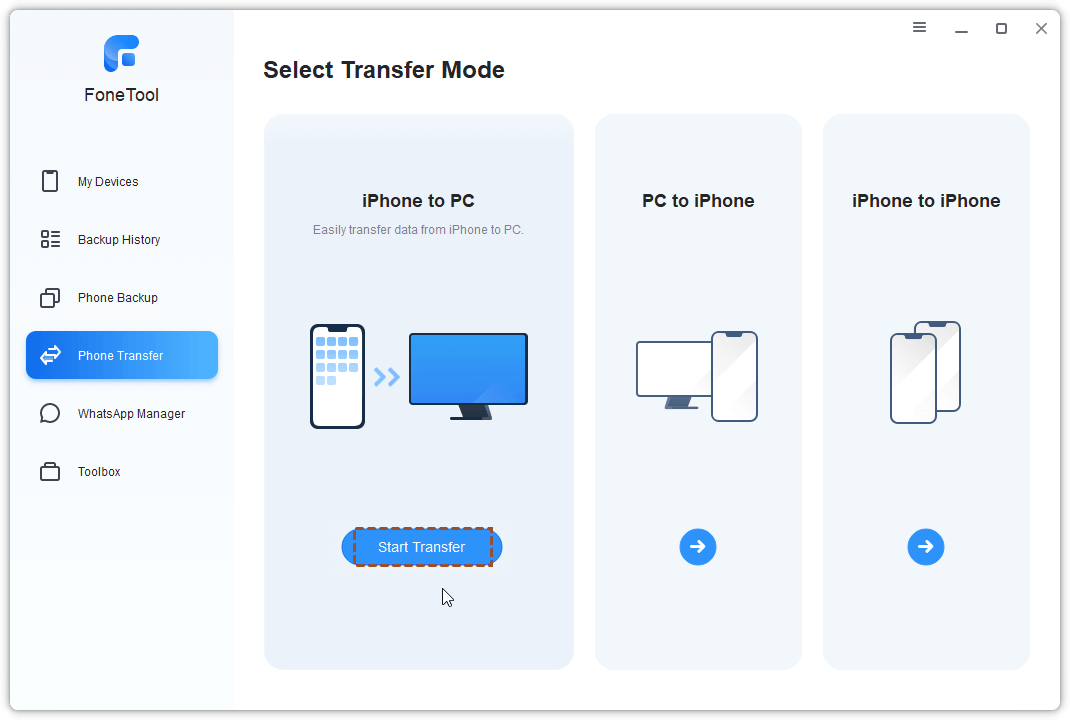
Step 1. Connect iPhone to Windows PC > Launch FoneTool and click Phone Transfer > Go to iPhone to PC and click Start Transfer.
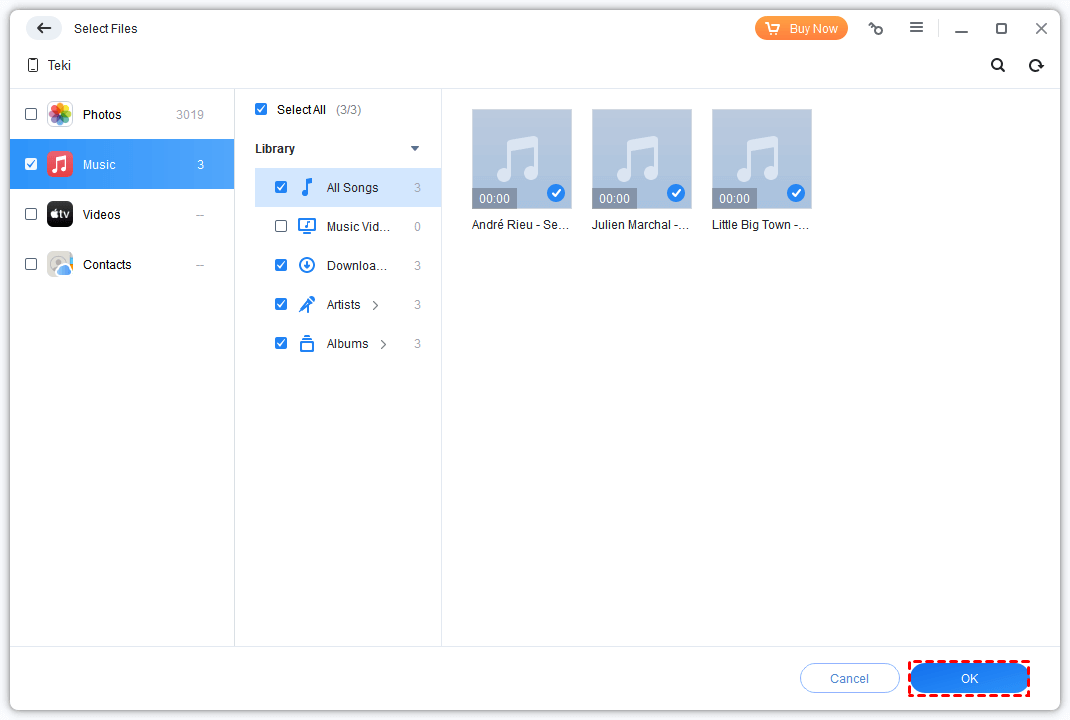
Step 2. Check each icon to preview and select the files you’d like to transfer > Click OK to continue.
Step 3. Click Start Transfer > Choose a storage path to save these files. You can save the files to any local folders on Windows, external hard drives, USB, and so on. Finally, simply click Start Transfer to begin.
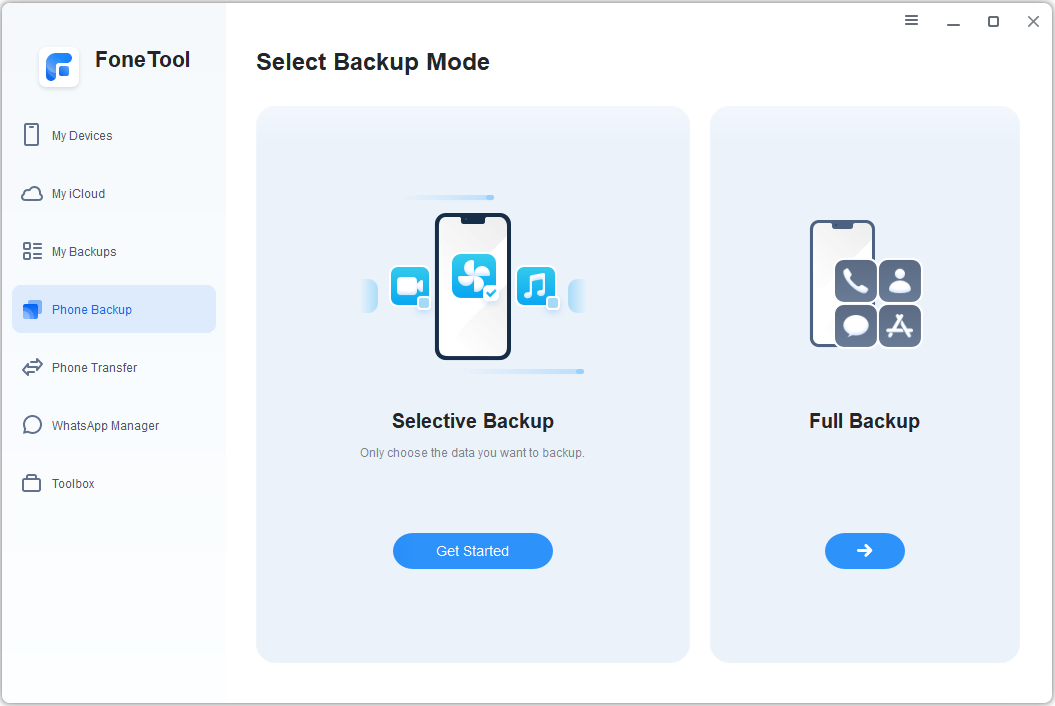
Backup iPhone to Windows 11 selectively or fully
Different from iTunes or iCloud, FoneTool provides you with two kinds of backup solutions, which are Custom Backup and Full Backup.
Literally, you can create full iPhone backup on PC with Full Backup option. While, you can also backup wanted files from iPhone to Windows PC. Here are the three simple steps to make it.
Step 1. Make sure your iPhone is connected to the Windows 11 > Click Phone Backup > Go to Selective Backup (or Full Backup if you want).
Step 2. Preview and select the files you’d like to backup to computer. Then, click OK.

Step 3. Choose a storage path as you like > Click Start Backup to make it.

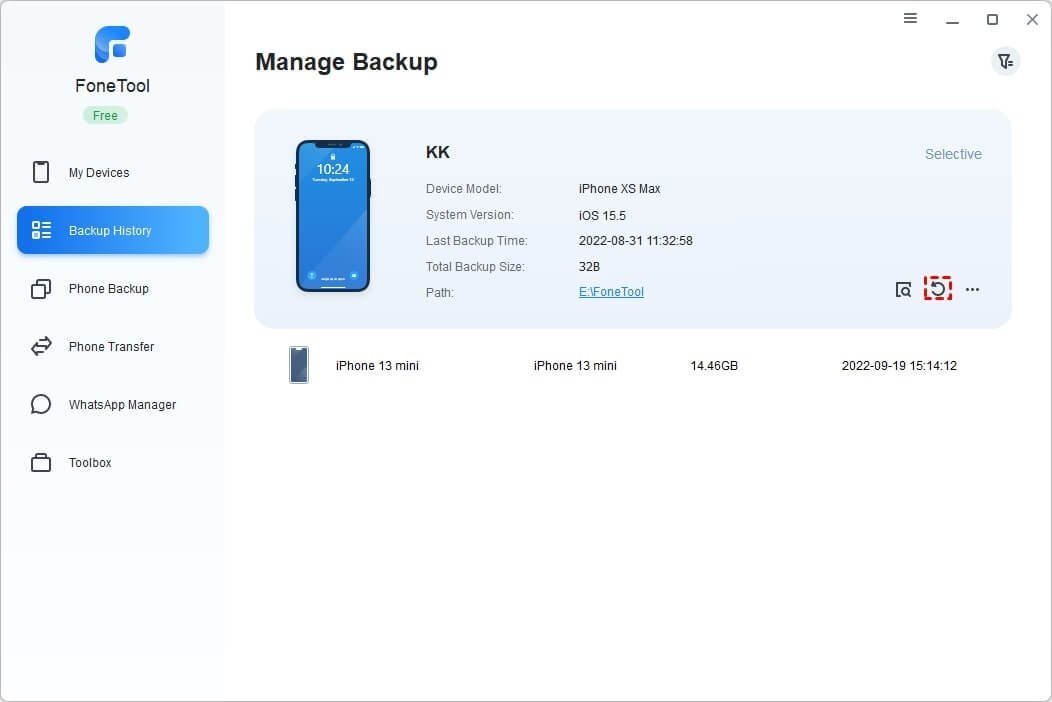
To browse the backup files on your computer, just go to Backup History. You can also restore or delete the backup files from here.
Conclusion
That’s all for the four ways to achieve iPhone to Windows 11 integration. Hopefully, you’ve now successfully learned how to make it. If this guide helps you, please share it with others.
