By
Roxanne
![]() / Last update
February 26, 2025
/ Last update
February 26, 2025
Cloning a hard drive to a bootable USB is a crucial task for data backup, system migration, or creating a portable operating system. In this article, we will walk you through the process of using a bootable USB to clone your hard drive, ensuring that you have a ready-to-use copy of your operating system or files in case of emergencies. Whether you are upgrading your hard drive, migrating to a new system, or securing your data, a bootable USB drive is an essential tool in modern computing.
Phase 1: Prepare Tools for Cloning a Hard Drive with Bootable USB
Before you begin the actual cloning process, you must ensure that you have the right tools and preparations. In this phase, we will outline the necessary equipment and software required to clone a hard drive with bootable USB drive:
1. Prepare and Make Bootable USB Drive
The first item you will need is a bootable USB drive. This USB drive will serve as the destination for your cloned data and should have enough storage capacity to hold the entire contents of the drive you are cloning.
- Size: Make sure the USB drive has at least 8GB of free space, but 16GB or more is recommended if your hard drive contains a lot of data.
- USB 3.0 or higher: If possible, choose a USB 3.0 or USB 3.1 flash drive for faster data transfer speeds.
- Formatting: Format the USB drive to FAT32 or NTFS. This will delete all existing data, so back up any important files before proceeding.
With AOMEI Backupper, you can easily create bootable USB and use it on any Windows computer, from Windows XP to Windows 11:
- Launch this all-in-one software and go to Tools > Create Bootable Media.

- Select the type of bootable CD: Windows PE and click Next.
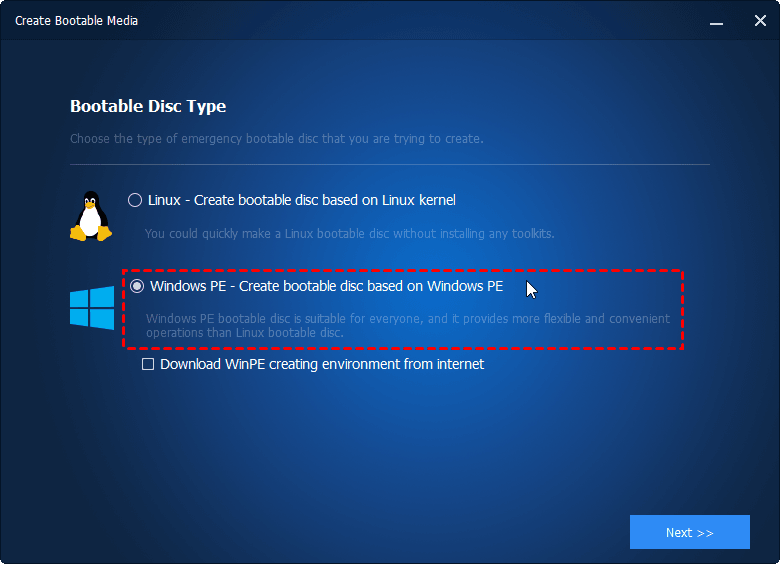
- Select Bootable Media: USB Boot Device and click Next to start the creation process.
After the creation is complete continue to read the following to clone the hard disk from the bootable media
2. Cloning Software
To clone a hard drive to a bootable USB, you will need reliable disk cloning software. AOMEI Backupper is one of the most effective and user-friendly options. It provides an intuitive interface for cloning an entire hard drive (including the operating system, system partition, and data files) to a USB drive.
3. Check the health of the source hard drive
Before you start the cloning process, it is crucial to check the health of the source hard drive. If the drive has bad sectors or other issues, the cloning process may fail or it may end up with a corrupted USB.
You can check the SMART status of the hard drive with tools such as AOMEI Partition Assistant. If the hard drive shows signs of failure, consider replacing the hard drive before proceeding with cloning.
Phase 2: Steps to clone the hard drive to a bootable USB
In this phase, we will take a deep dive into each step of the cloning process. It is important to follow these steps carefully to ensure a smooth transfer of the operating system and data to the bootable USB.
Step 1: Download and install AOMEI Backupper
The first thing you need to do before you start the cloning process is to download and install AOMEI Backupper. The software is known for its reliability and ease of use.
Step 2: Clone Hard Drive with the bootable USB
- Insert USB stick: Insert the USB stick into your computer. It is recommended to use a USB drive with at least 16GB of storage space, but 8GB will also work for smaller data transfers.
- Open AOMEI Backupper: On the main interface, click the Clone tab, then select Disk Clone.
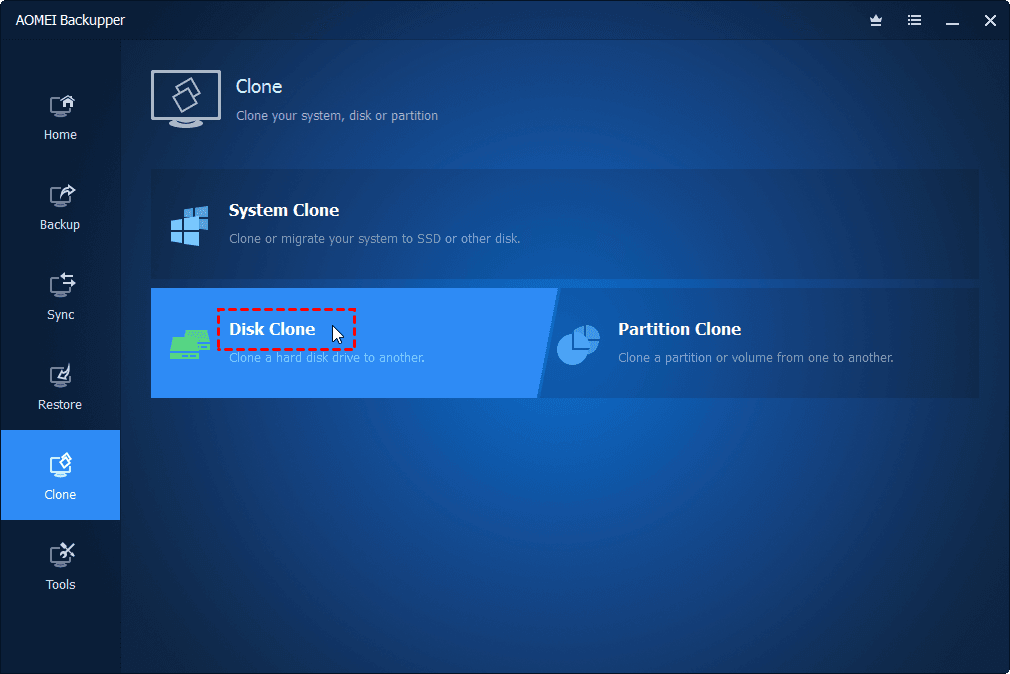
- Select the source and destination disks:
- Source Disk: This is your main hard drive, which contains the operating system, data, and system files you want to clone.
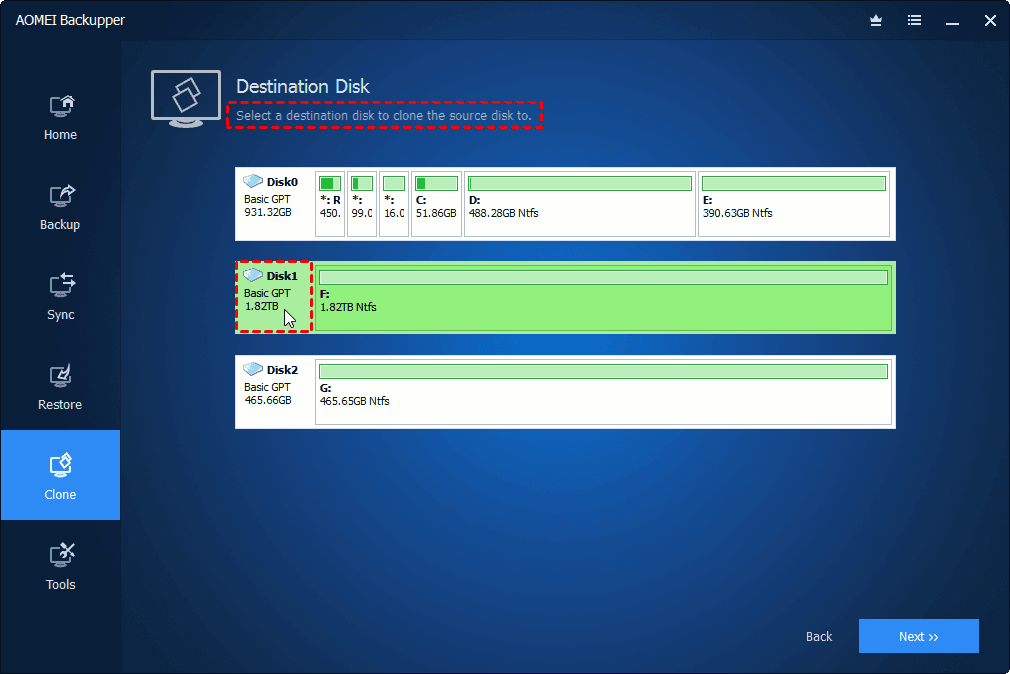
- Destination Disk: Select your USB drive as the destination for cloning. Make sure there is enough space on the USB drive to accommodate all the data on the source disk.
- Start the cloning process: After selecting the source and destination, click Start Clone to begin the cloning process.
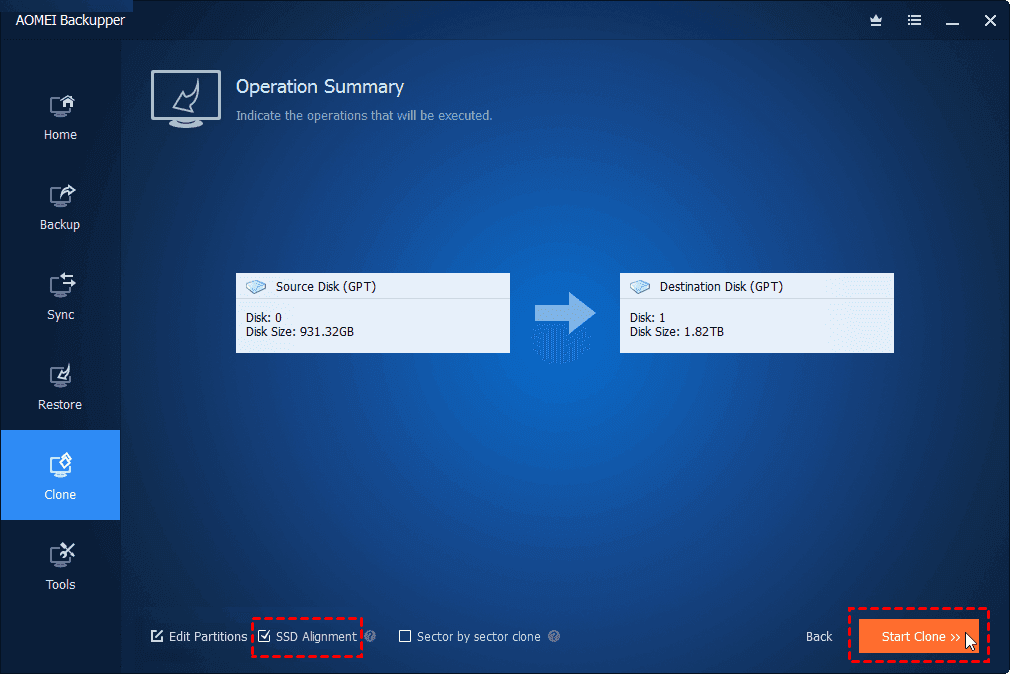
AOMEI Backupper will handle the complex process of copying the entire disk, including system files, partitions, and boot information. This process can take anywhere from a few minutes to a few hours, depending on the size of the hard drive and the speed of the USB.
Step 3: Test the bootable USB drive
The last step before considering the process complete is to test whether the USB drive is truly bootable. This ensures that you can boot from it in the event of a system failure or when migrating the operating system to another machine.
- Restart your computer: After the cloning process is complete, restart your computer.
- Enter BIOS/UEFI setup: When the computer restarts, press the BIOS access key (usually F2, ESC, or DEL, depending on the manufacturer).
- Set USB as first boot device: In BIOS/UEFI setup, navigate to the Boot tab and set the USB stick as the primary boot device.
- Save and exit: After adjusting the boot order, save the changes and exit BIOS/UEFI. Your system will now try to boot from the USB drive.
- Verify boot: If the cloning process was successful, the computer should boot with the cloned USB drive and you will see your operating system running just like it did on the original hard drive.
Phase 3: Troubleshoot and fix cloned USB problems
In some cases, you may encounter problems after cloning a hard drive to a bootable USB. These problems are usually related to boot settings or partitioning errors. In this section, we will address common problems and their solutions.
1. Check the boot mode
One of the most common reasons why a bootable USB does not work is an incorrect boot mode in the BIOS/UEFI. Some systems use UEFI (Unified Extensible Firmware Interface) while others use Legacy BIOS mode. Here's how to fix this:
UEFI vs Legacy mode: If your original system was set up to boot in UEFI mode, make sure the same boot mode is selected for the USB stick in the BIOS/UEFI setup. Conversely, if your original system used Legacy BIOS mode, select Legacy as the boot mode for the USB.
How to change the boot mode: In the BIOS/UEFI setup, you will find an option to switch between UEFI and Legacy. Make sure it matches the mode used by the original hard drive for proper compatibility.
2. Repair the boot record
If the cloned USB does not boot, you may need to repair the Master Boot Record (MBR) or Boot Configuration Data (BCD) on the cloned USB. Here's how to repair the boot record:
1. Boot from Windows installation media: Boot to the Windows Recovery Environment using a Windows installation disk or recovery USB.
2. Open the Command Prompt: Once in the recovery environment, select "Troubleshoot", then "Advanced options", and finally "Command Prompt".
3. Run the boot repair command:
Enter the following commands one by one to repair the boot record:
- bootrec /fixmbr
- bootrec /fixboot
- bootrec /rebuildbcd
4. Restart your computer: After running the repair command, restart your computer and try booting from the USB again.
3. Re-clone the drive
If none of the above solutions work and the bootable USB still doesn't work, you may need to re-clone the hard drive. Make sure the original disk is in good condition (no bad sectors or corruption) and try to clone again using AOMEI Backupper.
Sometimes, interruptions during the cloning process or software errors can cause an incomplete transfer, resulting in boot errors. Running the process again may fix these issues.
4. Check for errors on the USB drive
If the USB drive itself has physical or logical errors, it may prevent it from becoming a bootable drive. Here's how to check and fix potential problems on the USB drive:
- 1. Run the disk check utility: Use the built-in check disk utility on your computer to scan the USB drive for errors.
- 2. Reformatting the USB stick: If the error persists, try reformatting the USB stick using the FAT32 or NTFS file system (depending on the size of the drive). Reformatting will delete all data, so make sure to back up any important files before doing this.
Conclusion
Cloning your hard drive to a bootable USB can provide significant benefits, including data protection, system portability, and disaster recovery. By following the outlined steps and preparing the right tools, you can ensure that your USB drive is a fully functional backup of your operating system or files. Whether you're upgrading your hard drive, migrating to a new PC, or simply safeguarding your data, this process can be done easily and efficiently with the right software.
FAQs About Cloning Hard Drive with Bootable USB
Now, let’s address some common questions related to cloning a hard drive to a bootable USB.
1. How can I clone my entire OS to a bootable USB stick?
To clone your entire operating system to a bootable USB, follow these steps:
- Use cloning software like AOMEI Backupper.
- Select your system disk (OS disk) as the source disk.
- Choose your USB stick as the destination disk.
- Start the cloning process.
- After completion, set the USB stick as the boot device in BIOS/UEFI to boot from it.
2. How do I make a copy of Windows 10 bootable USB?
To create a copy of Windows 10 on a bootable USB:
- Download the Windows 10 ISO file from Microsoft’s official website.
- Use a tool like Rufus or AOMEI Partition Assistant to create a bootable USB.
- Select the Windows 10 ISO as the source and the USB drive as the destination.
- Follow the on-screen instructions to write the image to the USB.
3. Can you clone a bootable hard drive?
Yes, you can clone a bootable hard drive to another disk or USB. Using software like AOMEI Backupper, you can clone the entire bootable disk, including the operating system, system files, and partitions. The cloned disk or USB will be bootable as long as the cloning process is done correctly and the boot records are intact.