Thinking about upgrading your drive or reorganizing partitions? This guide shows you exactly how to move the system reserved partition to another drive while ensuring Windows stays bootable.
The System Reserved partition might be small in size—typically around 100 to 550 MB—but it plays a critical role in Windows boot operations. Normally, this partition lives on the same drive where Windows is installed, but there are scenarios where moving it becomes necessary:
📍 The System Reserved Partition is located on a wrong drive. This issue commonly occurs when you install Windows with more than one hard drive attached to the computer.
📍 The disk containing the System Reserved Partition may be failing. If the original disk is showing an error like “Hard disk failure is imminent,” you may move system reserved partition to a healthy drive.
If something goes sideways during the move, you could end up with a non-bootable PC and risk data loss if you're not prepared. Therefore, it’s wise of you to create a full system backup beforehand.
💡 How to Do It Right
★Use built-in backup tool Backup and Restore (Windows 7) or reliable third-party backup software.
★Create a system/disk image, not just file-level backups—this captures the entire OS, system reserved partition, and recovery tools.
★Save the backup to an external drive, NAS, or cloud storage—never the same drive you're modifying.
Also, make sure to create Windows recovery media (USB/DVD). If Windows can't boot after the move, this will be your lifeline to run repairs or restore from your backup.
Moving the System Reserved partition isn’t something most users do every day. Just follow these steps carefully to avoid breaking your Windows boot process.
✍ Note: The following steps apply to the situation where C drive and system reserved partition are on different drives and you want to put them on the same drive.
1. Press Windows + X and select Disk Management.
2. Check if there is unallocated space on the destination drive. If not, right-click on an existing partition and select Shrink Volume to create some (~550 MB is usually enough).
To move the System Reserved partition safely and without errors, you'll want a reliable disk cloning tool. AOMEI Cloner is one of the best options. It offers all-around cloning solutions:
🌟Disk Clone: Creates an exact copy of an entire disk (HDD/SSD) to another disk, including the operating system, applications, and all partitions.
🌟System Clone: Clones only the system-related partitions (OS, boot files, and essential drivers) to another disk, excluding non-system data.
🌟Partition Clone: Copies a specific partition (e.g., system reserved partition) to another location while preserving data structure.
Download and install AOMEI Cloner on your computer now.
Easiest disk/partition clone software for Windows PC/Server
Then follow the instructions below to copy system reserved partition to another drive:
1. Launch AOMEI Cloner and go to Clone > Partition Clone.
✍ Note: If C drive and system reserved partition are on the same drive, you should use System Clone to move both system reserved partition and C drive to the new disk to ensure your computer can boot from the new disk after moving.
2. Select the System Reserved partition on your source disk (usually around 100–550 MB and labeled as "System Reserved") and click Next.
3. Choose the unallocated space on the destination disk as the target and click Next.
4. In the Operation Summary page, click Edit Partition. In the pop-up window, set the drive letter as None and click OK.
5. Click Start Clone and wait for the process to finish.
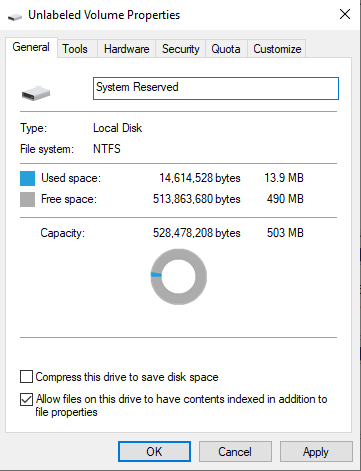
1. Open Disk Management, right-click on the new System Reserved partition and select Properties. Name it “System Reserved” under the General tab.
2. Right-click on the new System Reserved partition and select Mark Partition as Active. This makes your system know where to boot from.
Restart your computer to see if it can boot successfully.
1. What happens if I delete the System Reserved partition by mistake?
If the System Reserved partition is deleted without properly transferring boot files, your system won’t boot. You’ll need a Windows installation or recovery disk to rebuild the BCD and restore boot capability.
2. Do I need to move the System Reserved partition when migrating to an SSD?
Yes. If your goal is to boot entirely from the SSD, the System Reserved partition must be copied as well, since it contains critical boot files.
3. Do I need to set the partition as active on GPT systems?
No. The active flag only applies to MBR-based BIOS systems. UEFI systems using GPT don’t use that flag and rely on the EFI System Partition (ESP) for booting.
You now have a step-by-step guide to safely transfer the System Reserved Partition to another drive—an essential process when migrating or optimizing your Windows installation. By using a trusted cloning tool like AOMEI Cloner, you can ensure a seamless transition without disrupting your Windows boot environment.
Easiest disk/partition clone software for Windows PC/Server
🎯Critical Reminders Before & After Migration
🔹 Back Up Your System First: Use Windows Backup or disk imaging software to prevent data loss.
🔹 Verify Boot Functionality: Restart and confirm Windows boots correctly from the new drive.
🔹 Don’t Delete the Old Partition Immediately: Keep it as a fallback until you’re 100% sure the new setup works.
🔹 Check Disk Management: Ensure the System Reserved Partition is properly recognized on the new drive.