How to Solve Snap Layouts Not Working in Windows 11
Snap layouts is a convenient feature to change the layout of windows on the desktop. However, there are some users who found the Windows 11 snap layouts does not work. Why is this, and how to resolve it?
By Delia Updated on December 10, 2024
In Windows 11. we can use snap layouts to change the layout of windows on the desktop at will, which is a very convenient feature. However, there are some users who found the Windows 11 snap layouts does not work. Why is this, and what can be done about it?
How to use snap layouts in Windows 11
The general way to use snap layouts is to press Win + Z or hover your cursor over the maximize icon in the upper right corner of the app. You will see 4 (or 6 if you have a large display) grid layouts to choose from, each of which will have several different configurations of areas.
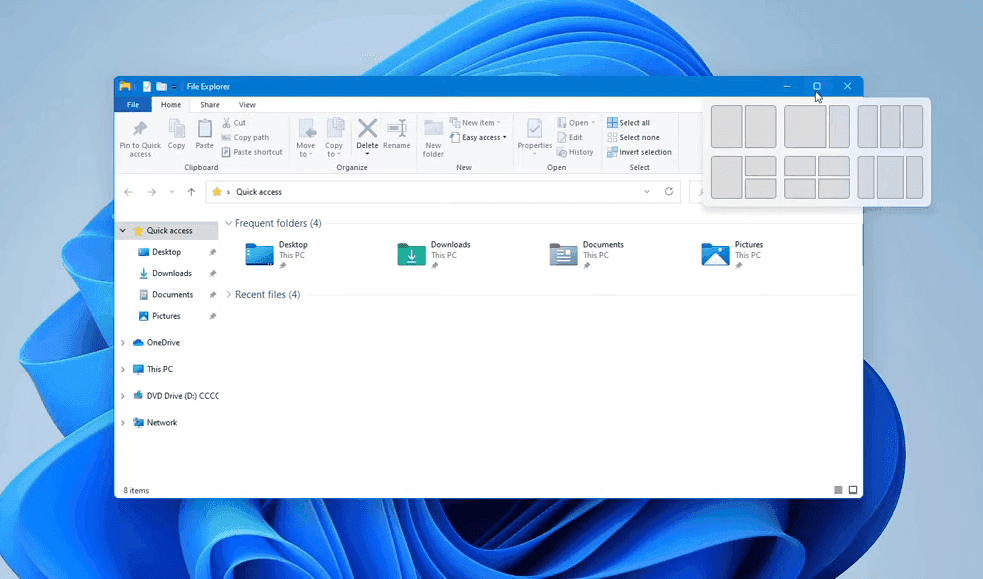
Select a layout and hover over the area where you want your active app to be located, and that area will turn blue. Click on it. and your application will snap into that location.
If you have other applications open, they may appear as thumbnails in another area. Press Alt + Tab to switch to each open application, then select the area where you want the application to be.
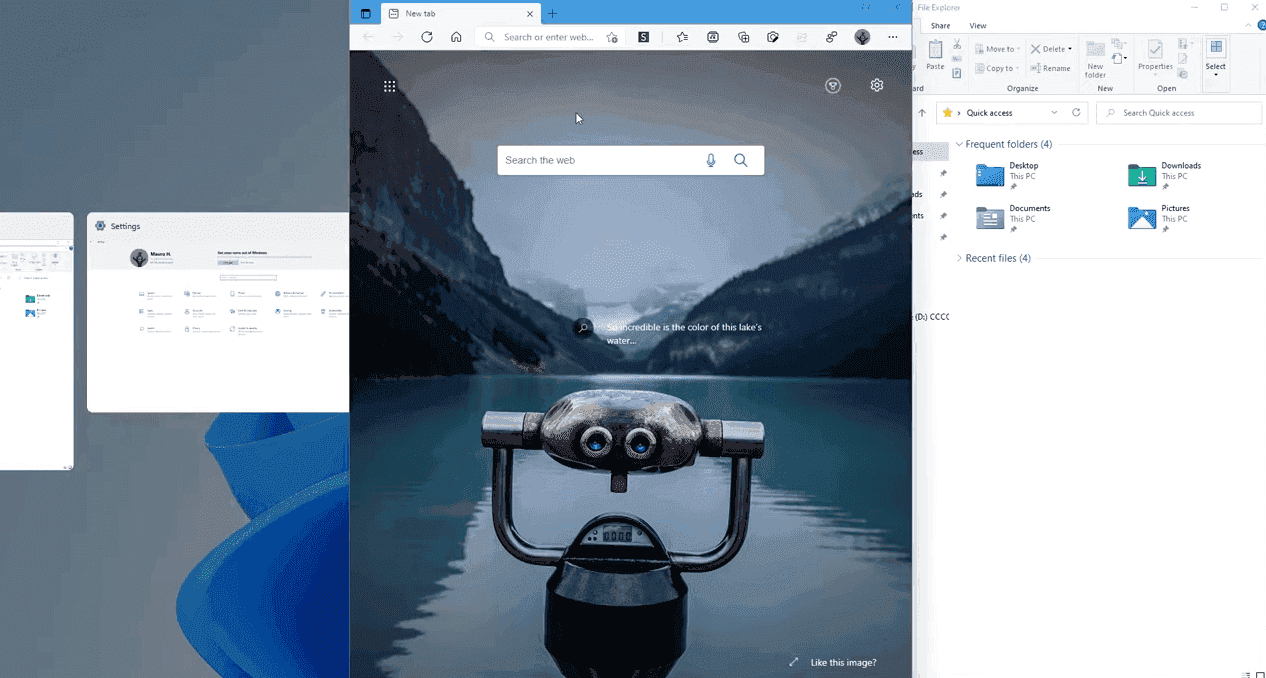
The layout of your snapshot will also be reflected in the taskbar. If you go to the taskbar and hover over an application's icon in the layout, you will see thumbnails of that application and the layout group to which it belongs.
How to fix snap layouts not working in Windows 11
If snap layouts do not work on your computer, this may be due to the fact that it is not enabled, so let's take a look at how it should be handled.
Method 1. Enable snap layouts in Settings.
1. First open Start menu and choose "Settings".
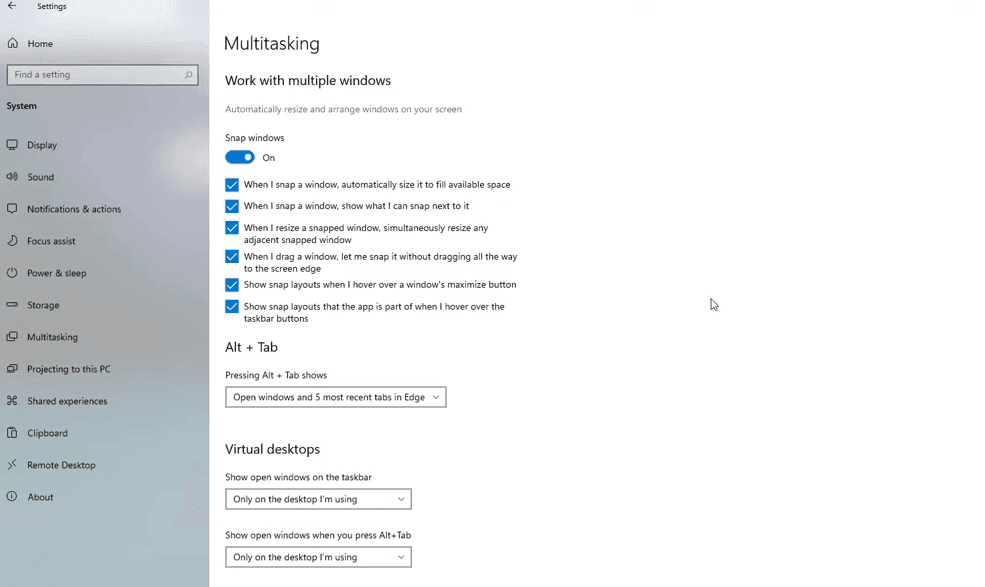
2. Select “System” and select "Multitasking" on the left panel.
3. Here you can enable or disable “Snap windows” completely, or configure the detailed options separately.
After that, you can restart the computer for the options to take effect.
Method 2. Enable snap assist via registry
1. If the snap layouts cannot be applied after above settings, you can also try to modify the registry.
2. Press "Win + R" to open the run window, then enter "regedit" and press Enter key.
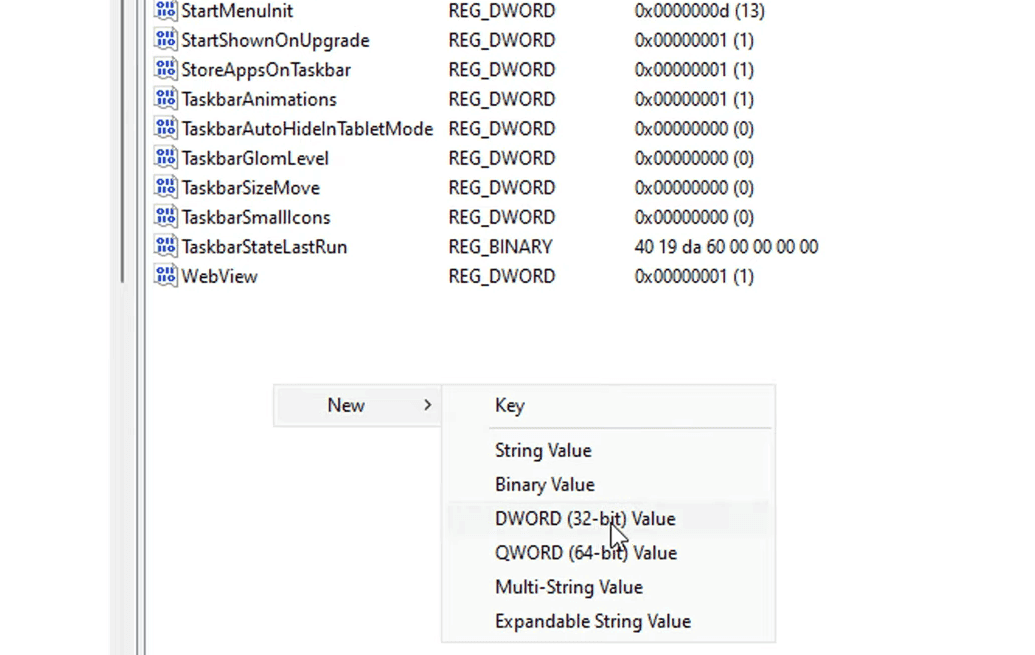
3. Navigate to the following registry:
Computer\HKEY_CURRENT_USER\Software\Microsoft\Windows\CurrentVersion\Explorer\Advanced
4. Look for "EnableSnapAssistFlyout" on the right, double-click it and set its value to 1.
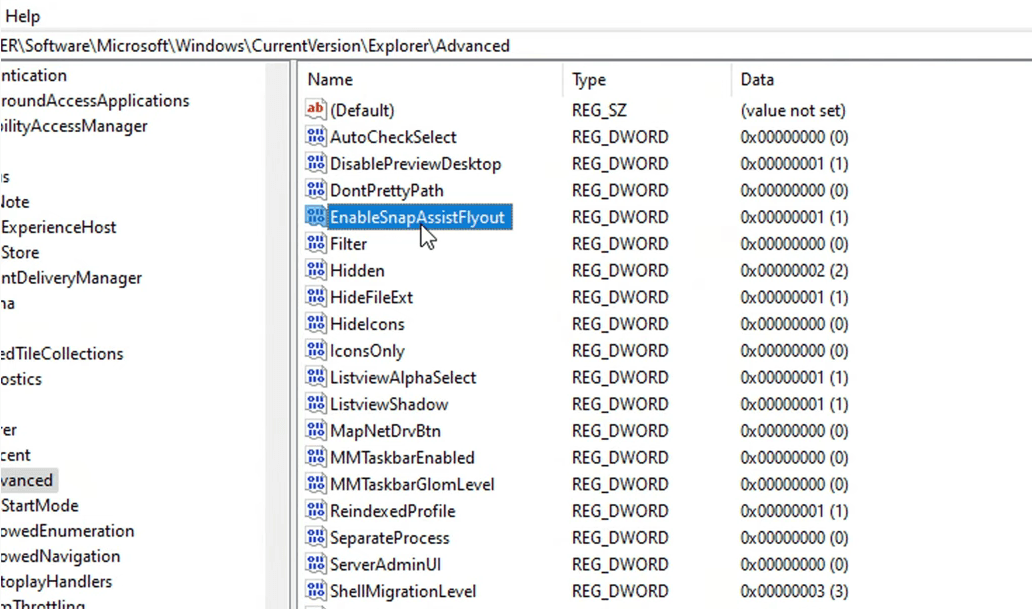
5. If you cannot find this item, please right-click the blank area and create a new "DWORD (32-bit) Value", then rename it as "EnableSnapAssistFlyout", and change its value data into 1.
Then restart the computer, your snap layouts feature shall work normally now.
If the above two methods are unable to solve the Windows 11 snap layout not working problem, then it may be the system itself is not installed correctly, you can try upgrading to the latest version and so on. If it still does not work. you may have to reinstall the system.